Overview of the TOUCH control system
1. Entrance to the office
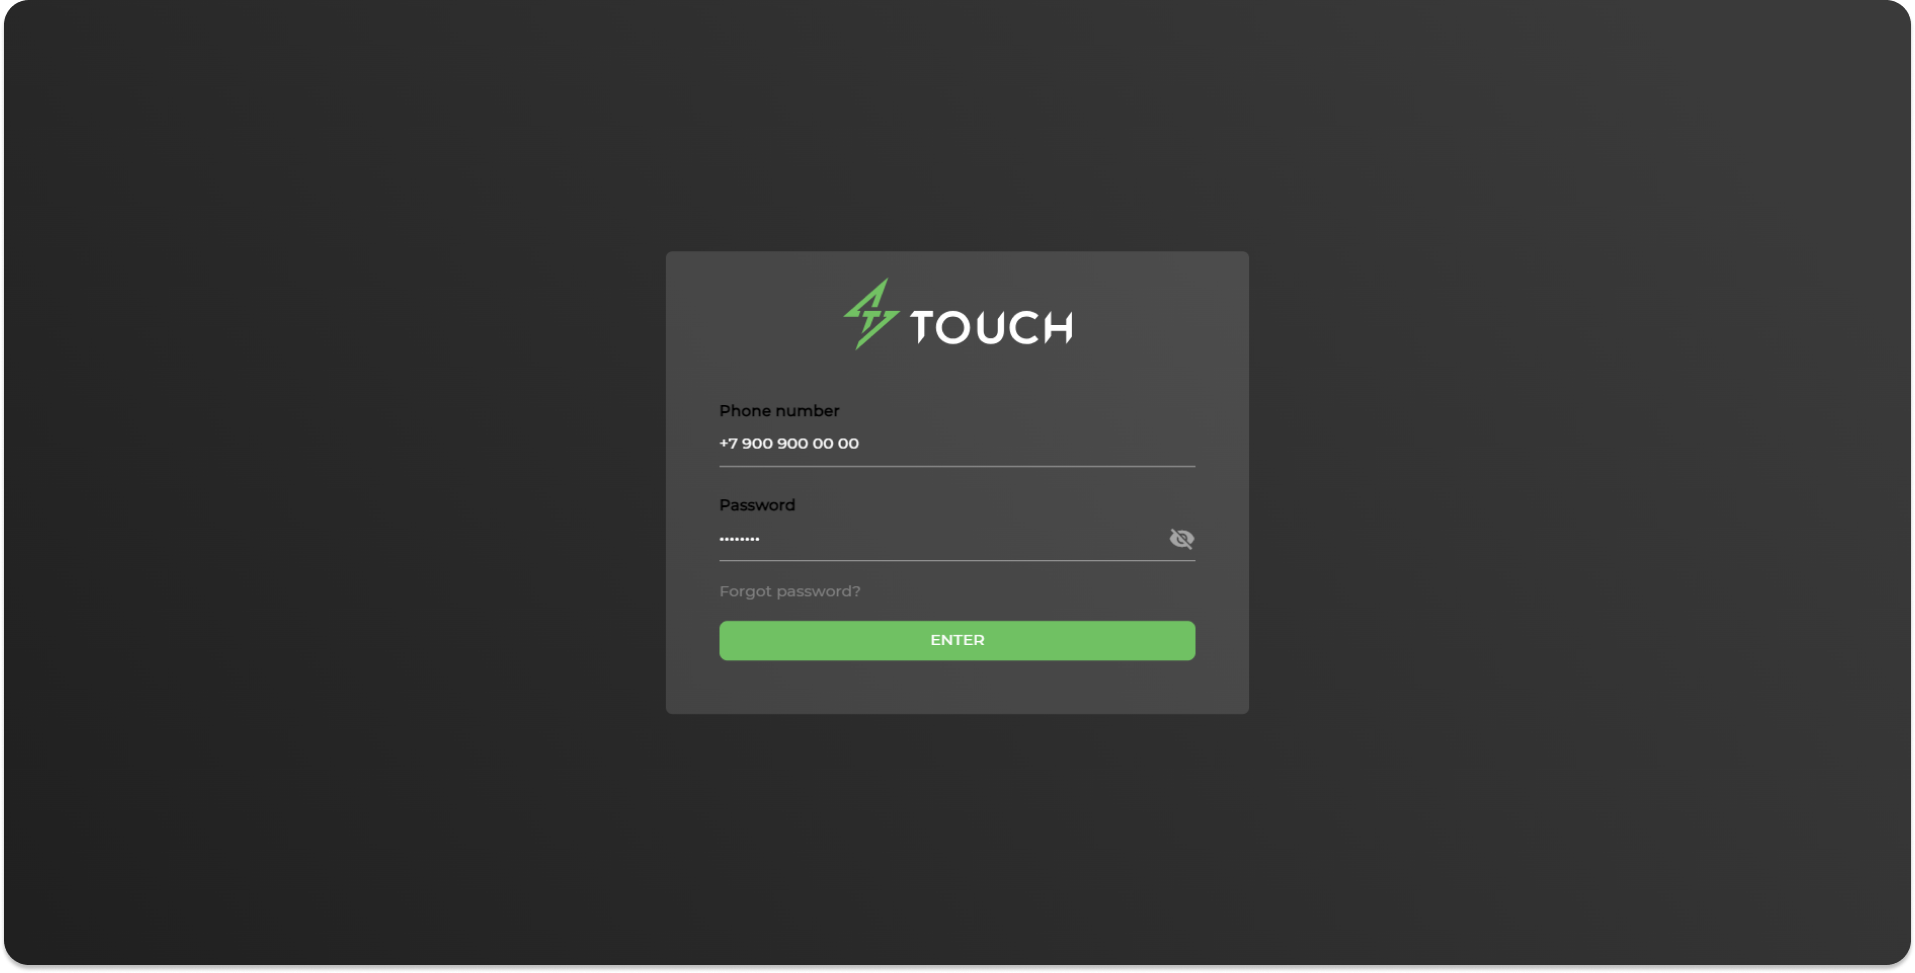
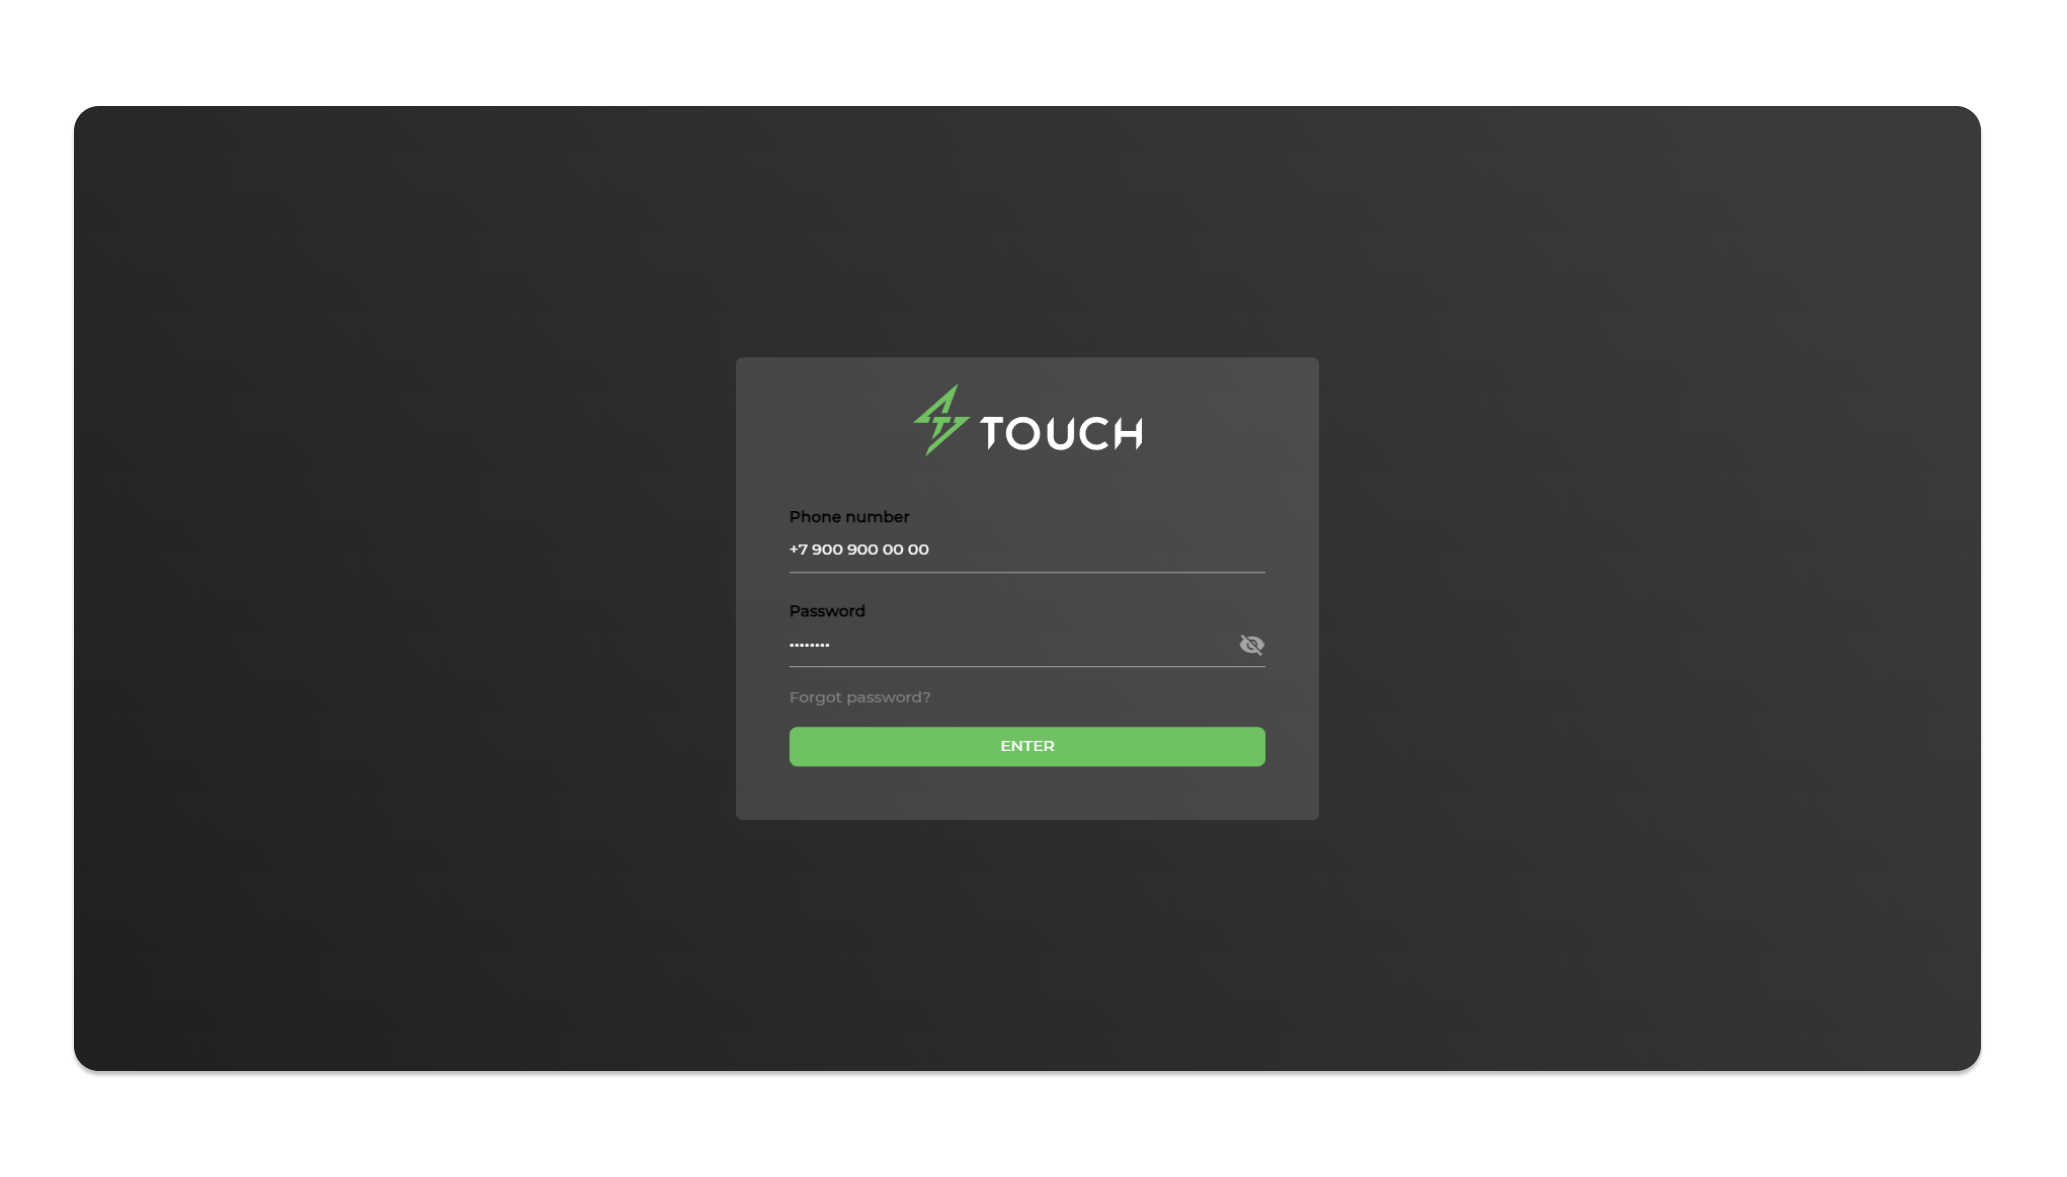
Login to the application is carried out by login and password, which were specified during registration. To do this, the user:
Enter your personal login in the "Phone number" field;
Enter your personal password in the "Password" field;
Press the "Login" button. Enter login/password to enter the cabinet
1.1 Forgot your password?
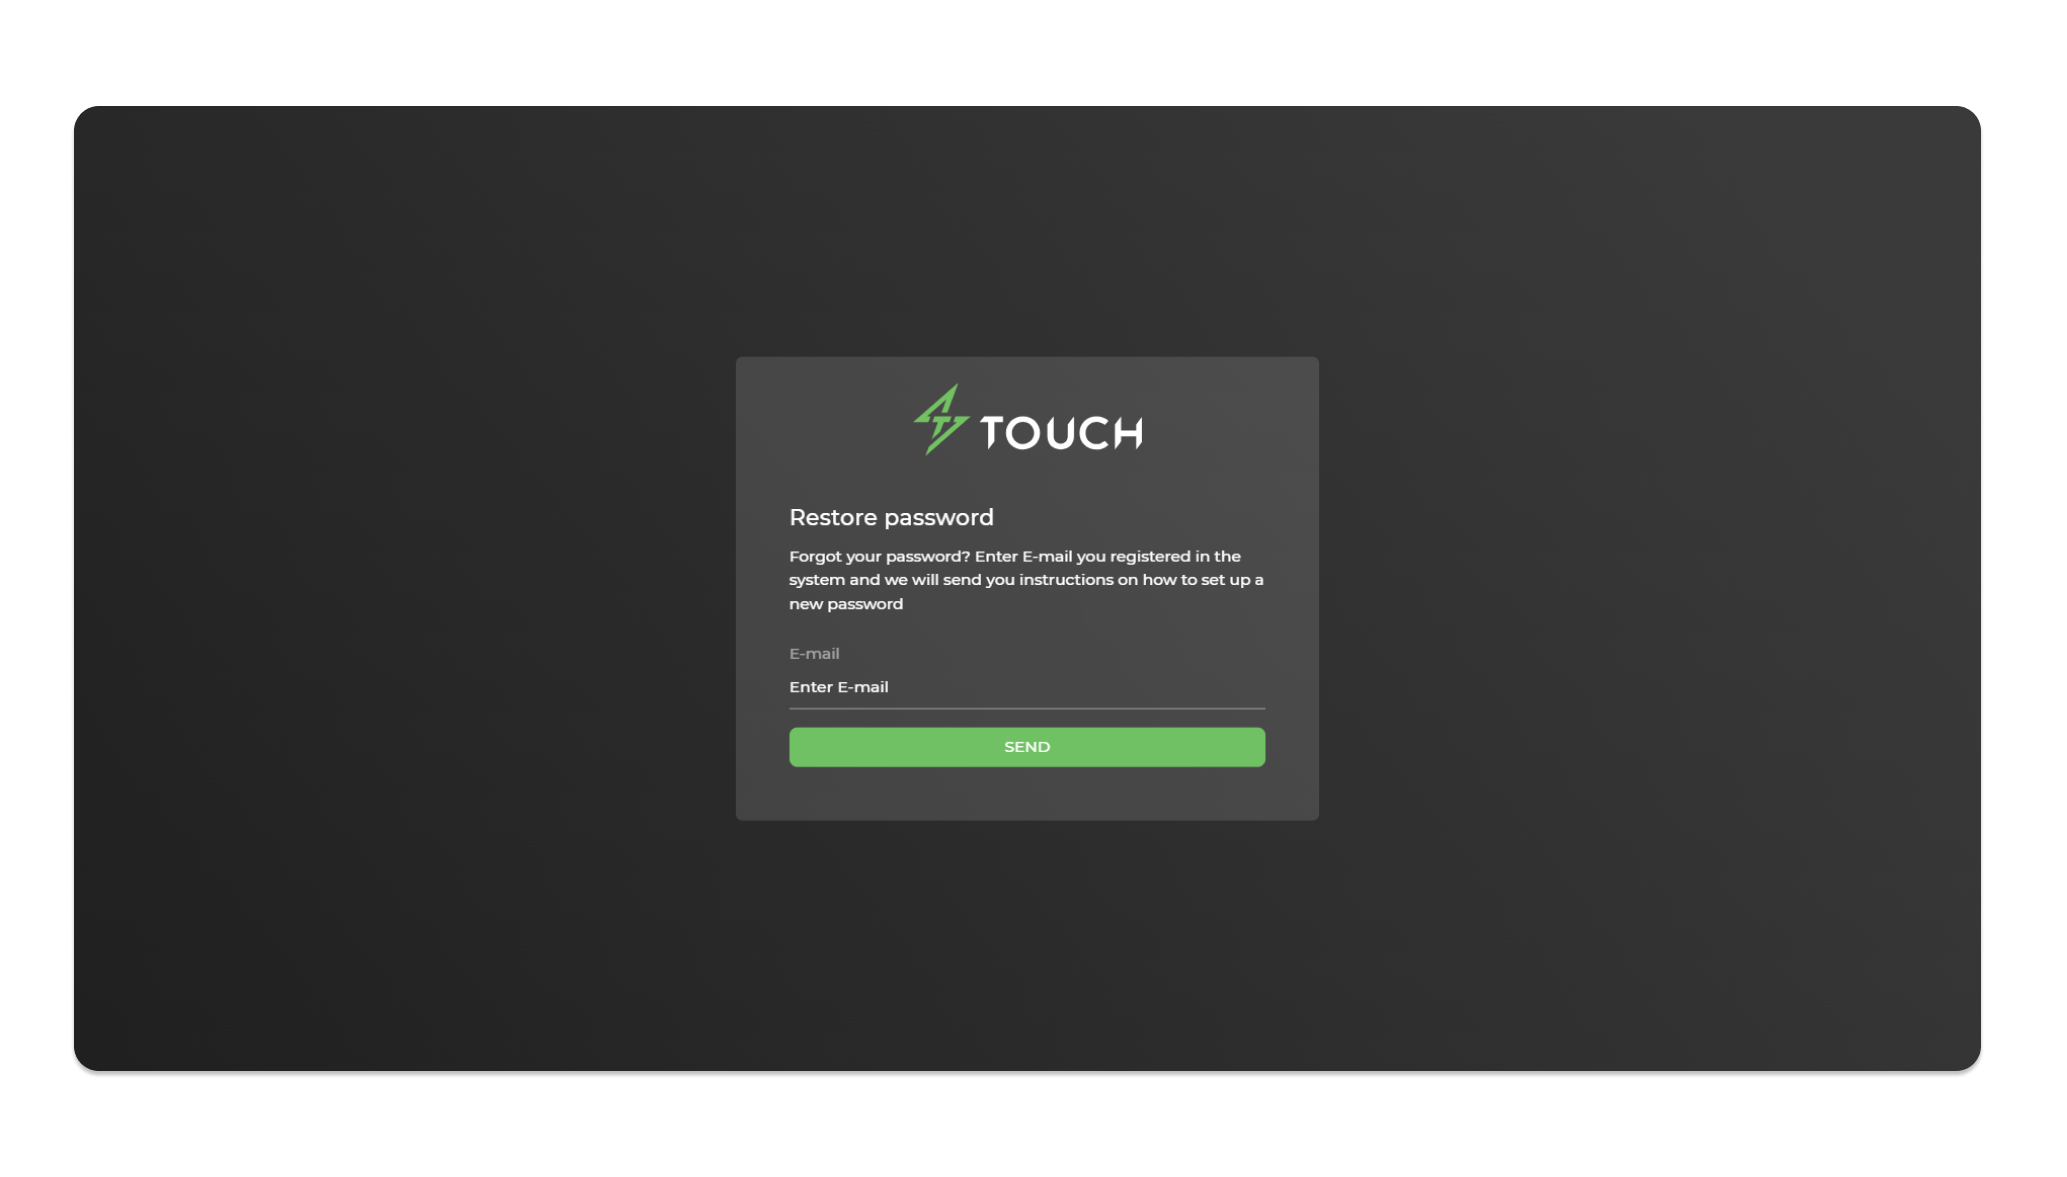
In case the user has forgotten the password, the password recovery function is available (by sending an e-mail to the user's E-Mail with a special link to reset the password). To recover the password, the user:
- Click "Forgot Password?" on the login page.
In the "Recover Password" window that opens, the user:
- Enter your personal email in the "E-mail" field;
- Click the "Send" button. Enter Email.
Follow the recommendations from the letter. When you click "Recover", the password recovery window opens. In the window that opens, the user:
Fills in the "Enter new password" field;
Fills in the "Repeat new password" field;
Press the "Send" button. Reset password.
The system restores the password and opens the main login page.
2. Menu bar
The cabinet menu bar in the expanded view shows the active section and the main actions available in it.
Clicking on the current section displays the full menu bar, which contains the following main sections:
- Overview - initial page with a widget of user support requests and metrics;
- Sessions - display and manage current and completed sessions;
- Companies - display and management of companies registered in the system;
- Locations are charging stations;
- Customers are customers of the Charging Station Operator;
- Rates are charging rates;
- Reports - system reports;
- Settings - system settings.
The visibility of the menu bar sections and the set of functionality of each section depends on the role of the current user.
3. Overview section
To go to the "Browse" section, select "Browse" from the menu bar.
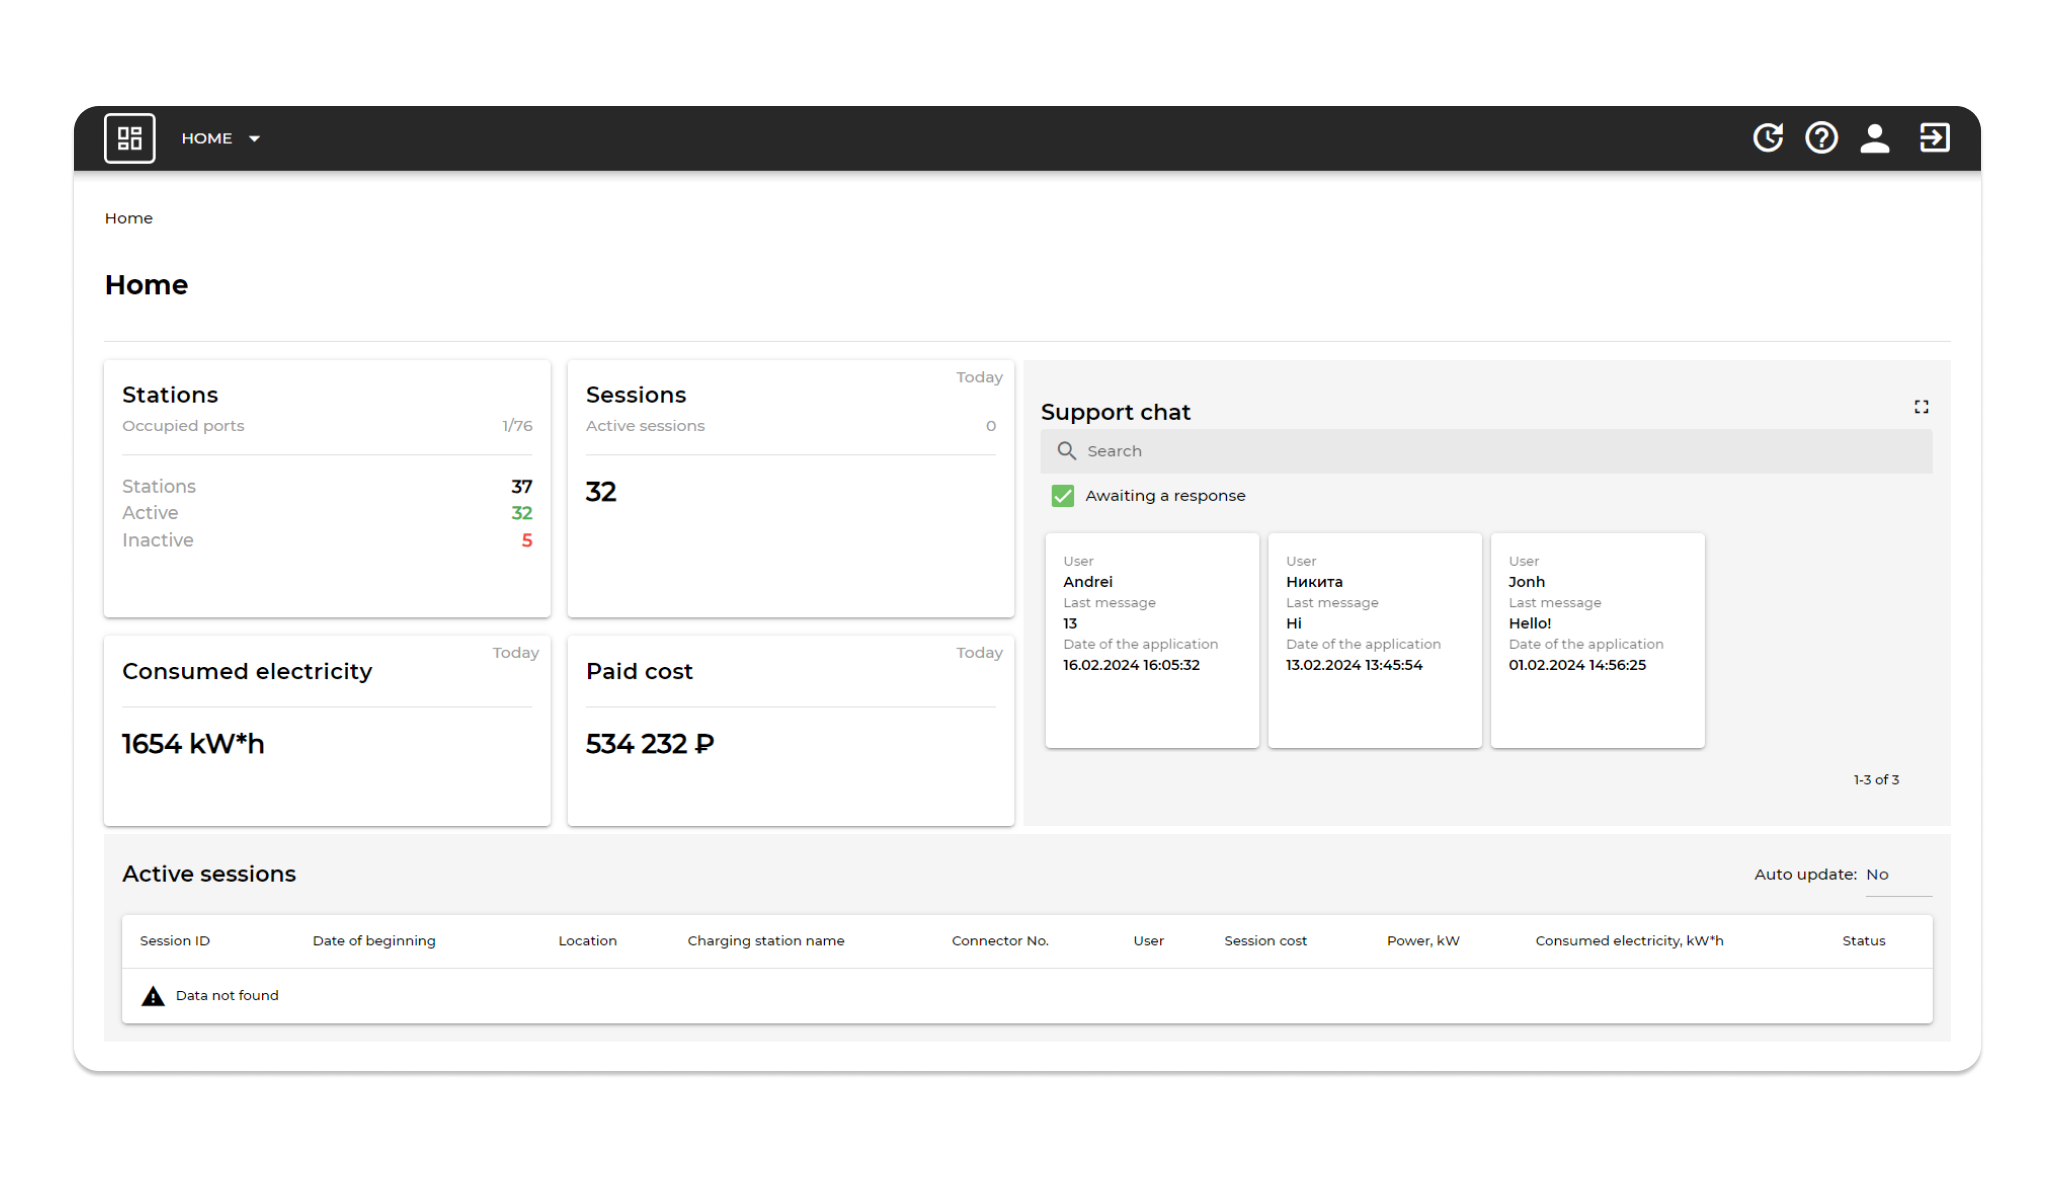
The visibility of dashboard widgets is determined by the user's role (Administrator, Business Owner, Support).
The "Overview" section is a summary of technical support chats with filtering by unanswered messages or messages of the current user only and search by chats. To display new messages , you should check the "Awaiting reply" checkbox.
Metrics are available to the user within their company - information on sessions, on the cost of charging sessions, on energy consumed. The data is dynamic and displays up-to-date information.
A window with a list of current sessions is also displayed within the user role. It is possible to manage sessions from the window
4. Section "Sessions"
To open the "Sessions" section, select "Sessions" from the menu bar. Sessions
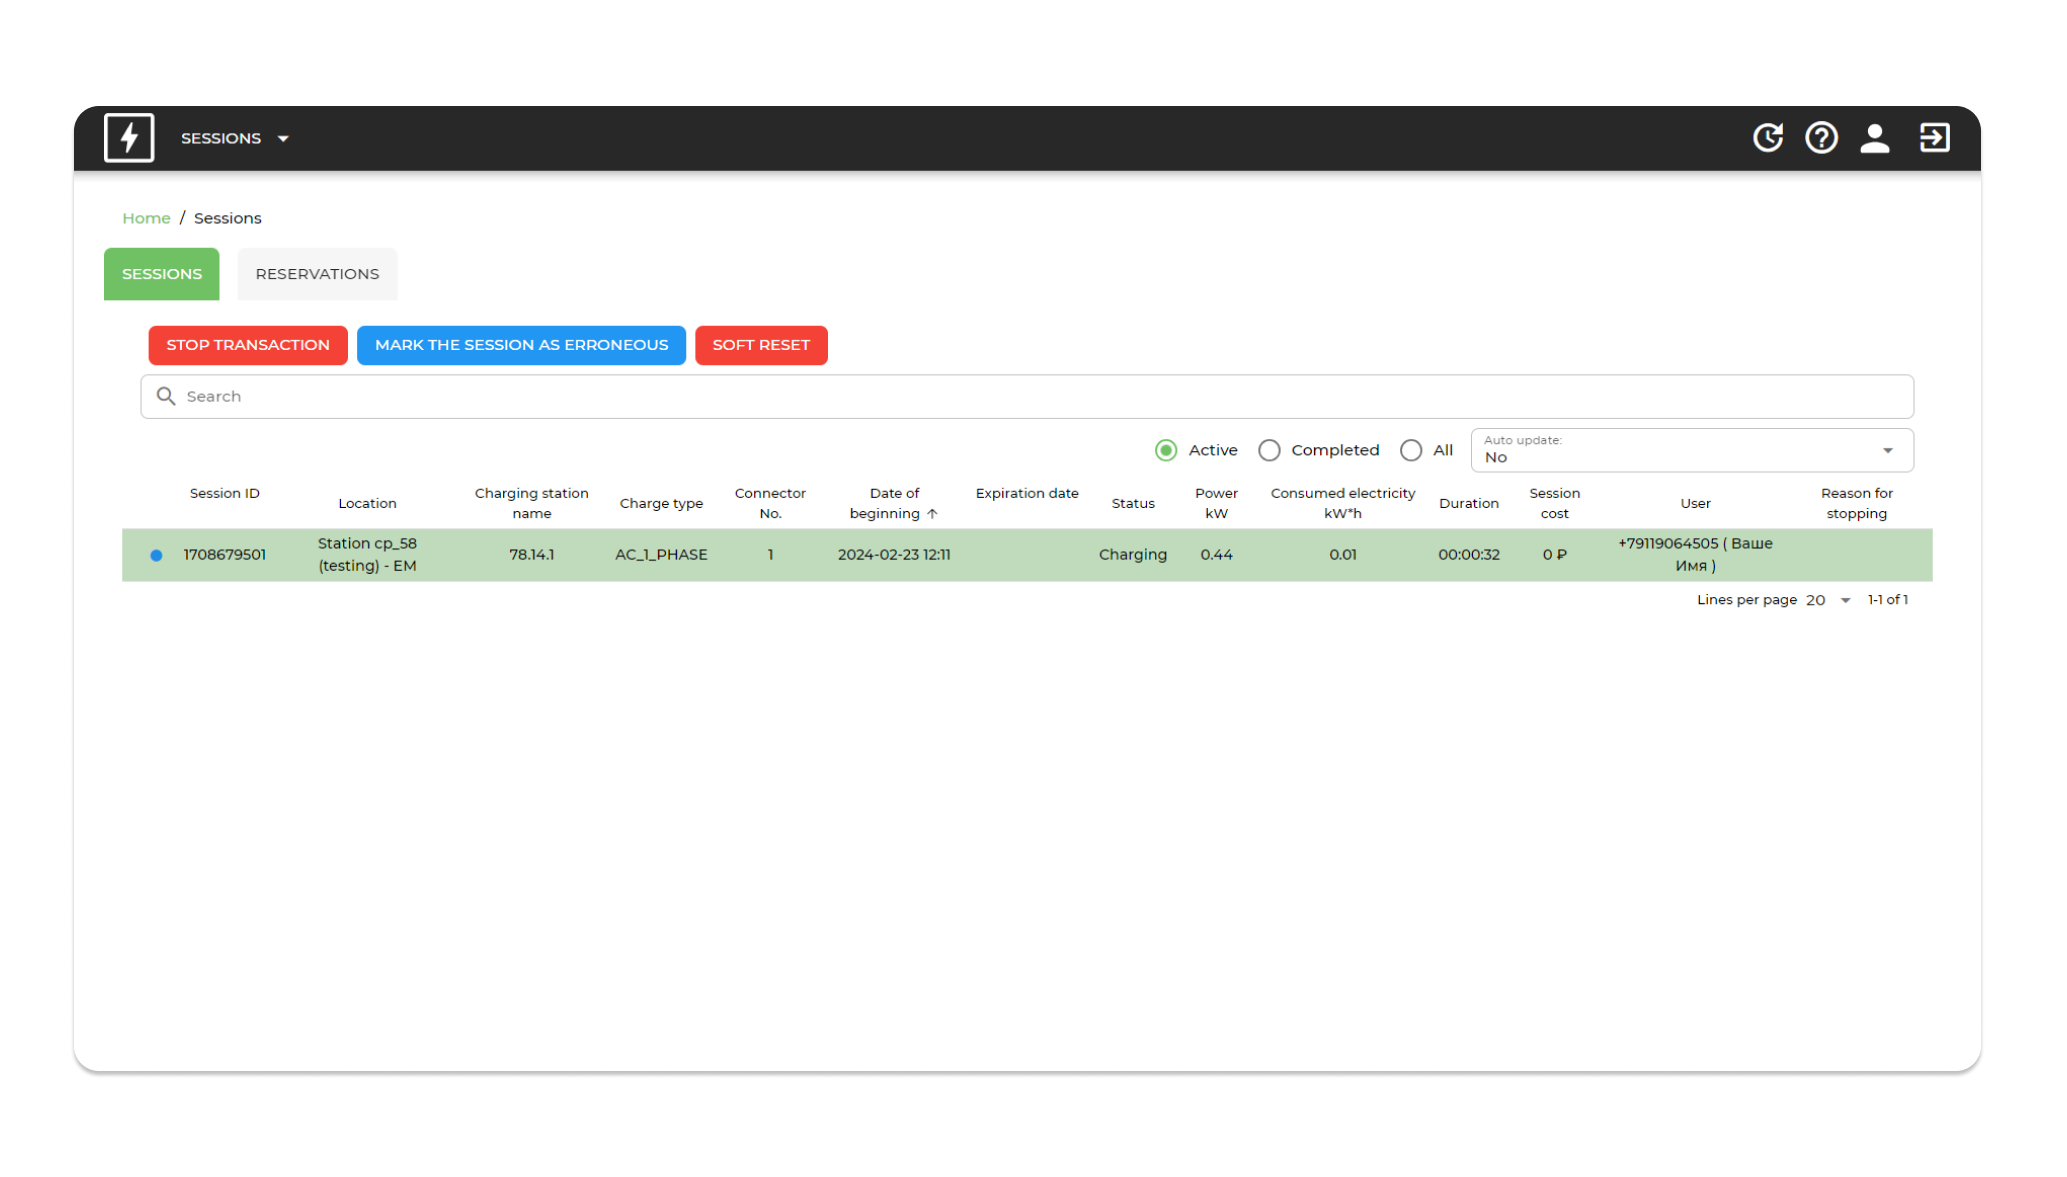
4.1 Active sessions display and management
The main features of the section are:
- Displays a page with active sessions;
- Ability to manage the session;
- Stopping the session;
- Marking an erroneous session;
- Soft reset the station;
4.2 Completed sessions
A tab with completed sessions is available on the Sessions page.
The user can access:
- Search by session;
- Sorting a table with a list of sessions;
- Summary information for each session
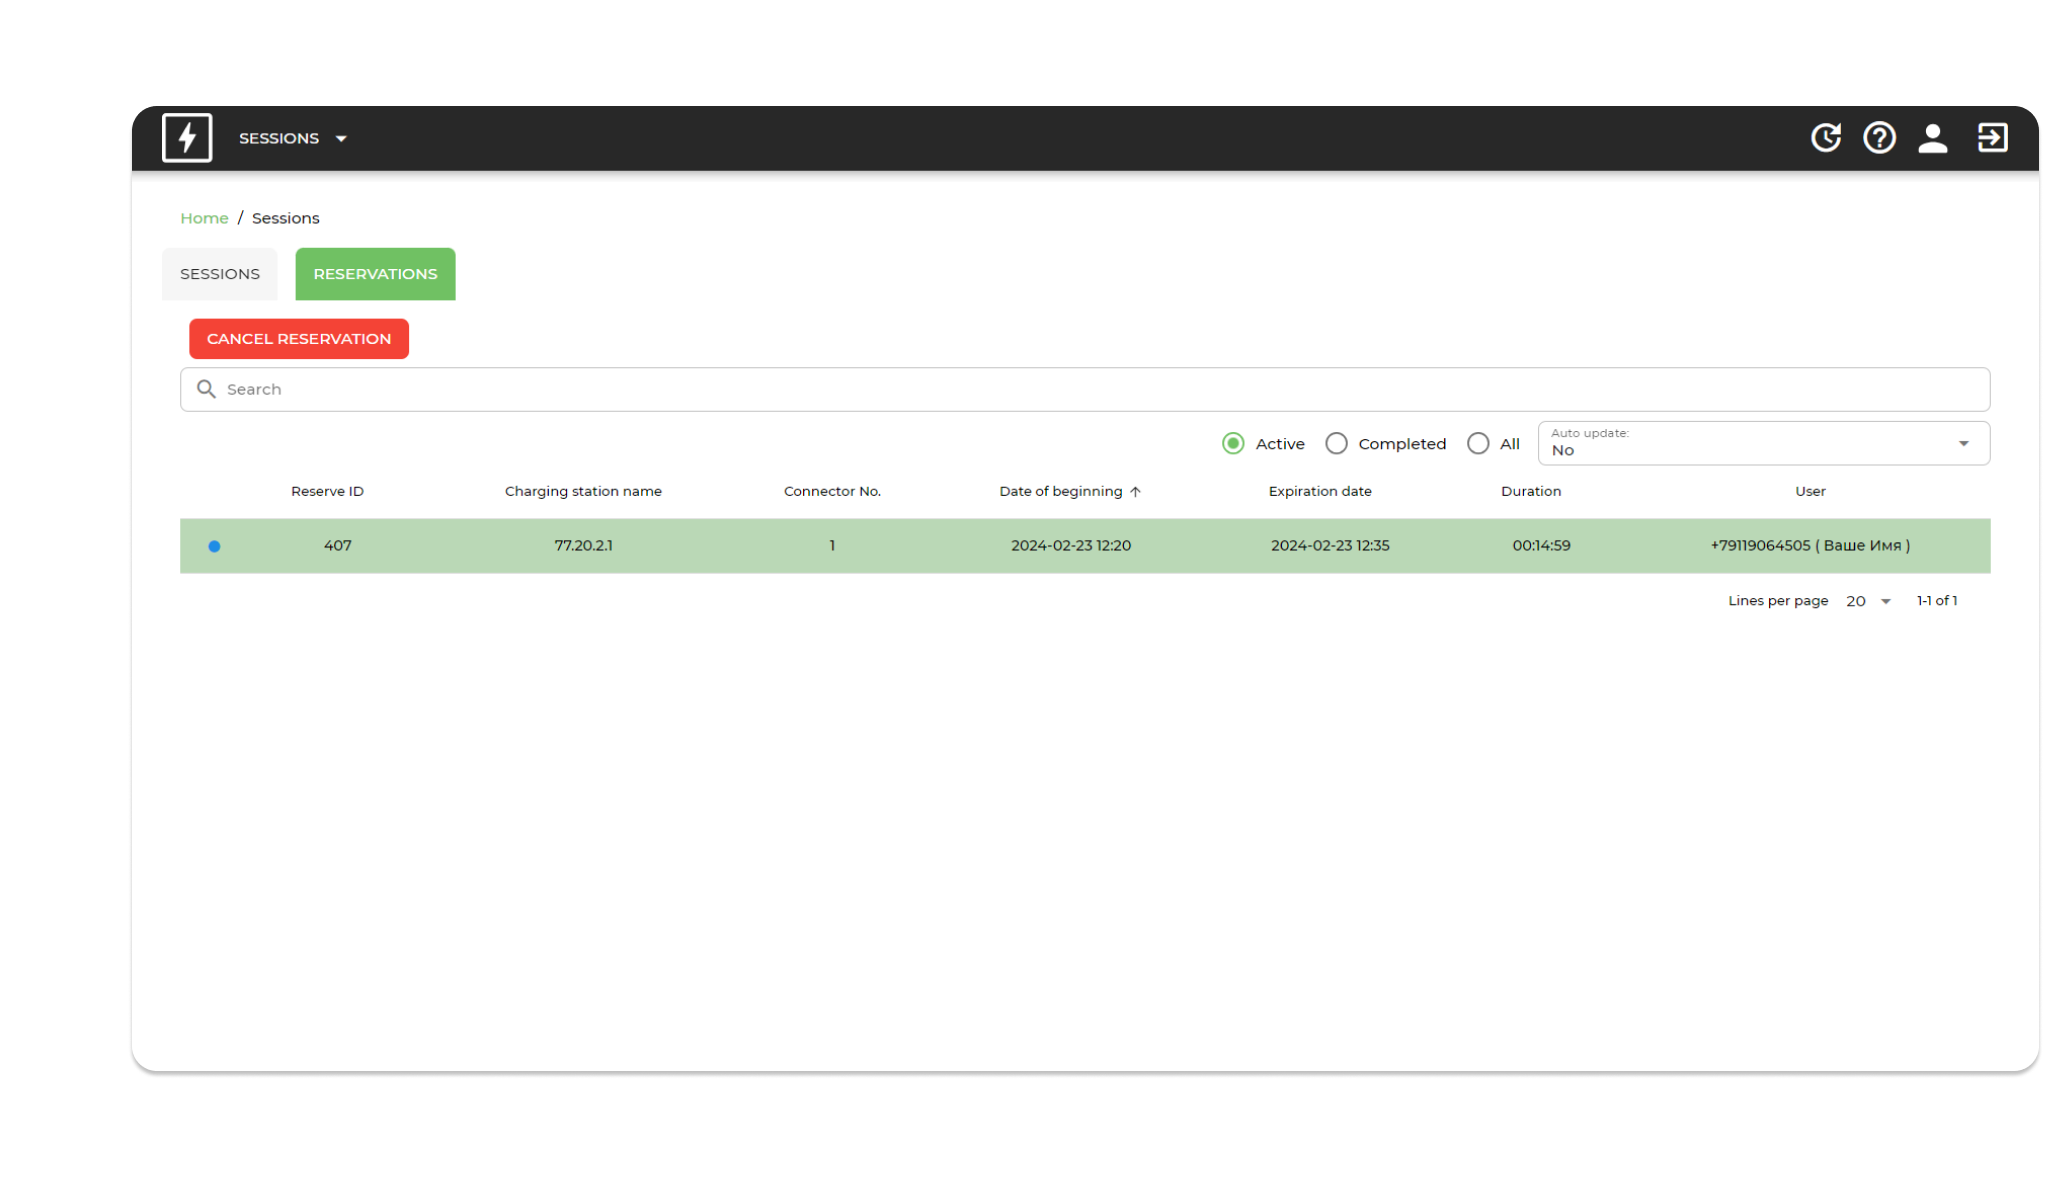
4.3 Active bookings display and management
The main features of the section are:
- Display a page with active reservations;
- Ability to manage reservations;
- Stopping the reservation;
4.4 Completed bookings
A tab with completed sessions is available on the "Bookings" page.
The user can access:
- Search by reservations;
- Sorting a table with a list of reservations;
- Summary information for each reservation.
5. Section "Companies"
To open the "Companies" section, select "Companies" from the menu bar.
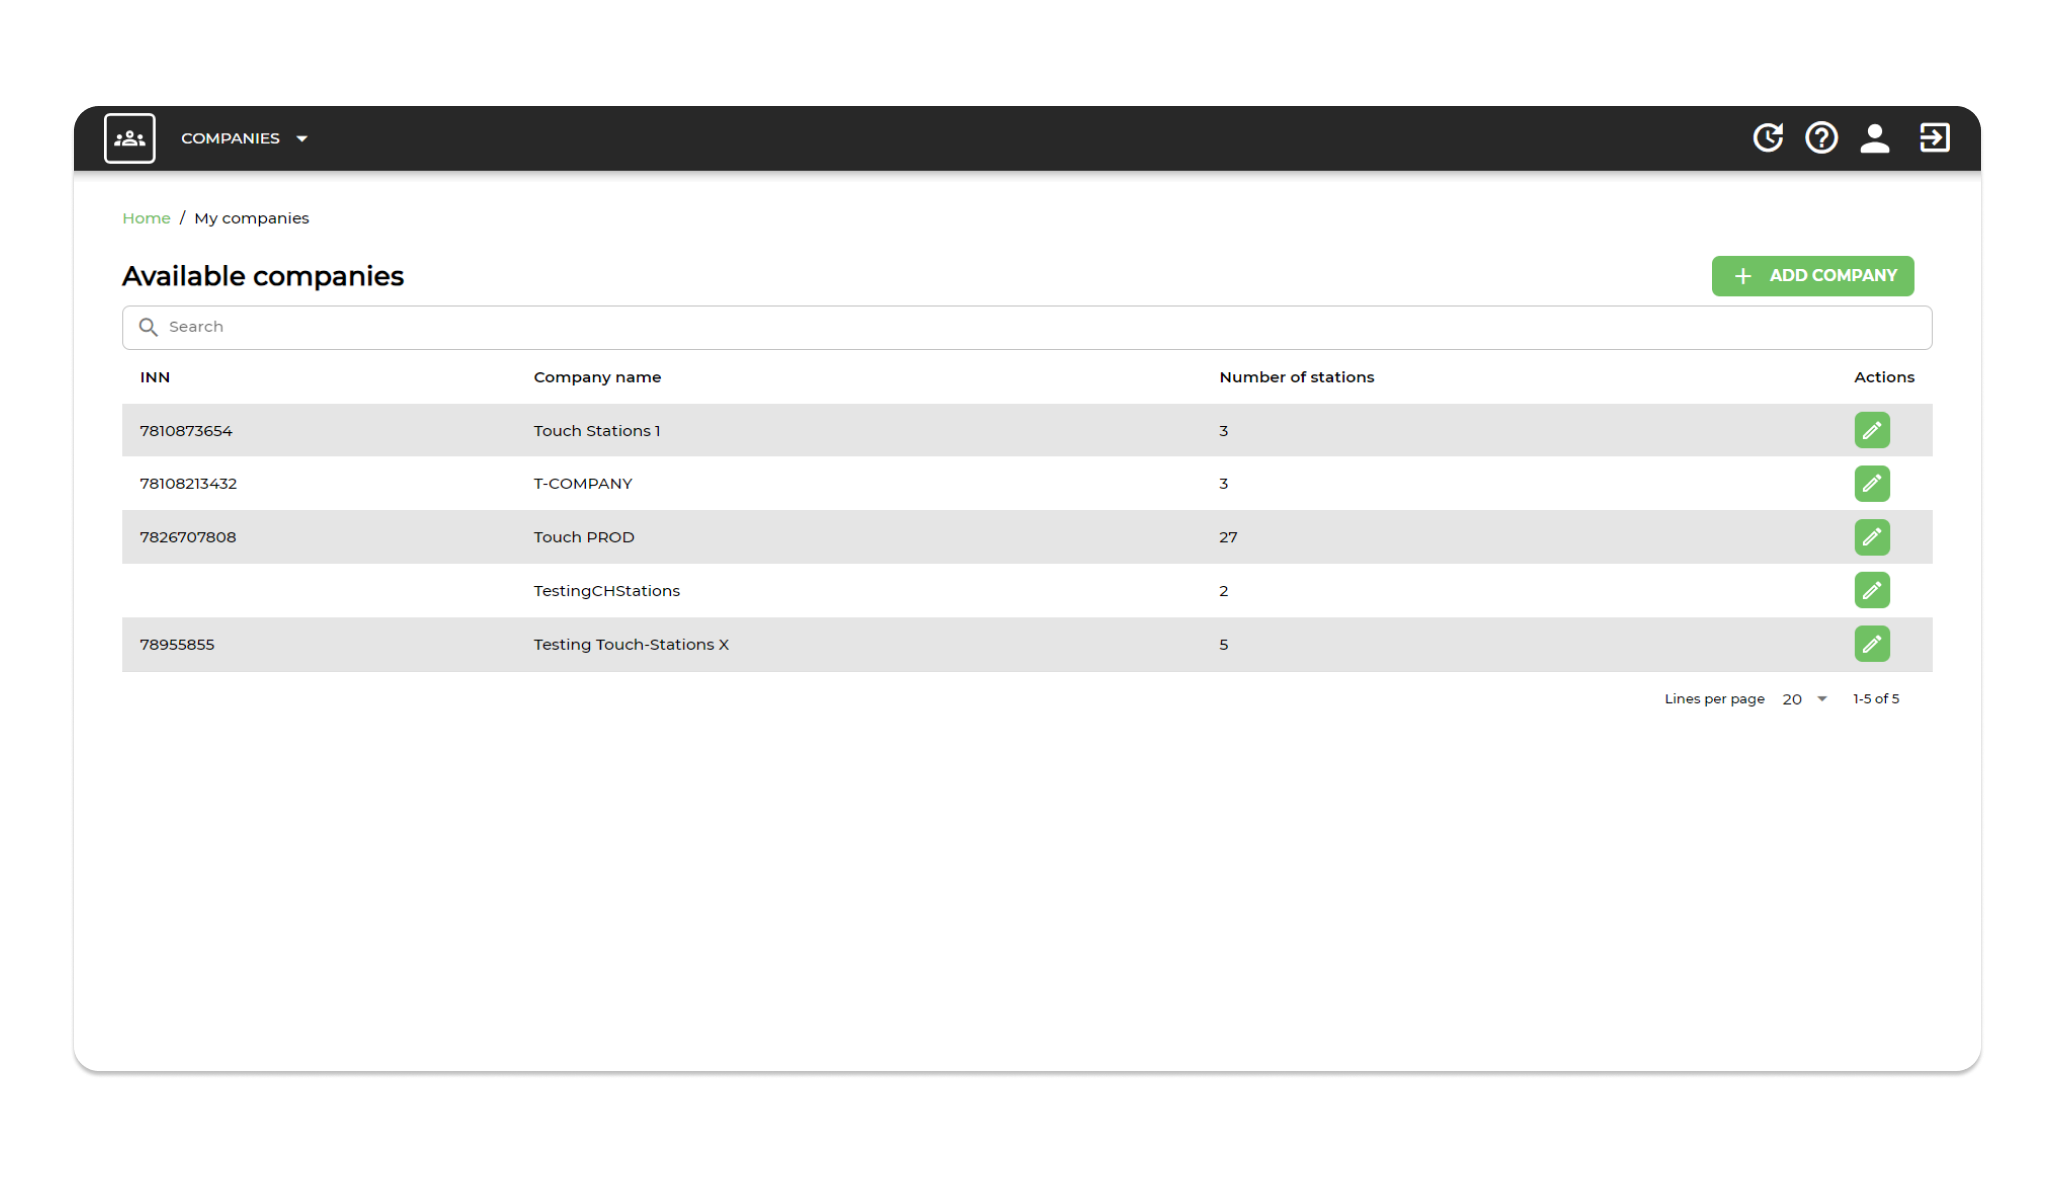
The section contains a list of companies. The list allows you to perform the following actions:
- Looking for a specific company;
- Go to a specific company card;
- Add new companies;
- Edit existing companies;
- Replenish fleet balance. Company list
5.1 Adding a new company
To add a new company, the user clicks the "Add Company" button in the list.
The system opens the window of adding a new company, where you should fill in the fields:
- Enter a phone number;
- Enter email;
- Enter the password and repeat it;
- Enter the name of the company;
- Select a currency.
After filling in the fields, click "Register".
5.2 Company Card
In the company card you can edit company information, add employees to the White List, view available stations, see revenue and electricity consumed.
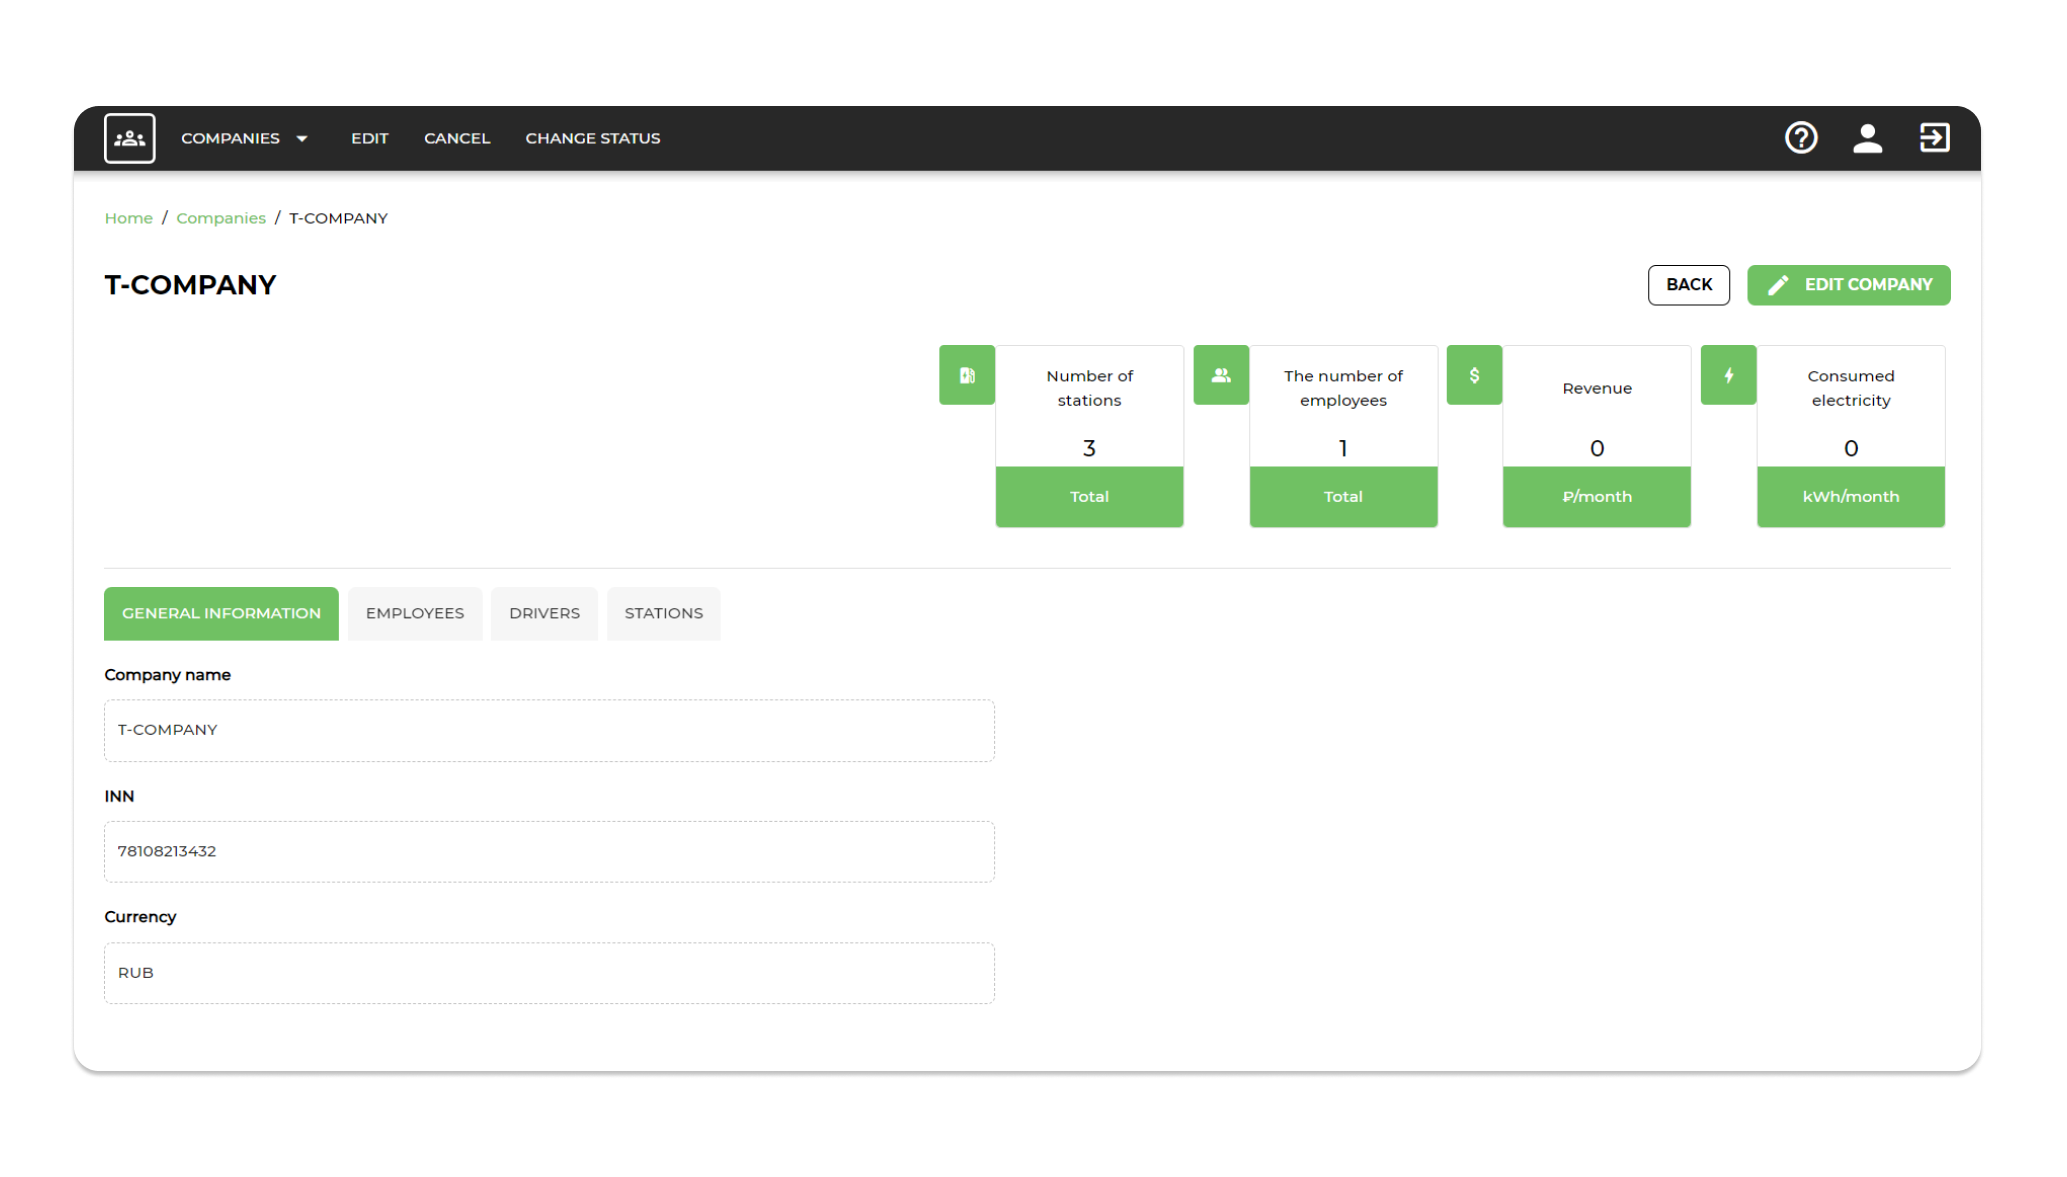
5.2.1 General Information tab
On the "General Information" tab you can view the company name, TIN and currency used.
Employees tab
The "Team" tab contains the list of users-employees (Full name, E-mail, status) and allows you to perform the following actions:
- Seeking a specific employee;
- Go to a specific employee's card;
- Adding new employees;
- Edit existing employees:
The set of fields depends on the role of the edited user (for Business Owner the company name and accounting currency are shown, for ordinary employees there is a choice of role - Support Service or Management Service).
- Reset passwords in case employees are unable to log in;
- Change employee status (active/inactive);
- Delete an employee from the list.
5.2.2.1 Add a new employee
To add an employee to the list, press the "Add employee" button.
The system opens the Add Employee window, in which you must:
- Enter a phone number;
- Enter the password;
- Enter last name;
- Enter a name;
- Enter middle name;
- Enter email;
- Select an employee role;
- Enter the employee's job title.
After filling in the data, press "Add employee". The system adds the employee to the list and adds the new employee's card.
5.2.2.2 White List
White List is the ability to set separate rates at specific stations and their connectors for your employee customers or any of your own preferred customers. You can make a station near your office free only for your employees and charge for other customers.
To add an employee to the list, click the "White List" White List button The system opens the list of clients listed in the White List. To add a client, press the "Add Client" button. The system opens the Add Customer entry window:
- Enter a phone number;
- Choose a company:
The company is selected by default.
- Select a location group;
- Select locations;
- Select a charging station;
- Select a connector.
After filling in the data, click "Yes"
5.2.3 Tab "Drivers". Company fleet
The "Drivers" tab is intended for adding drivers to the Company's fleet. The tab contains the list of users-employees (Phone number, user name, status, description) and allows you to perform the following actions:
- Looking for a specific driver;
- Adding new drivers;
- Remove the driver from the list;
- Edit drivers that have already been added;
- Change the status of the driver (active/inactive).
The system also displays the available fleet balance. To add a driver to the list, click the "Add Driver" button. The system opens the Add Driver window where you must:
- Enter phone number; Enter phone number
- Select a found driver;
- Enter a name;
- Enter description.
After filling in the data, click "Add". The system adds the driver to the list. In the client application TOUCH Corporative profile, to which you can go by a special button.
5.2.4 Stations tab
The Stations tab displays the company's available stations. Stations tab
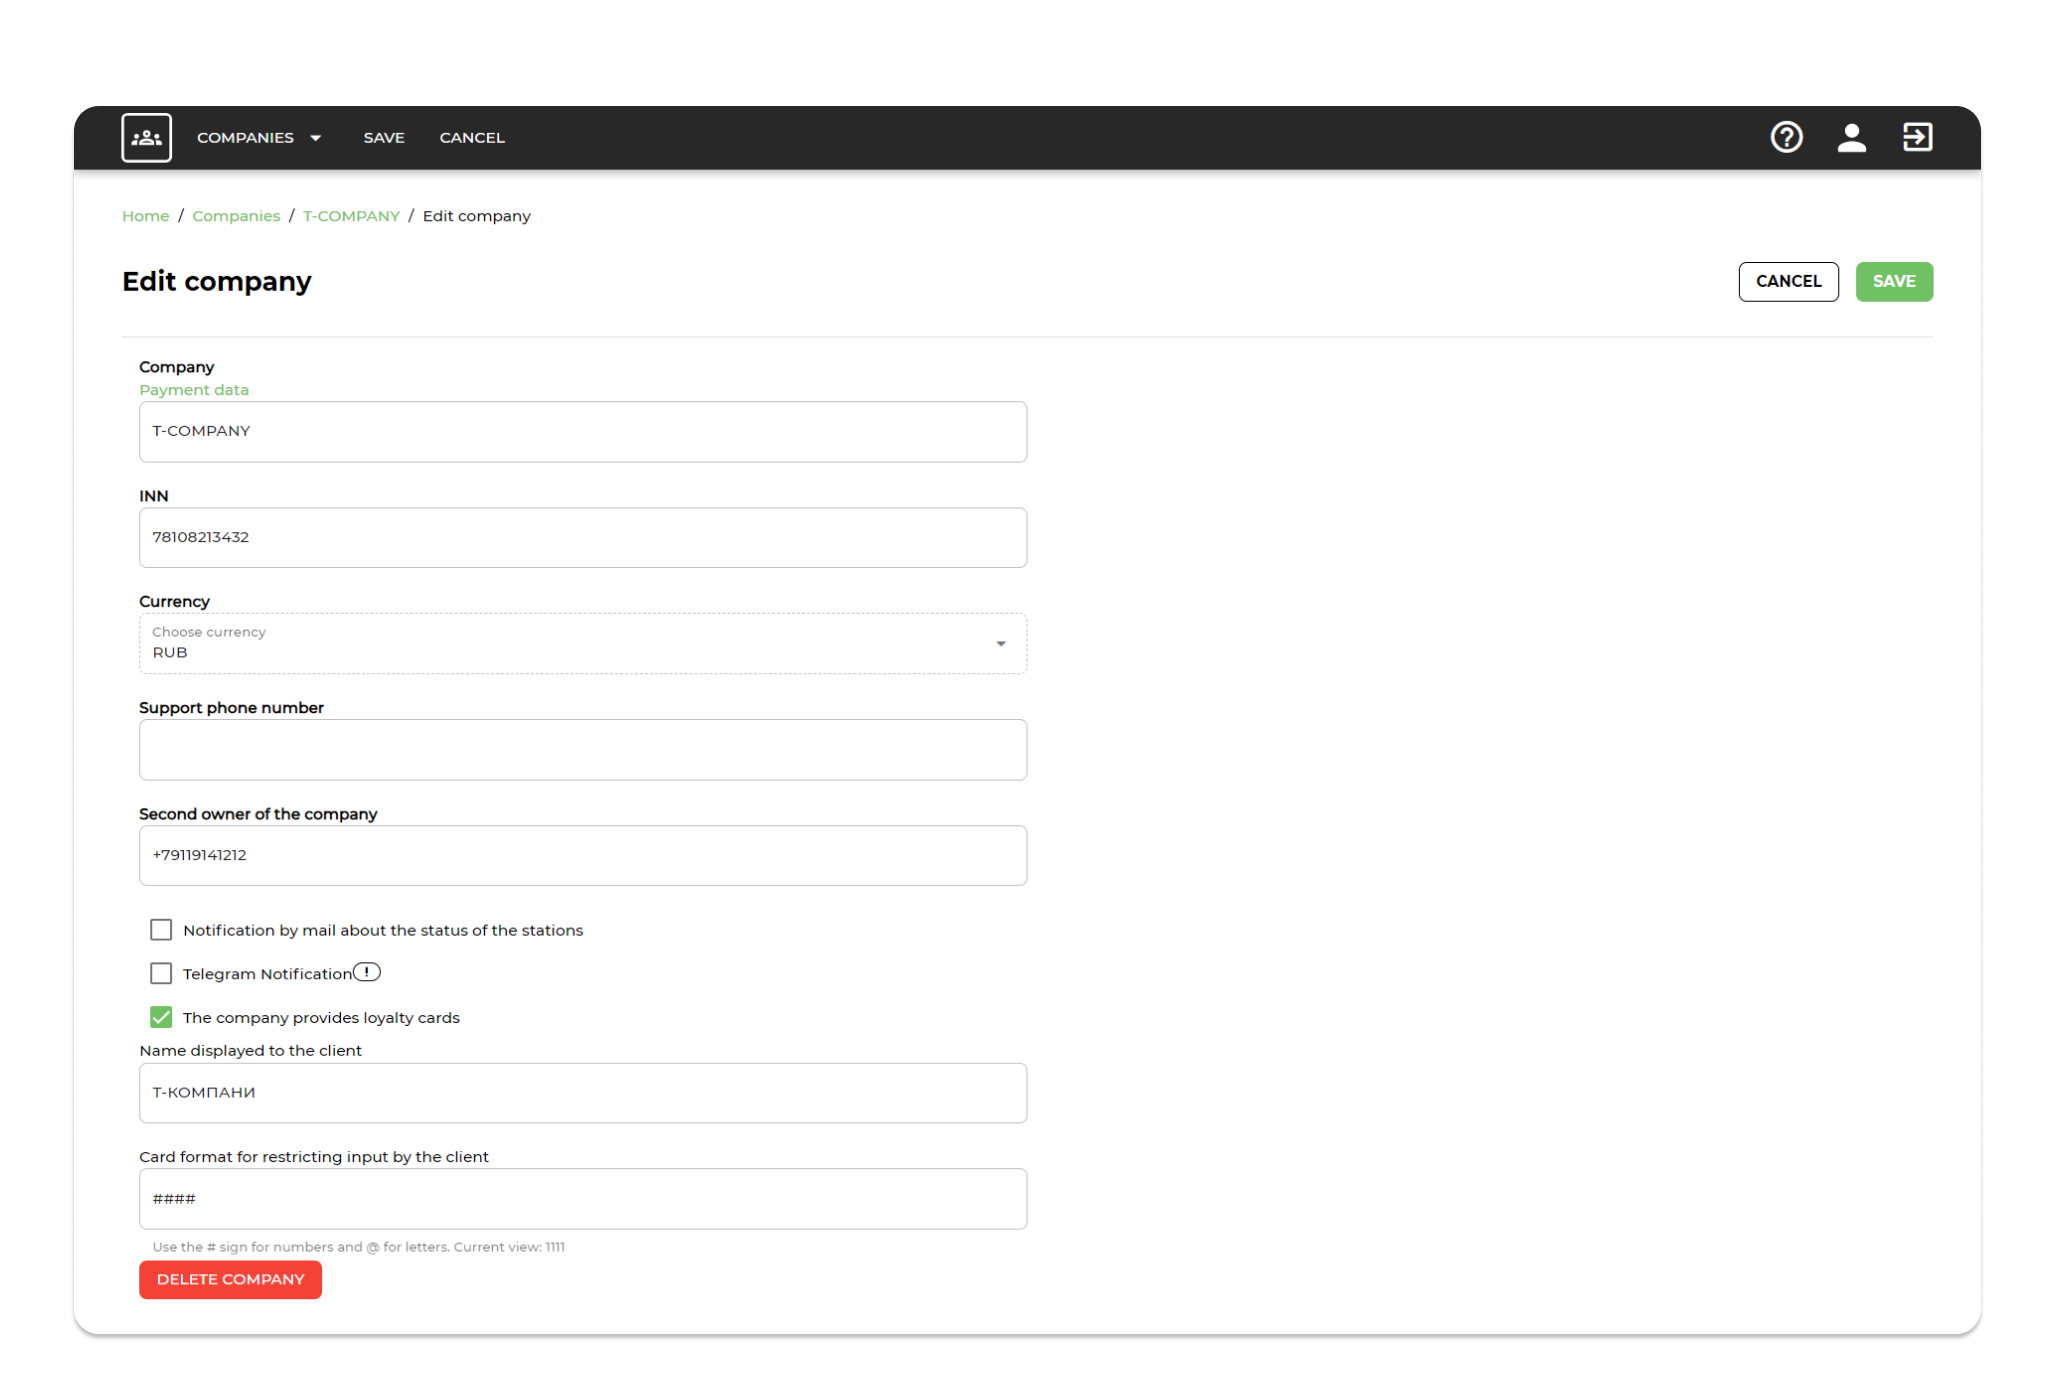
5.3 Company card editing mode
Company editing can be opened in two ways:
- In the Company list, click on the "Edit Company" "Edit Company" button
- In the Company card, click on "Edit" in the menu bar or click on the "Edit Companies" button.
The system opens the company editing window. In the opened window you can:
- Change the name of the company;
- Change the TIN of the company;
- Set or clear the "Notification to mail about station operation status" flag;
- Check or uncheck the "Notification to Telegram" box: The system opens the "Telegram Chat ID" input window. It is necessary to enter the chat id and add the bot to a group or channel as a regular user, the bot name is @touch_app_bot. In order to find out your chat ID, you can use a special bot @getmyid_bot
- Add the ability to add loyalty cards for customers: It is necessary to check the box "Company provides loyalty cards" and enter the mask of the card number according to the instructions. After making changes, click "Save" or click "Add" on the menu bar.
5.4 Replenishment of fleet balance (in the role of ADMINISTRATOR)
To replenish the balance of the fleet, you need to select a company in the list of companies. The system displays the button "Transactions on drivers' account", also the fleet balance. To replenish the fleet balance you should press the button. Replenishment of fleet account The system opens the list of account operations. In the opened window click "Add".
The system opens a fleet recharge window where you must:
- Fill in the amount of the change;
- Fill in the description;
- Press the "Add" button The system replenishes the fleet account. The drivers added to the list can then use a special corporate profile in the TOUCH mobile application.
6. Section "Clients"
To go to the list of clients, select the "Clients" item in the menu bar.
6.1 General view and main features of the section
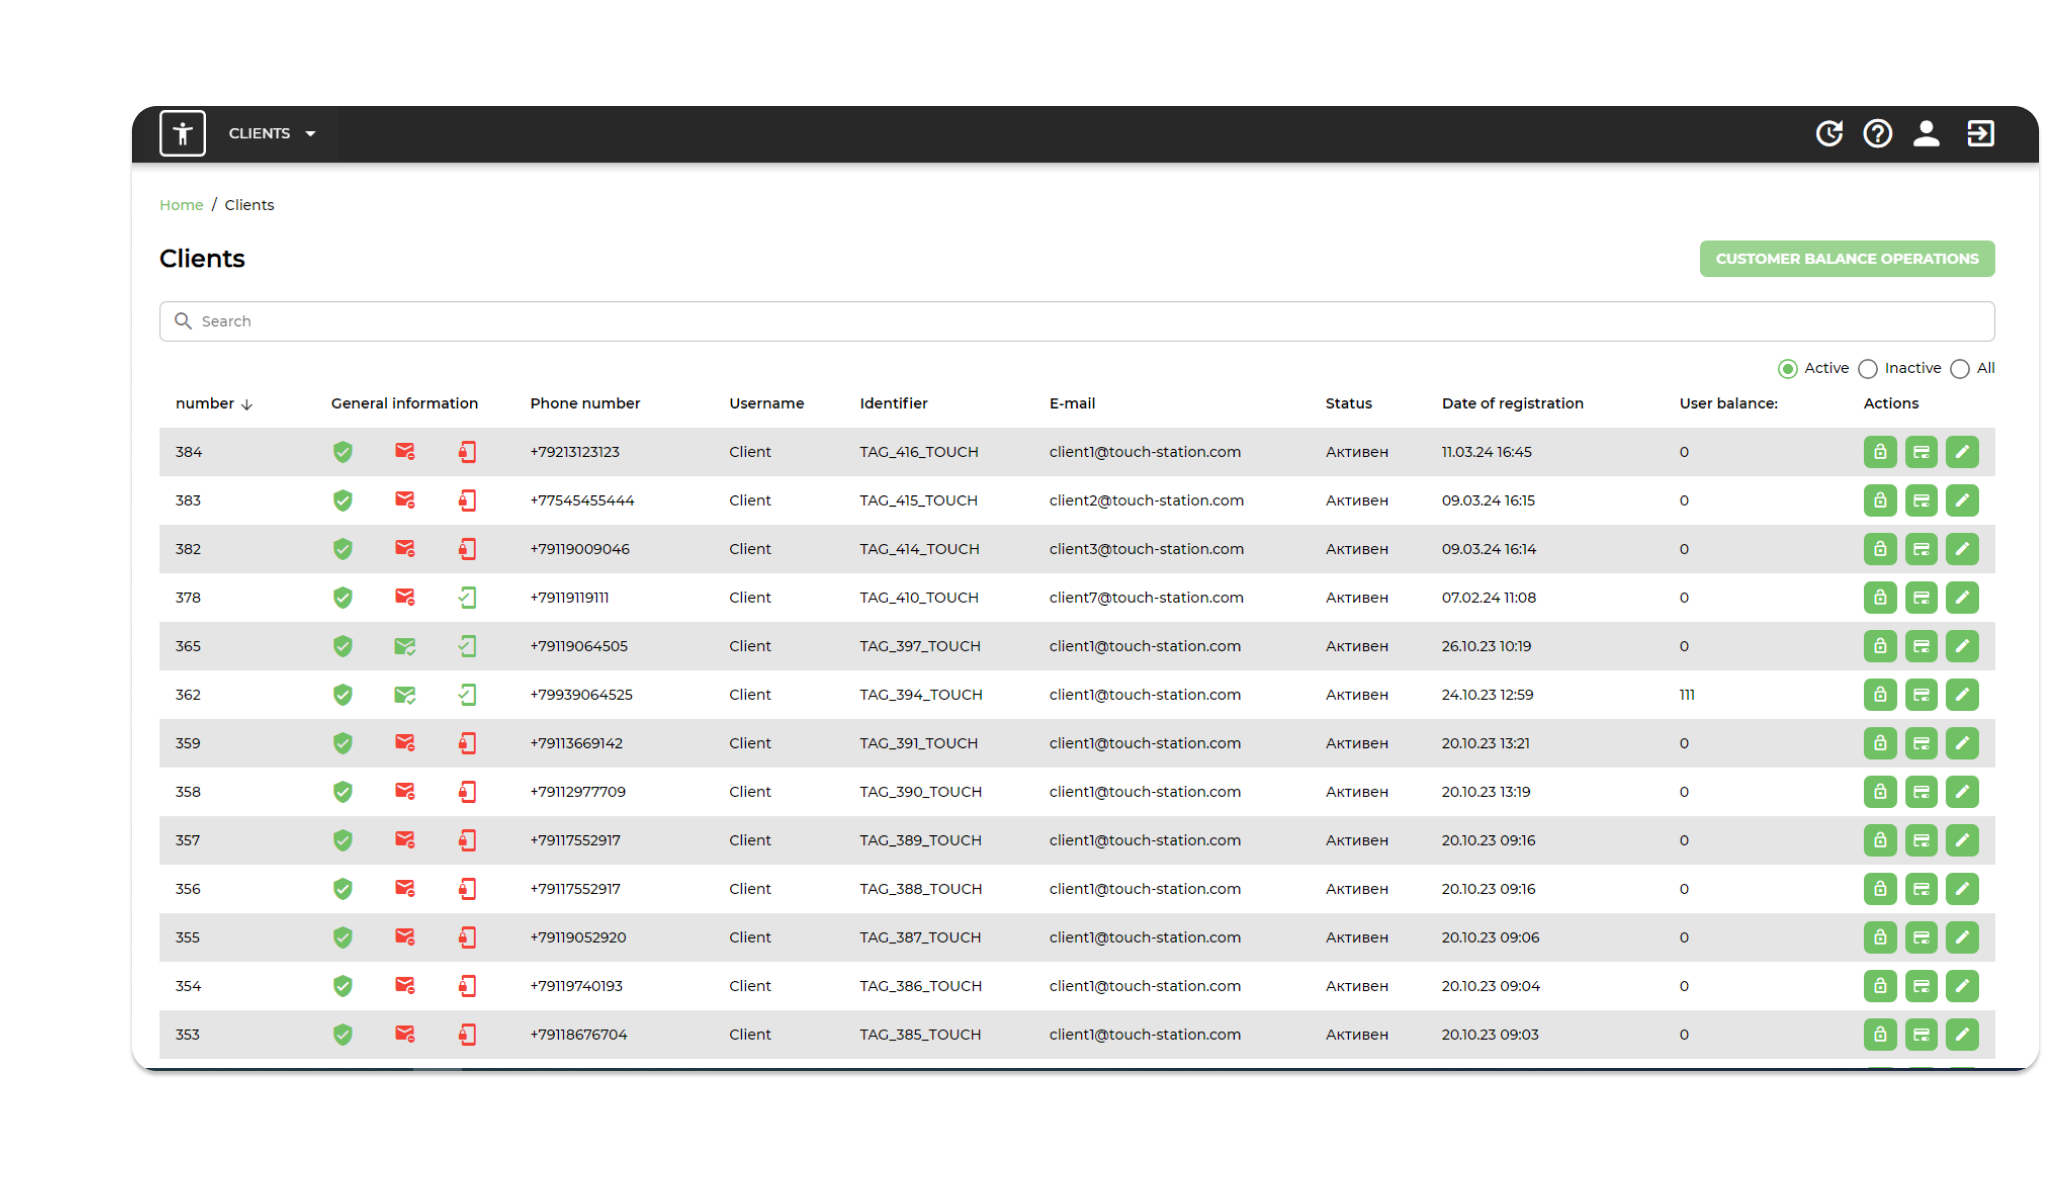
The "Customers" section contains the list of users-customers of the Charging Station Operator (phone number, user name, identifier, e-mail, status and date of registration) and allows to perform the following actions:
- Seeking a specific client;
- View the stations at which the customer is charging;
- Review customer orders;
- View the client's outstanding debt;
- Repay the client's debt;
- Change settings in the client card.
By default, the system forcibly writes off debts from users with negative balance once a day. To repay the debt in the "Business owner" user role, select the client and click "Repay debt". If there are funds on the user's card, the debt will be repaid.
6.2 Customer card
In the customer card, you can view a list of charging stations at which the customer has performed charging sessions.
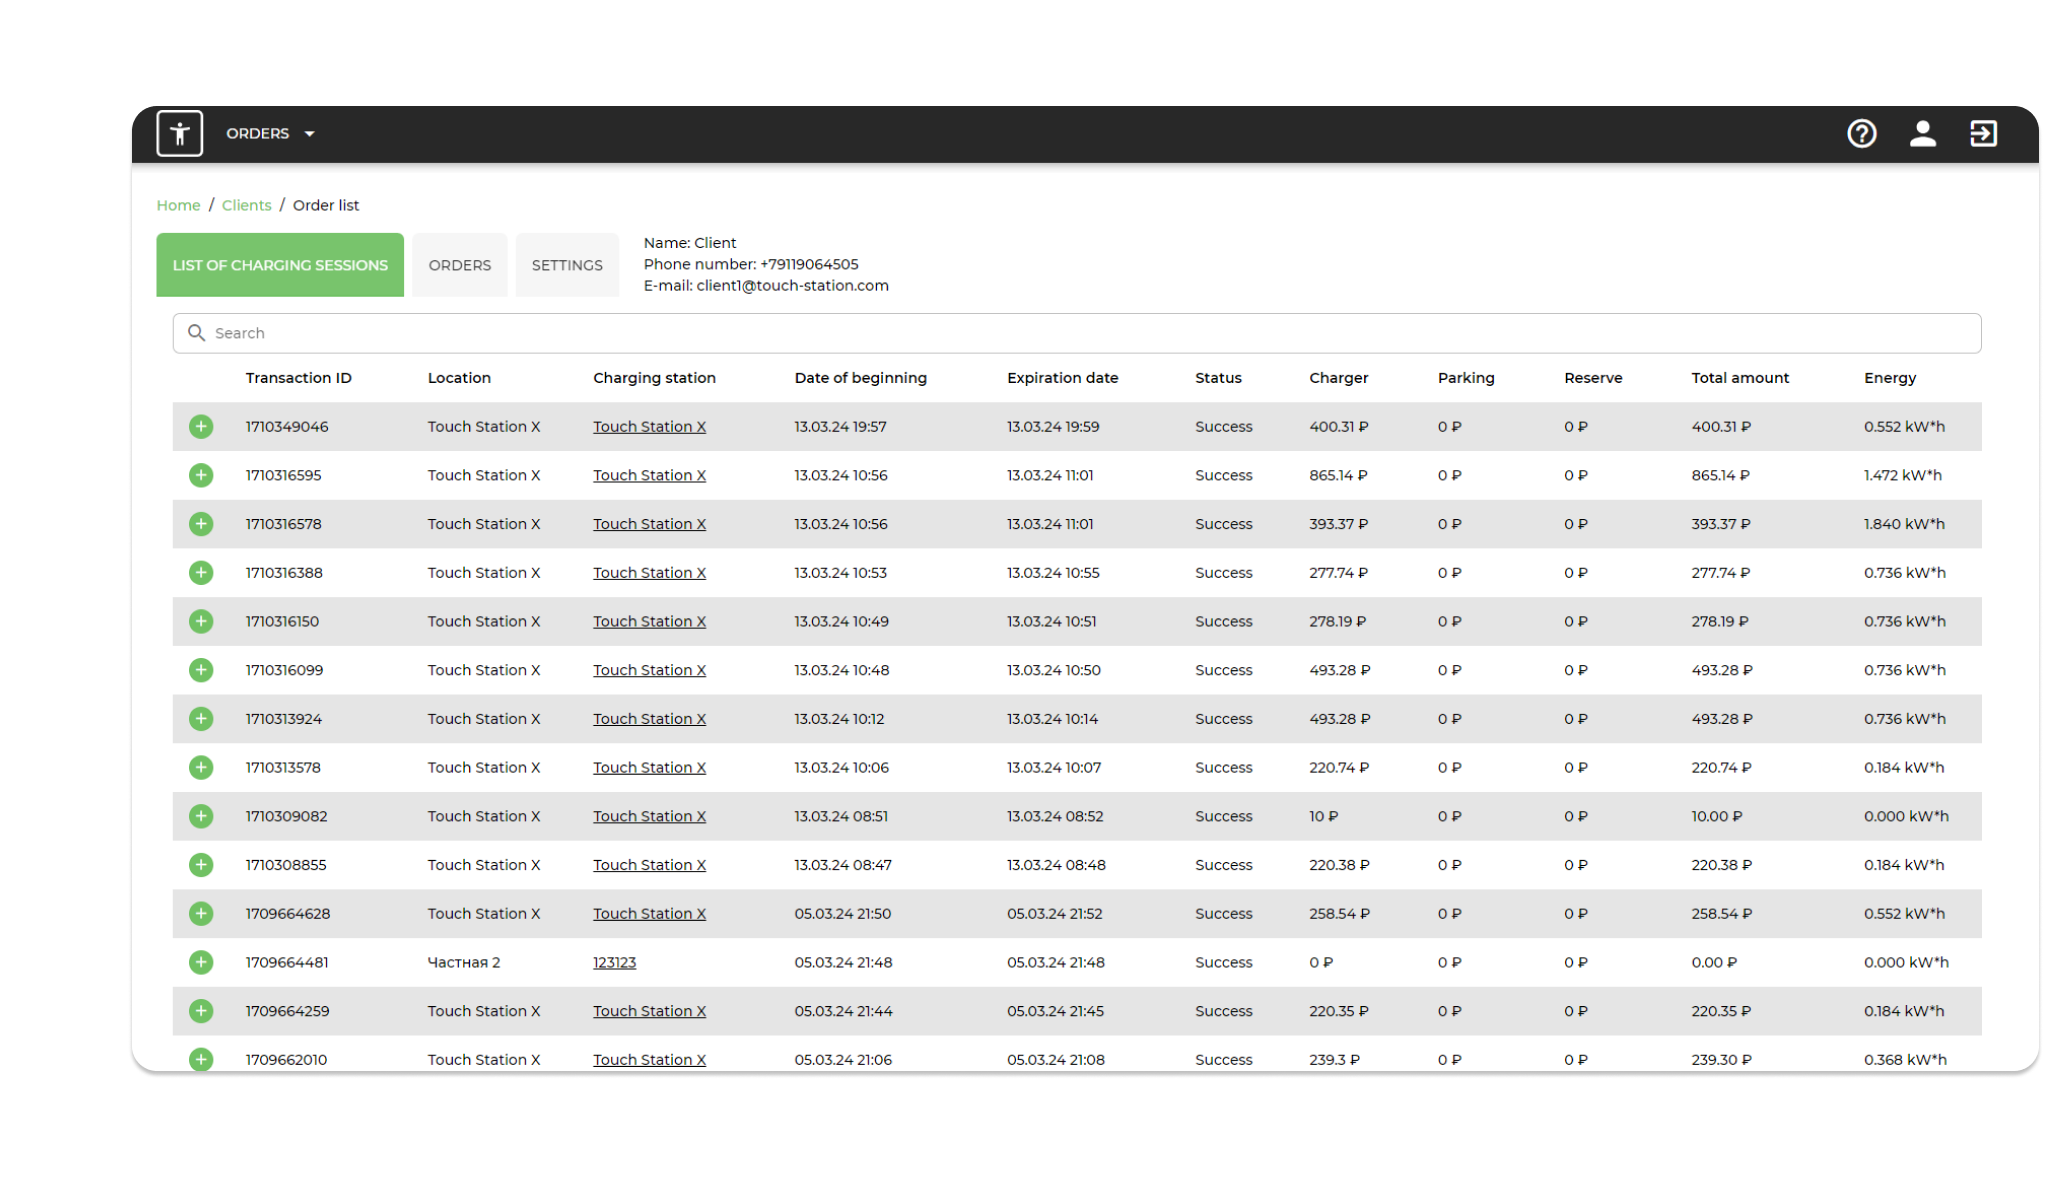
Click on the "+" icon to reveal the details of the charging session.
In the customer card, you can view a list of the customer's orders.
In the client's card you can edit the client's settings, change his status, confirm e-mail and phone number, set the possibility of debiting the client's internal balance.
7. Section "Locations"
To open the "Locations" section, select "Locations" from the menu bar. General view of the
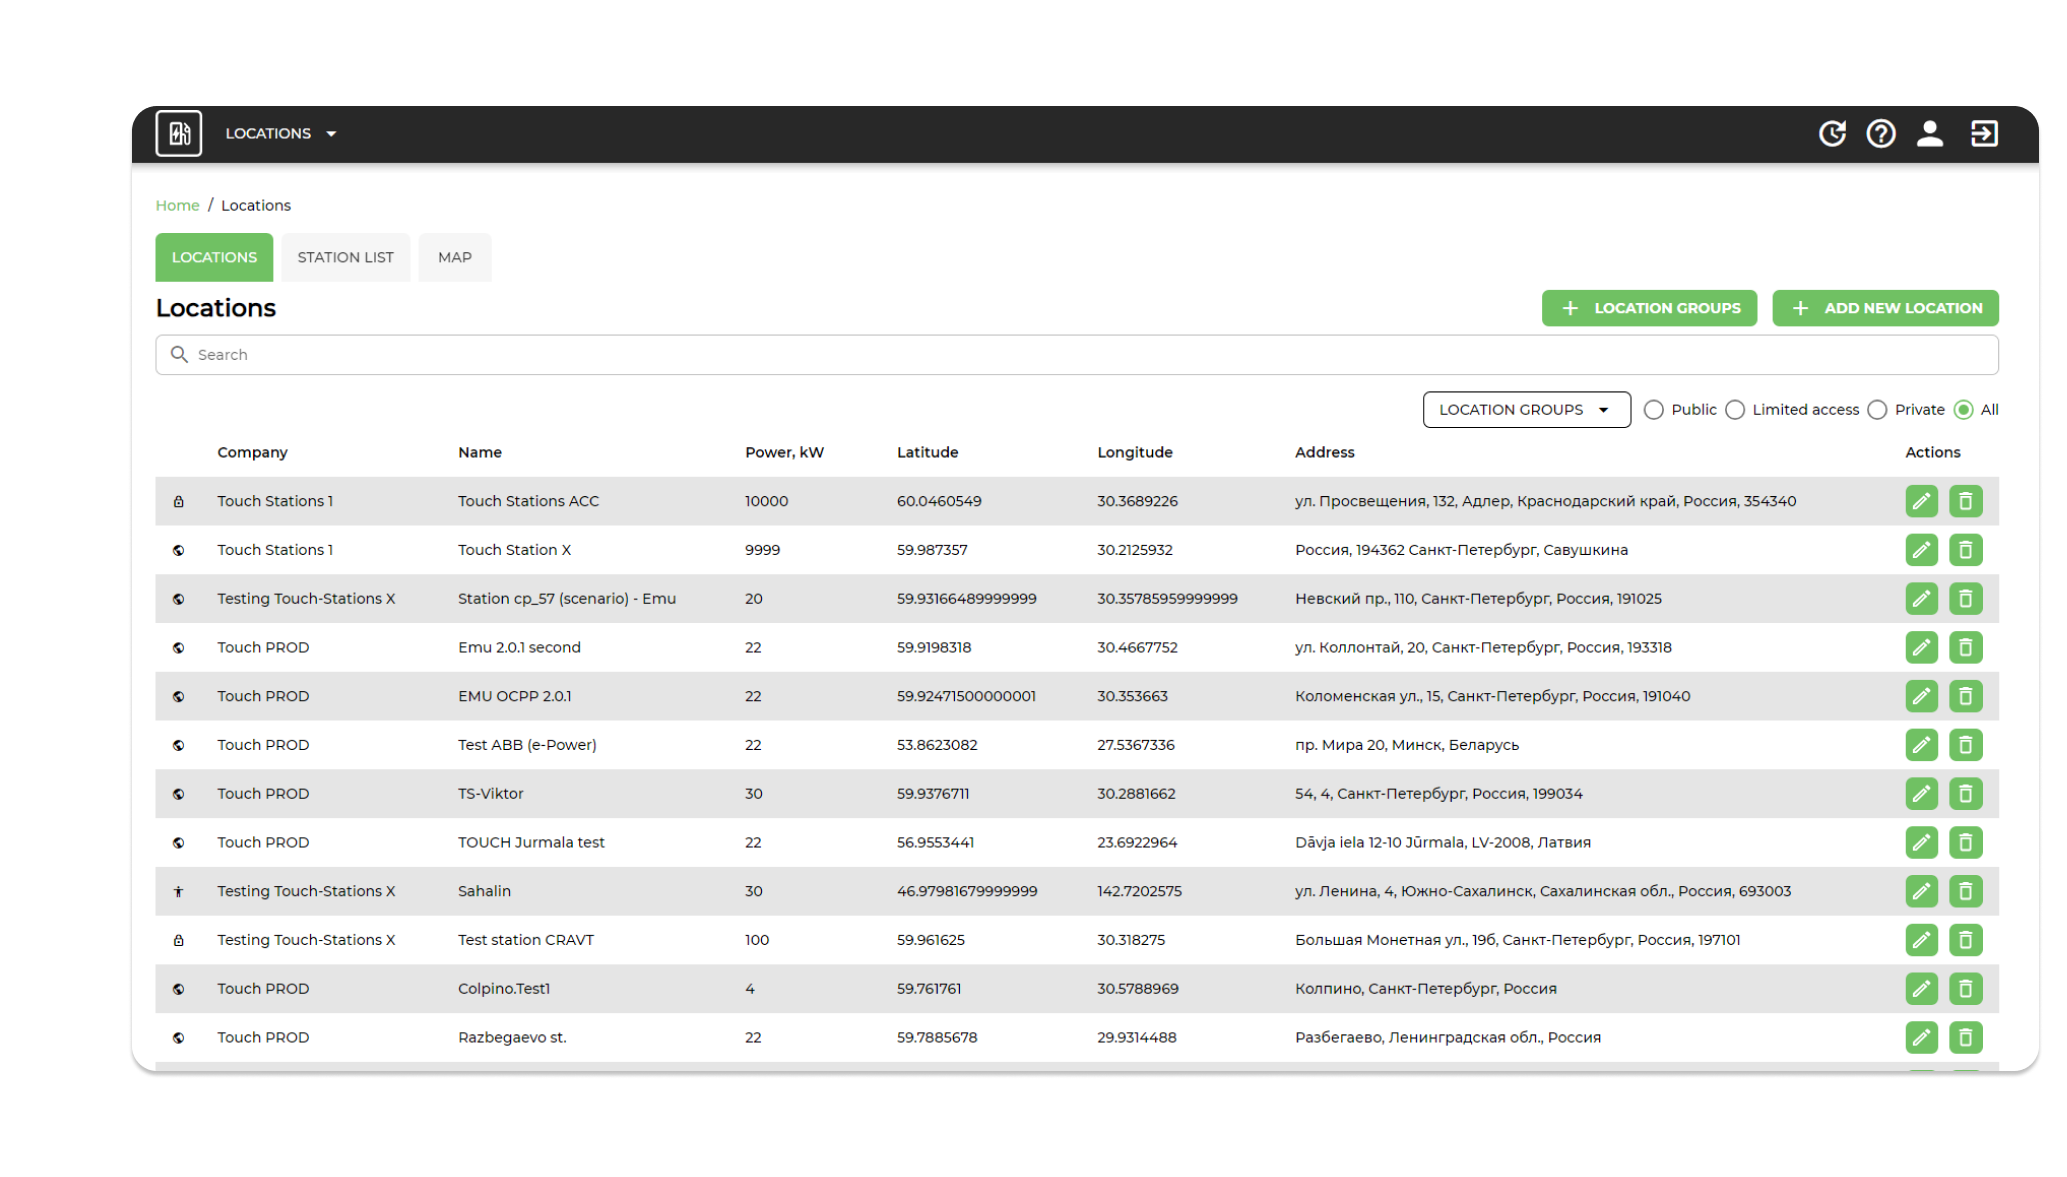
7.1 General view and main features
Locations are a single point of power distribution where multiple charging stations can be connected, or a single charging station (in other words, a group of physical stations).
The "Locations" section provides a list of all locations owned by the company (name, capacity, latitude and longitude, address) and the possibility to perform the following actions:
- Looking for a specific location;
- Filter by public/private/all locations;
- For public stations, filter the list by group;
- Edit location;
- Delete location;
- Go to the card of a specific location;
- Add a new location group;
- Add a new location.
By double-clicking, you can go to the Locations card.
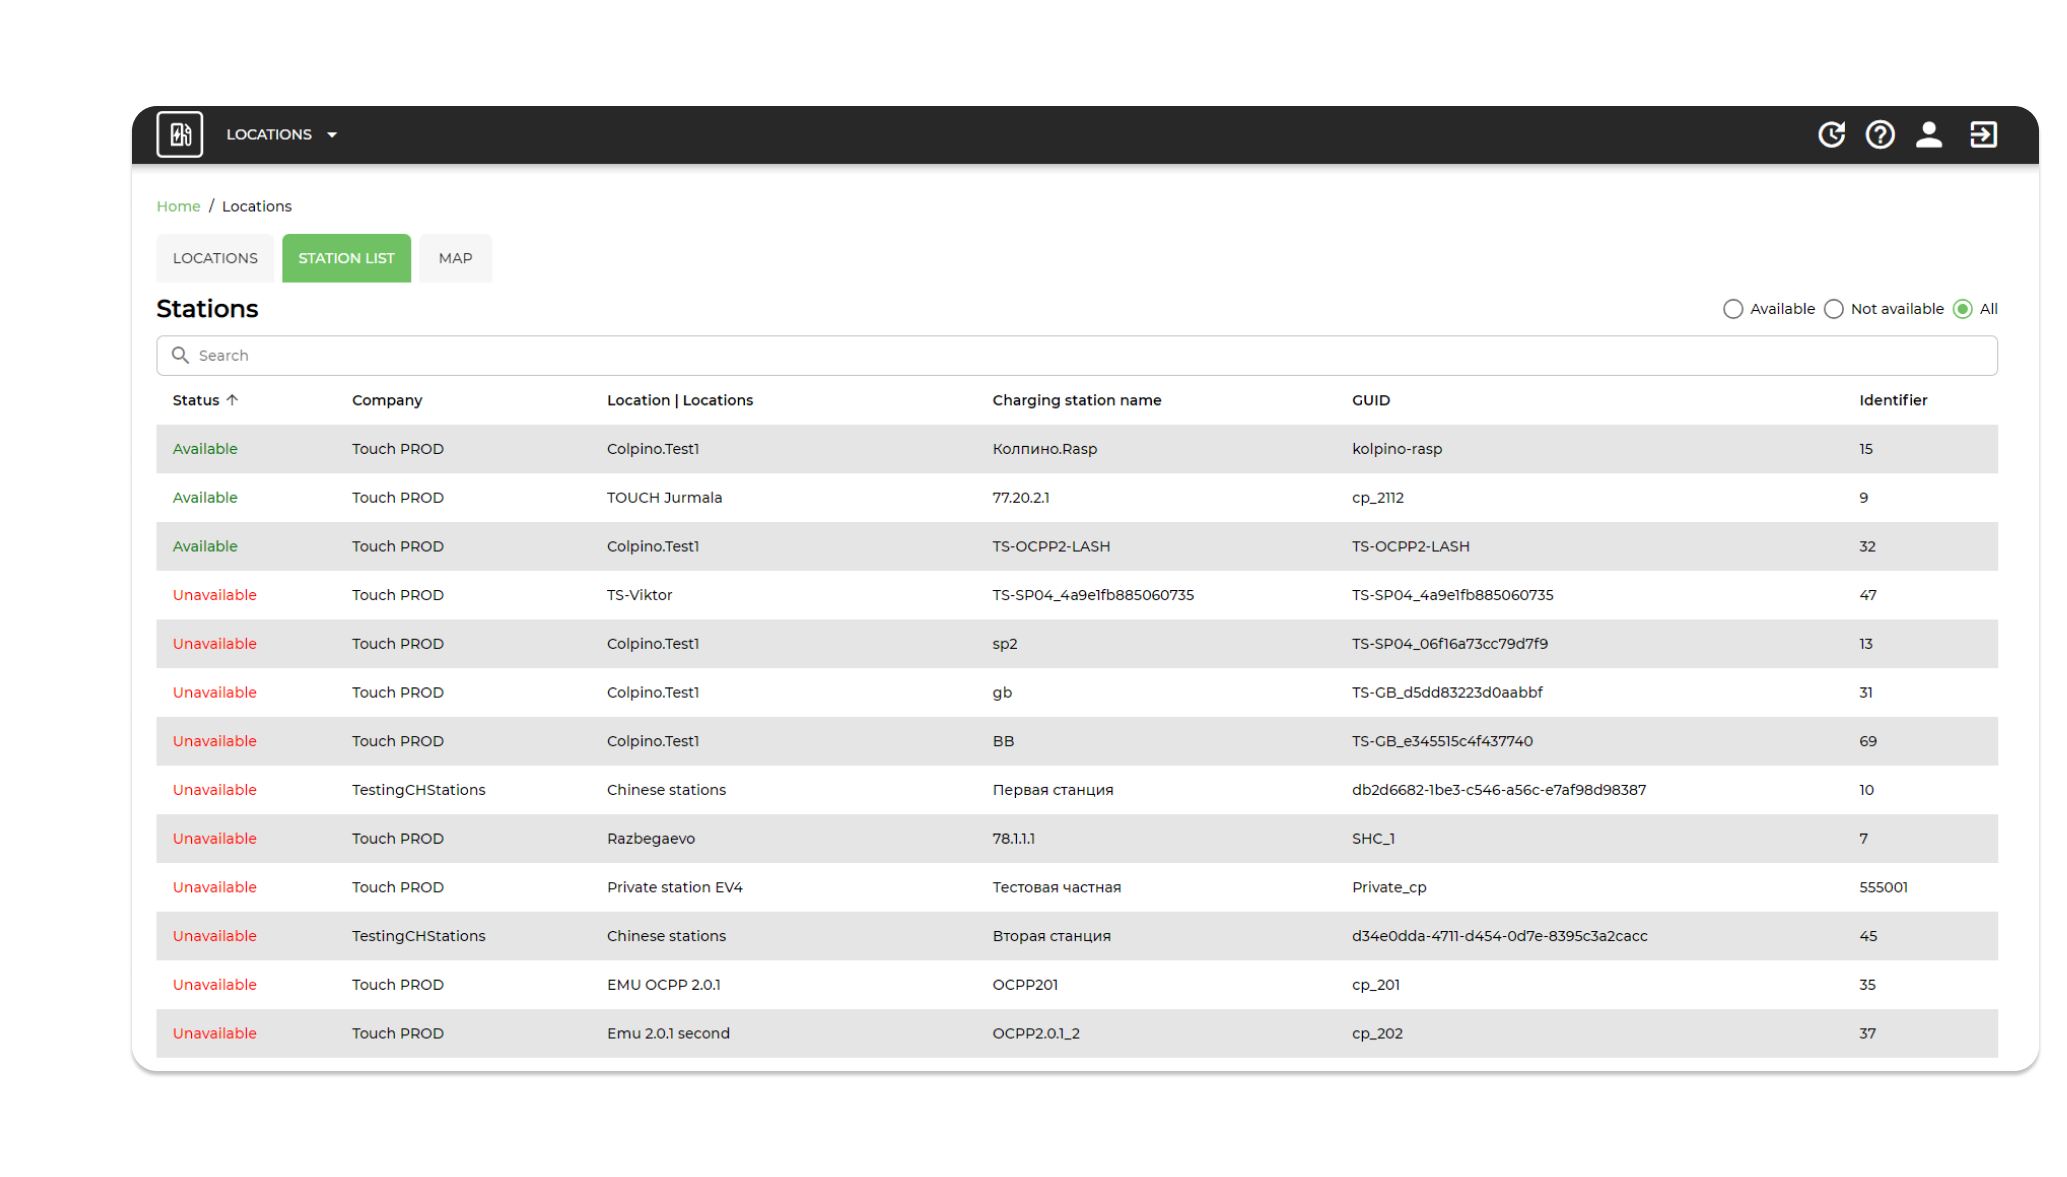
The "Locations" section contains a list of stations, to do this go to the "Station List" tab.
The list shows the available stations for all locations. By double-clicking, you can go to the Locations card.
7.2 Location Card
In the Location Card you can view and, if necessary, edit information about this location, perform management operations with the desired physical charging station (change the availability of the station or its connector, send a cable disconnect command, perform a soft or hard reboot, clear the local station authorization cache).
The Location Card contains the following information:
- Which location group this location belongs to;
- 24-hour summary metrics for this location: number of charging sessions, revenue, electricity consumed;
- Charging stations included in this location, their status, connectors, capacity, type, tariff;
- Events by location (Event type, station name, connector ID, description, date and time);
- Location statistics: summary report with filtering by date and period + list of charges;
- Location reviews filtered by confirmed/unconfirmed/all;
- List of active chargers (charging ID, station name, connector, start date, status, duration, user).
7.2.1 Charging stations tab
On the Charging Stations tab, you can view:
- Stations included in the location;
- Station Status;
- Connectors and power;
- The established tariff by station.
7.2.2 "Events" tab
On the Events tab you can view events by EHS stations (event type, station name, connector identifier, description, date and time of the event). The function of searching for the required events is available, by station number.
7.2.3 Tab "Statistics"
On the Statistics tab, you can view a summary report by EPC on energy consumed and money received, filtered by period and connector type, as well as a list of relevant charging sessions.
7.2.4 Active Charges tab
The Active Charges tab is used to display the list of active charging sessions (charging ID, station name, connector, start date, status, duration, user).
7.2.5 Active bookings tab
The "Active bookings" tab is intended for displaying the list of active station bookings.
7.2.6 Clients tab
The Clients tab is intended for displaying the list of clients of the station.
7.2.6 Description tab
The Description tab is used to display the existing station settings and the specified variables.
7.3 Editing mode Locations
Edit Locations can be opened in two ways:
- In the Locations list, click on the "Edit Location" button Edit Location
- In the Location card, click on "Edit" in the menu bar or click on the "Edit Location" button.
The system opens the edit card.
7.3.1 Basic Information tab
The "Basic Information" tab in the editing mode allows you to:
- Change the name of the location;
- Select a different location group;
- Select the type of location;
- Save the selected settings;
- Delete location. Basic Information tab
7.3.2 Advanced settings tab
The Advanced Settings tab in edit mode allows you to, save selected settings and delete a location, as well as:
- Change the latitude and longitude; Depending on the specified address, the system will automatically set the latitude and longitude.
- Change of address: Depending on the latitude and longitude set, the system will automatically set the address.
- Change the power of the location, kW;
- Change the alternate title;
- Specify a description of the location card: In the TOUCH application, the location card will display the specified information (e.g. how to get to the station).
- Specify the description of the location card in the SU;
- Specify the cost of parking;
- Specify the mode of operation: You can specify the time period "From", "Software" or specify "Round-the-clock".
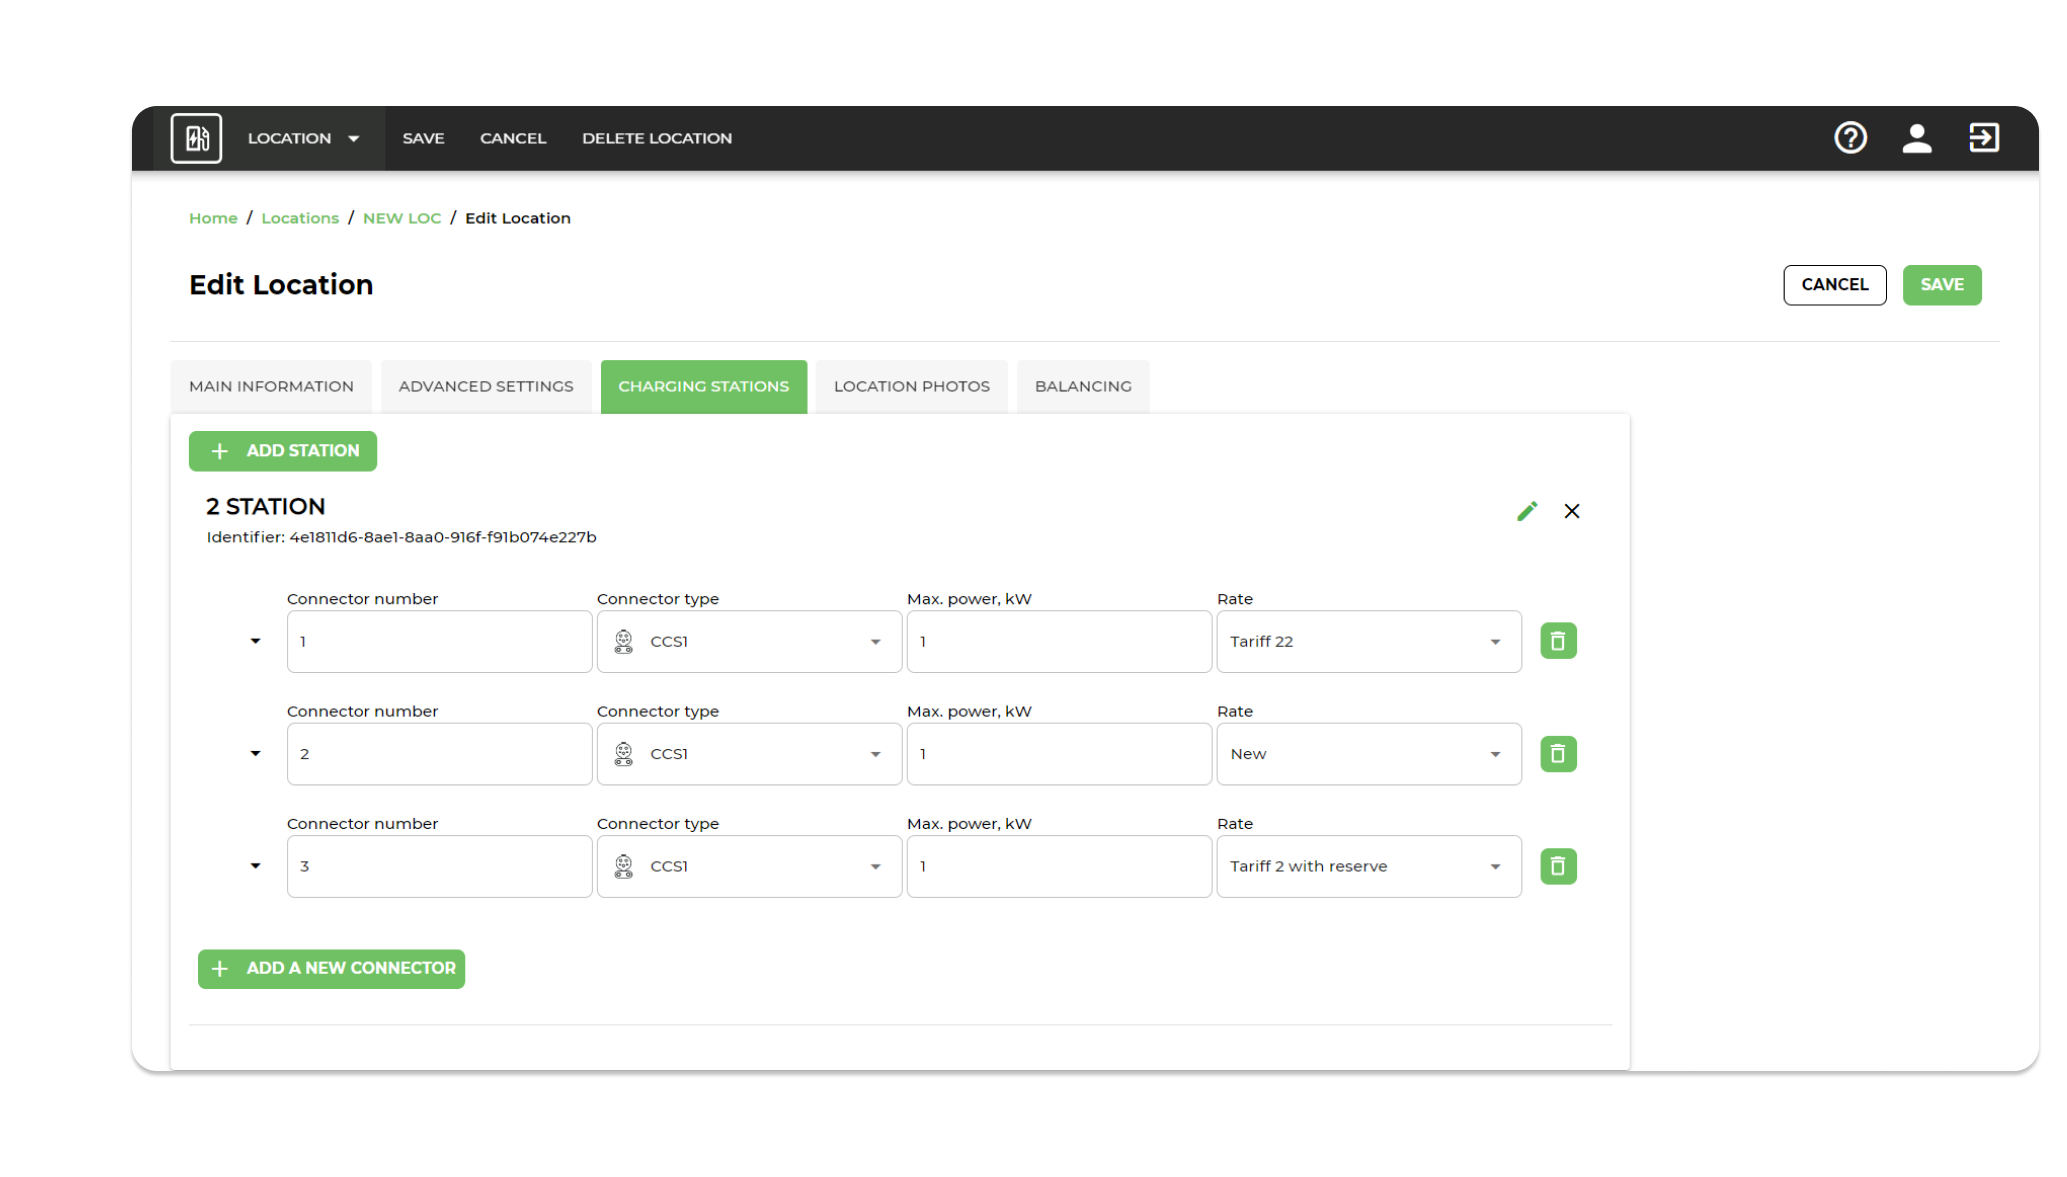
7.3.3 Charging stations tab
The "Charging stations" tab in edit mode allows you to:
- Add a new charging station inside the location;
- Change station data (ID, name, maximum power, tariff, latitude and longitude);
- Add a new connector inside the charging station;
- Change the connector data (number, type, maximum power, tariff);
- Remove the existing connector;
- Save the changes you have made;
- Cancel the changes and return to the location card. To add a new charging station, click "Add Station".
The system opens the Add New Charging Station window:
- Enter the name of the station;
- Enter power;
- Choose a rate;
- Select the OCPP version;
- Select the type of energy consumption calculation;
- Select the commissioning date;
- Option for technicians. The checkbox should be unchecked if the station does not support the reserve command;
- Click "Create."
The system creates a new station and displays it on the Charging Stations tab. To edit an added or existing station, click on the "Edit Station" button. The system opens the edit window, after changing the data, click "Done".
To add a connector to a created or existing station, click "Add New Connector". The system adds a new connector. The connector can be configured in various ways:
- Specify the connector number;
- Select the type of connector;
- Specify the maximum power, kW;
- Choose a rate;
- Remove the connector. Add a new connector
7.3.4 Location Photos tab
Through the "Location Photos" tab, you can add photos of the location/station. Click "Upload location photo" to add it. Click "Save". To delete a photo, open the photo and click the "Delete" button in the upper right corner.
7.4 Add New Location Mode
To add a new location you should press "Add new location".
The system opens the page of adding location. In the opened window fill in the fields:
- Specify the accessibility of the location;
- Enter the name of the location;
- Specify the owner of the location;
- Specify the location group;
- Enter the power of the location;
- Introduce an alternative title;
- Enter card description - optional field;
- Enter a description of the location card in the management system - optional field;
- Specify address - enter latitude and longitude or enter the address manually.
Press the "Add" button. The system adds a new location.
7.5 Add Location Group Mode
To add a location group, click on "Location groups".
The system opens the list of location group. In the window that opens, click "Add".
The system opens the Add Location Group window, in which you must:
- Fill in the name of the group;
- Select a company name;
- Select a parent group;
After filling in the form, press the "Submit" button. The system adds a new location group. If necessary, you can edit the location group by pressing the "Edit" button.
The system opens the window of location group editing. In the opened window fill in the fields:
- Change the name of the group;
- Change the name of the company;
- Change the parent group.
Press the "Submit" button. The system edits the existing location group.
8. Section "Tariffs"
To open the "Tariffs" section, select "Tariffs" from the menu bar.
The "Tariffs" section contains a list of tariffs (name, calculation currency, fixed cost of charging session start, fixed cost of charging session start, cost per 1 hour, cost per kWh, Cost of idle time without charging/min, fixed cost per reservation, cost per reservation/min) and allows to perform the following actions:
- Edit existing tariffs;
- Add new rates;
- Delete tariffs.
The main tariff fields for calculating the charging charge:
- A fixed start cost that is charged when any charging session starts (pressing the "Start Charging" button).
- A fixed cost for the start of a charging session, which is charged once the electric vehicle is connected to the station and starts consuming electricity.
- Cost per hour, which is multiplied by the length of the charging session
- Cost per kWh, which is multiplied by the energy consumed in a charging session.
- The cost of idle time without charging/min, which is charged for every minute the car is parked at the end of a charging session.
- A fixed reservation fee that is charged for any charging station reservation.
- A cost per reservation/minute that is multiplied by the station's idle time from the time the reservation begins until the charging session physically begins. Any tariff field can have a value of 0, which means that this field is not taken into account when calculating the total amount. Thus, by combining the values of tariff fields you can get very flexible tariffs.
8.1 Adding a new tariff
To add a new tariff, the user clicks the "Add new tariff" button in the tariff list. The system opens the window of adding a new tariff, where you should fill in the fields:
- Enter the name of the tariff;
- Select the owner of the tariff;
- Introduce a fixed cost for starting a charging session;
- Introduce a fixed cost for the start of a charging session;
- Enter the cost per hour;
- Introduce a cost per kWh;
- Introduce the cost of downtime without charging;
- Introduce a fixed cost per booking;
- Introduce a cost per reservation.
After filling in the fields, click "Add new tariff".
8.2 Editing the tariff
To edit a tariff, the user in the tariff list:
- Selects the rate you want to edit;
- Presses the "Edit tariff" button in the list or in the menu bar.
The system opens the tariff editing window, where you can change required fields:
- Enter the name of the tariff;
- Select the owner of the tariff;
- Introduce a fixed cost for starting a charging session;
- Introduce a fixed cost for the start of a charging session;
- Enter the cost per hour;
- Introduce a cost per kWh;
- Introduce the cost of downtime without charging;
- Introduce a fixed cost per booking;
- Introduce a cost per reservation.
After changing the required fields, press "Save". If necessary, the tariff can be deleted by clicking "Delete tariff" in the edit card or in the list of tariffs.
8.3 Booking management
The user can create fares with and without reservations:
- To activate the reservation - check the "Reservation" box and specify the cost of the reservation in the fare settings;
- To deactivate a reservation - remove the "Reservation" checkbox in the tariff settings; Manage Reservations
9. Section "Reports"
To open the "Reports" section, select "Reports" from the menu bar.
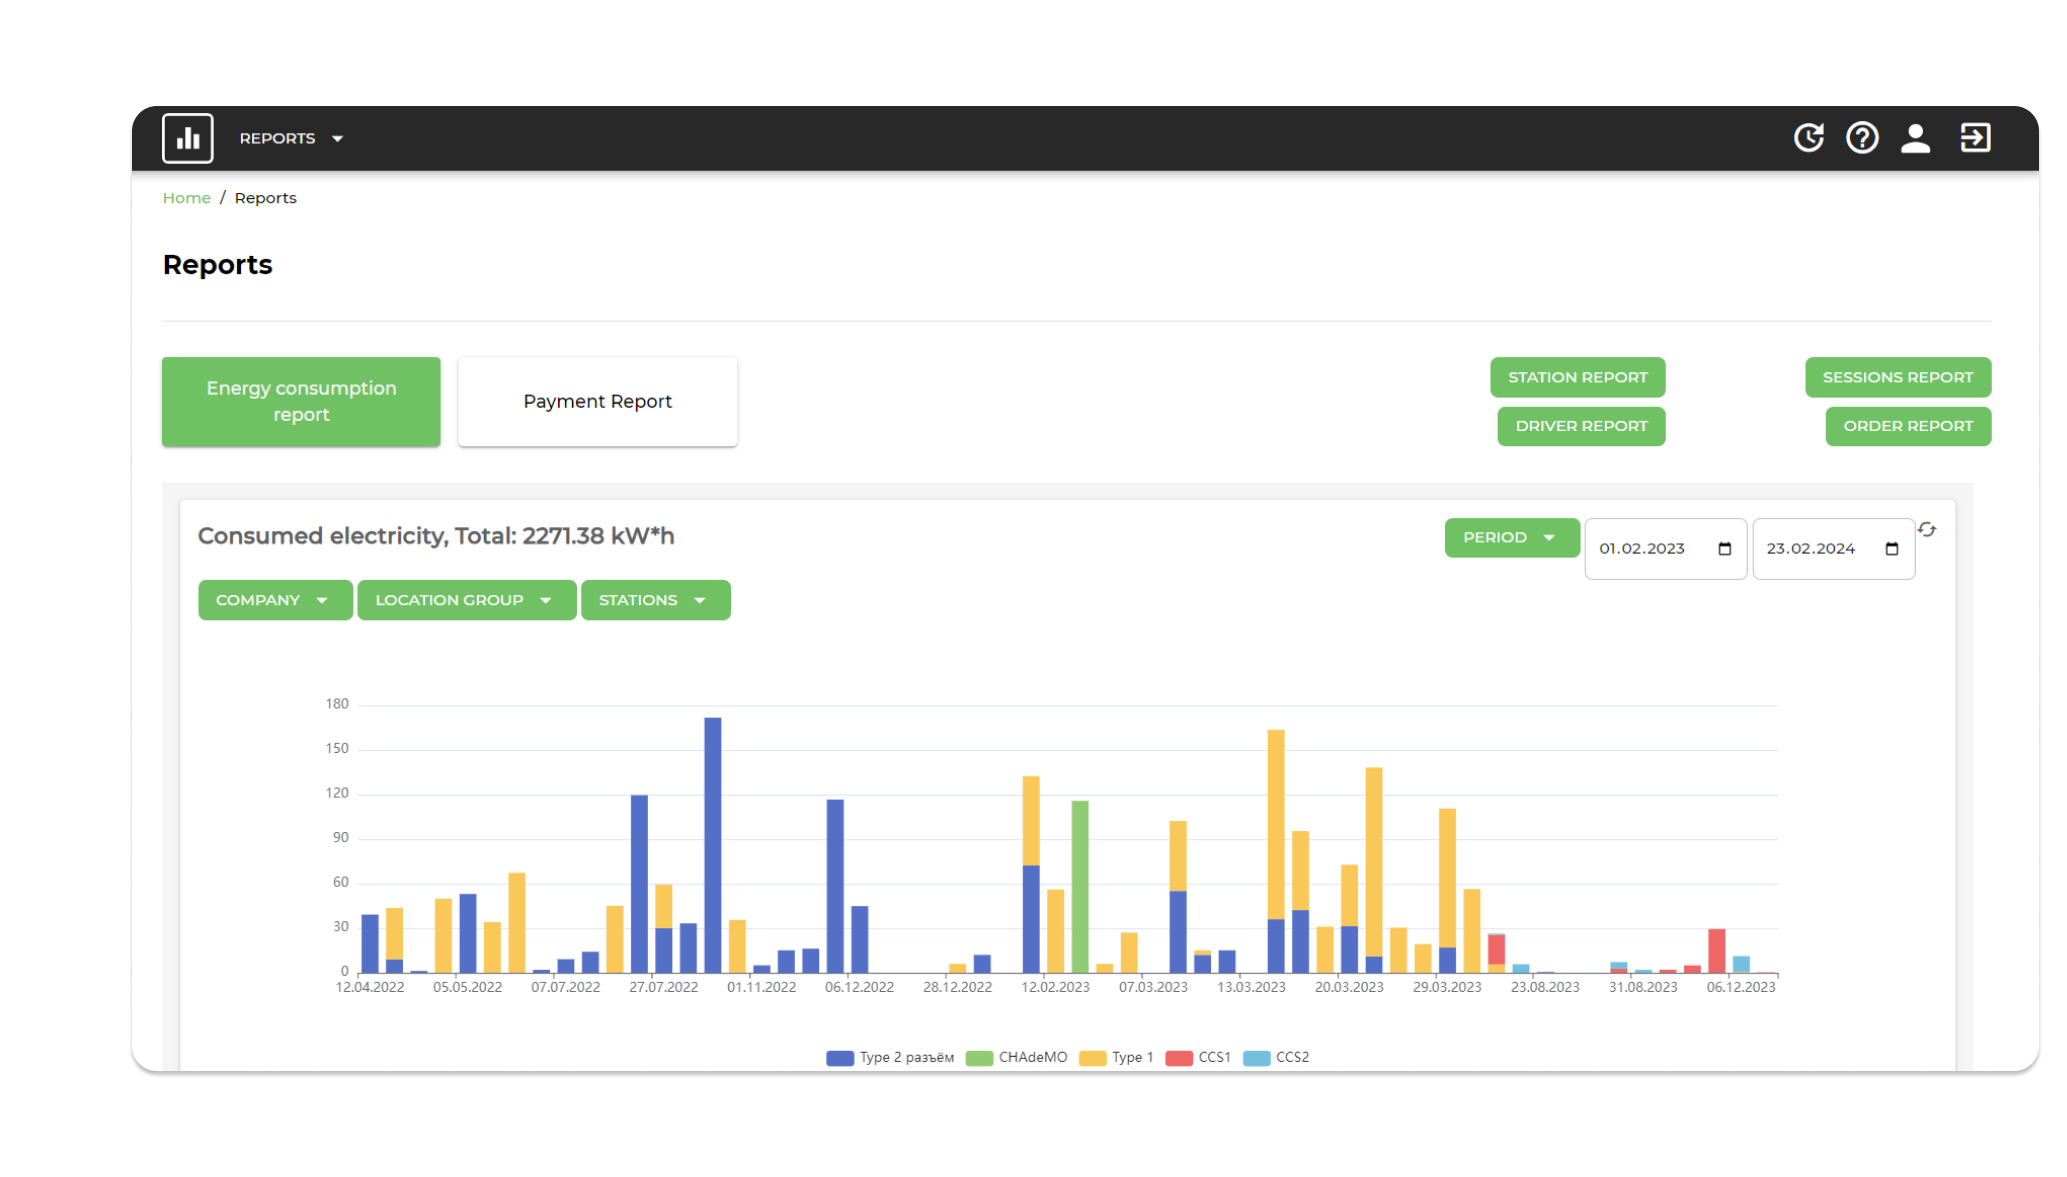
9.1 Report on consumed energy
Electricity consumption report with filtering by period, group of charging stations and EZS within the group, by connector type.
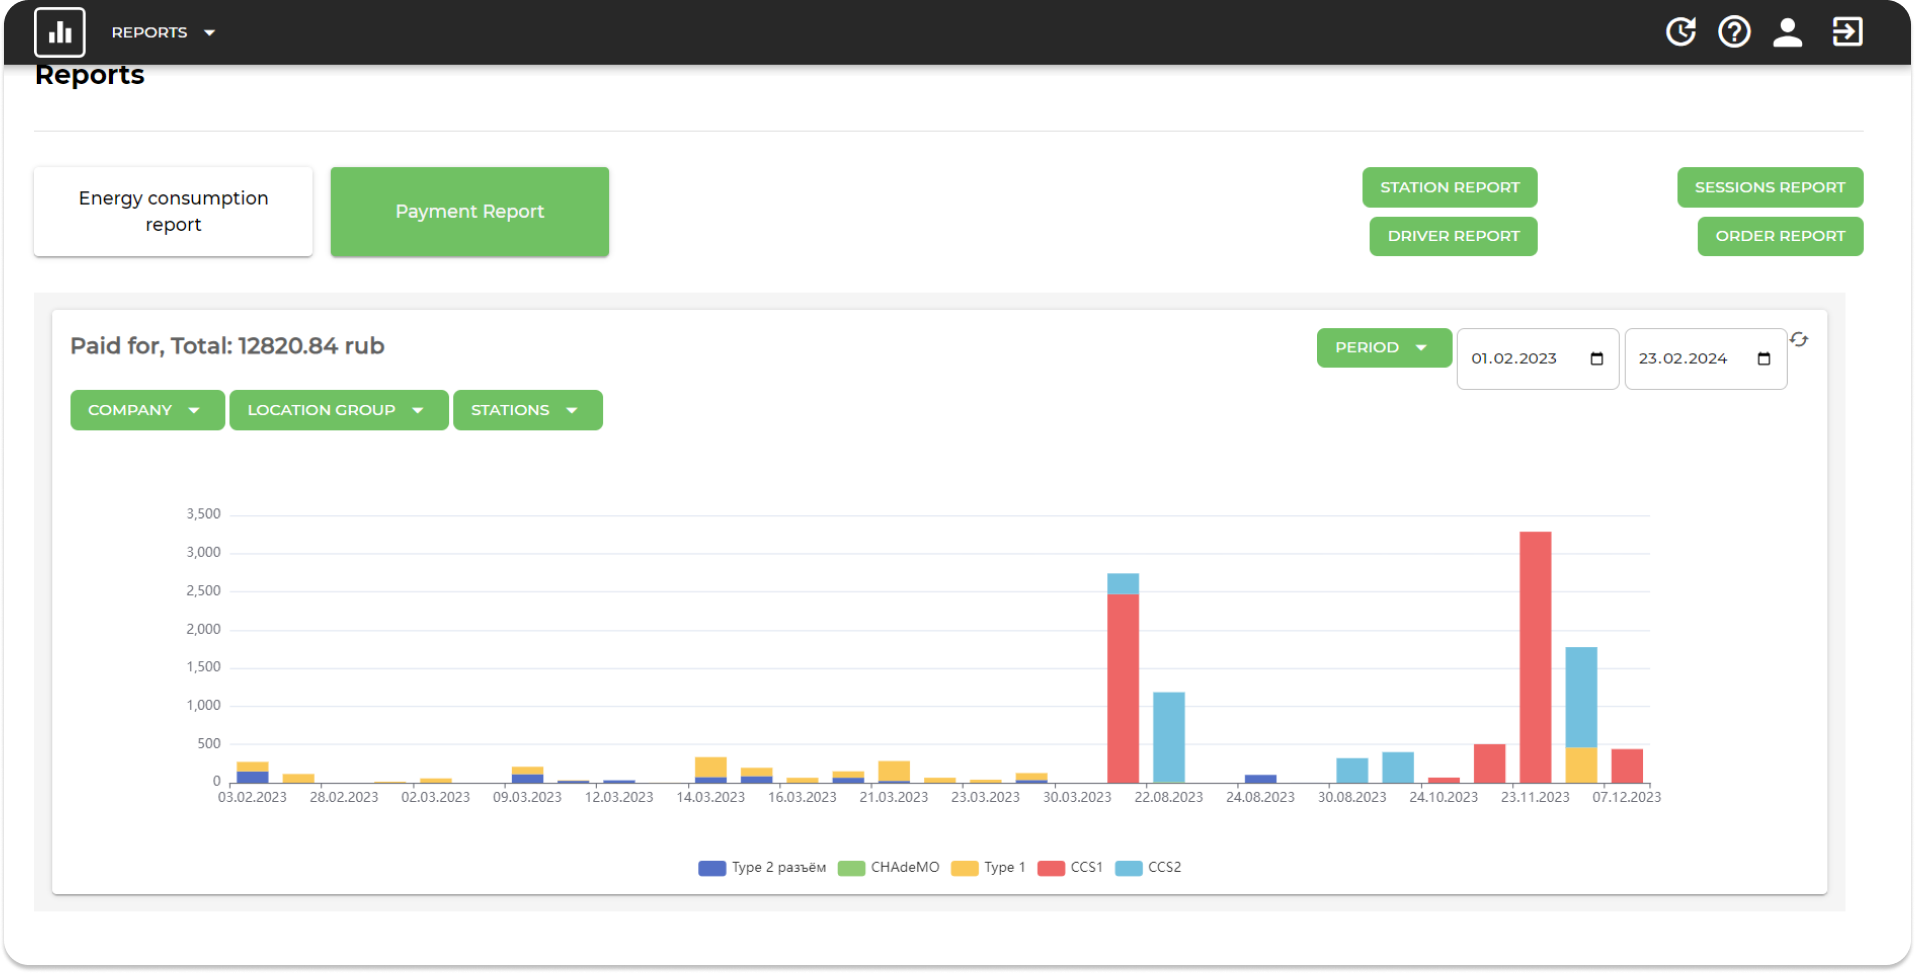
9.2 Report on payments
Cash receipt report with filtering by period, by charging station group and EZS within the group, by connector type.
9.3 Downloading reports
In order to unload reports by sessions and orders, you should press the corresponding buttons:
- Session Report;
- Orders Report;
- Station Report.
- Report by drivers (within corporate charges) Buttons for report uploading
When you click the "Session Report" button, a window opens in which:
- Select a period;
- Select a time zone;
- Select "Corporate Mode";
- Press "Done".
The system uploads the report in an Excel file.
When you click the "Order Report" button, a window opens in which:
- Select a period;
- Select a time zone;
- Select DC/AC stations or all;
- Press "Done." The system uploads the report in an Excel file.
When you click the "Station Report" button, a window opens in which:
Select a period;
Press "Done." The system uploads the report in an Excel file.
Section "Profile"
The "Profile" section contains information about the current user (status, photo, last name, first name, middle name, E-mail, phone number, role) and allows you to perform the following actions:
- Edit Profile;
- Change the status (active/inactive);
- Reset password. Profile
To edit an employee's profile, click the "Edit Employee" or "Edit" Edit Profile button The system opens an edit window, the user can:
- Change Email;
- Change your phone number;
- Change Name;
- Change Status;
- Change password.
- After changing the data, click "Save".