App for drivers
The client application provides work with the system of end users (drivers).
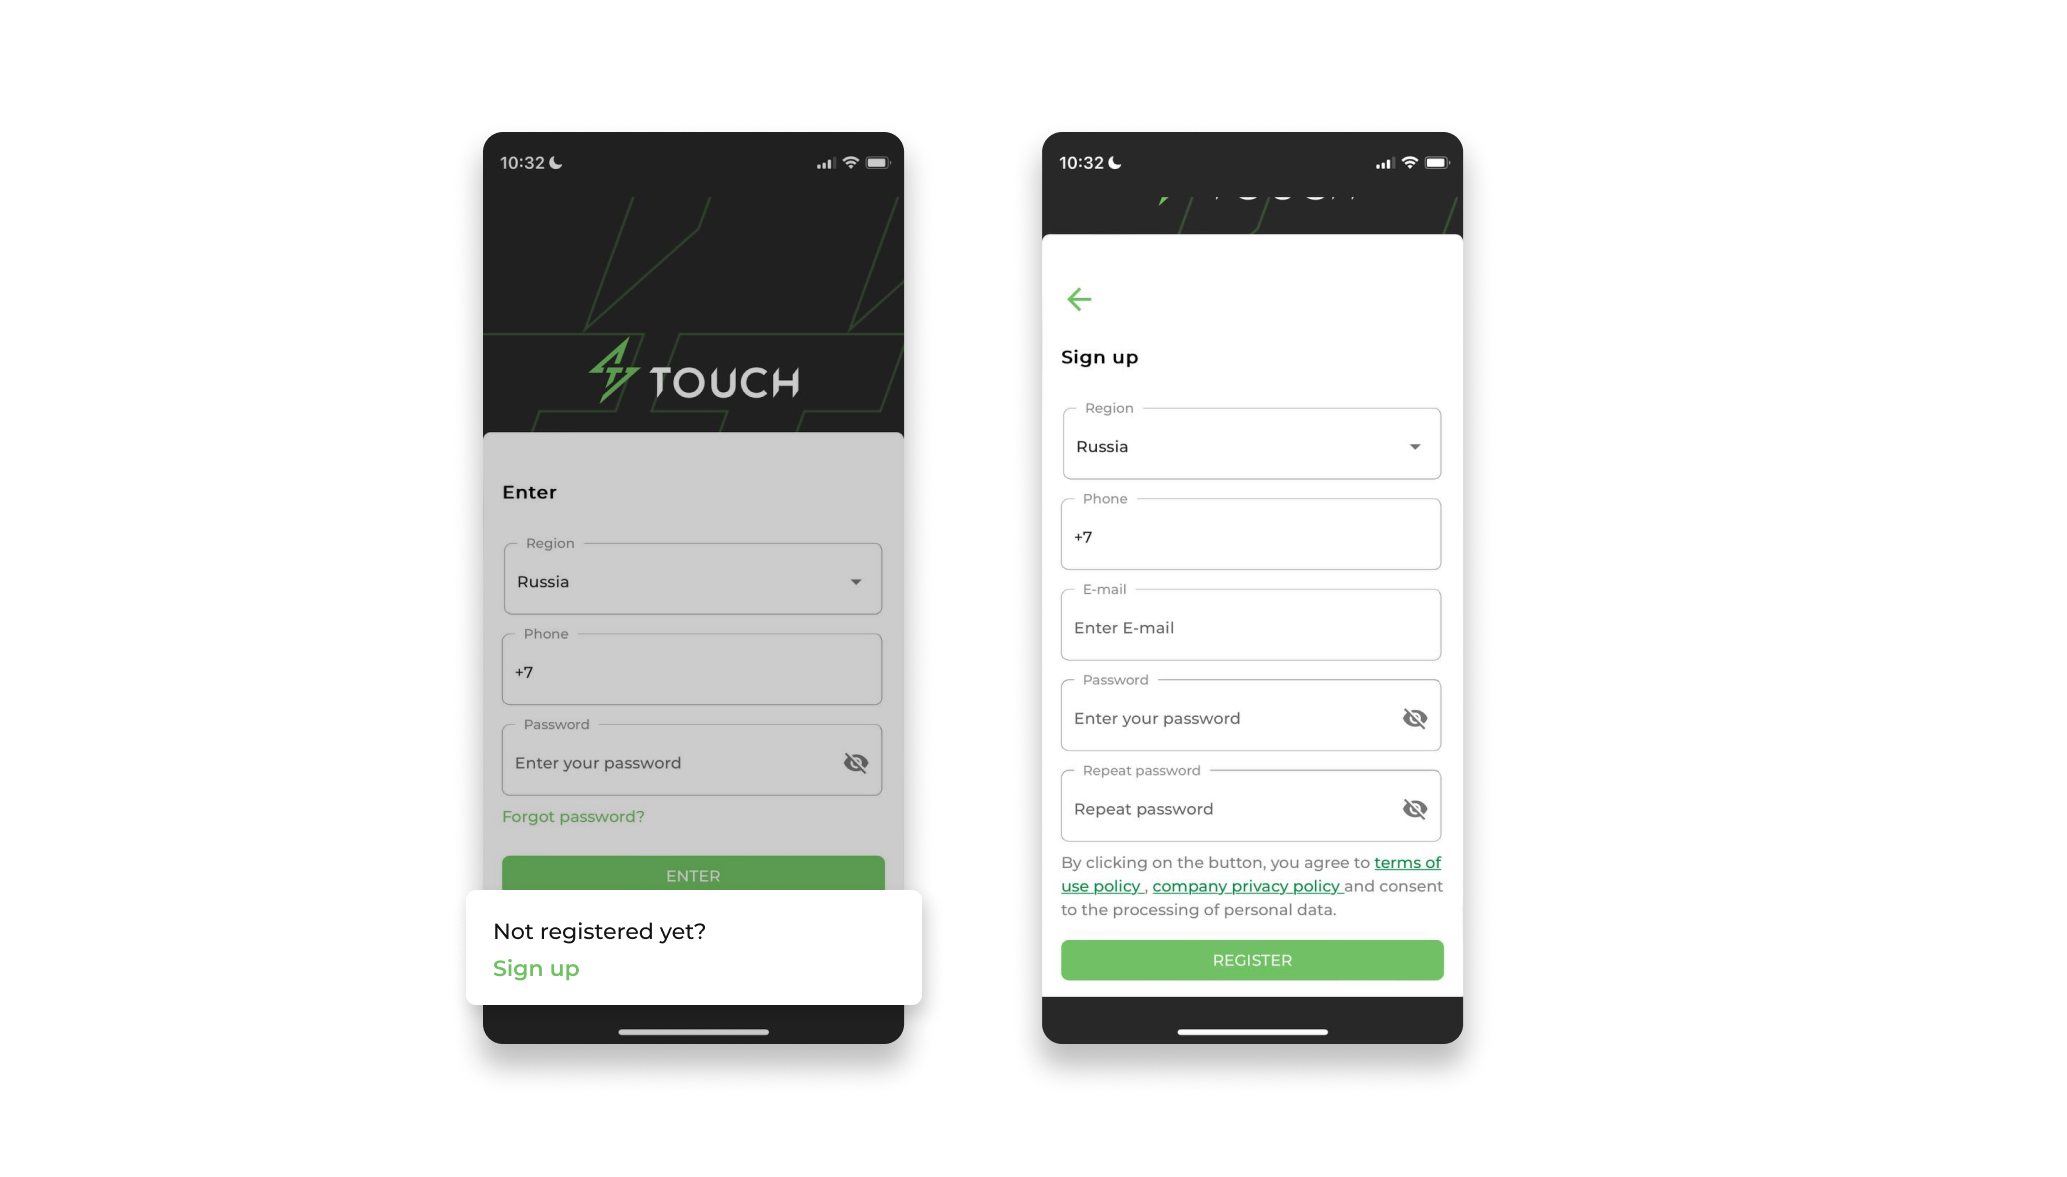
1. Registration in the app
To register in the application, go to the "Registration" section on the main login page.
In the "Registration" window that opens, you must enter the following data:
- Region - you need to select the registration region;
- Login;
- E-Mail;
- Phone number;
- Password;
- Repeat the password.
By clicking on the "Register" button, the user agrees to the terms of use of the application, the company's privacy policy and consents to the processing of personal data.
2. Log in to the app
To log in to the application, the user must:
- Select the region that was specified during registration;
- Enter the login that was specified during registration;
- Enter the password that was specified during registration;
- Click the "Log in" button.
In case of incorrectly specified data, the system will not allow you to log in to the application.
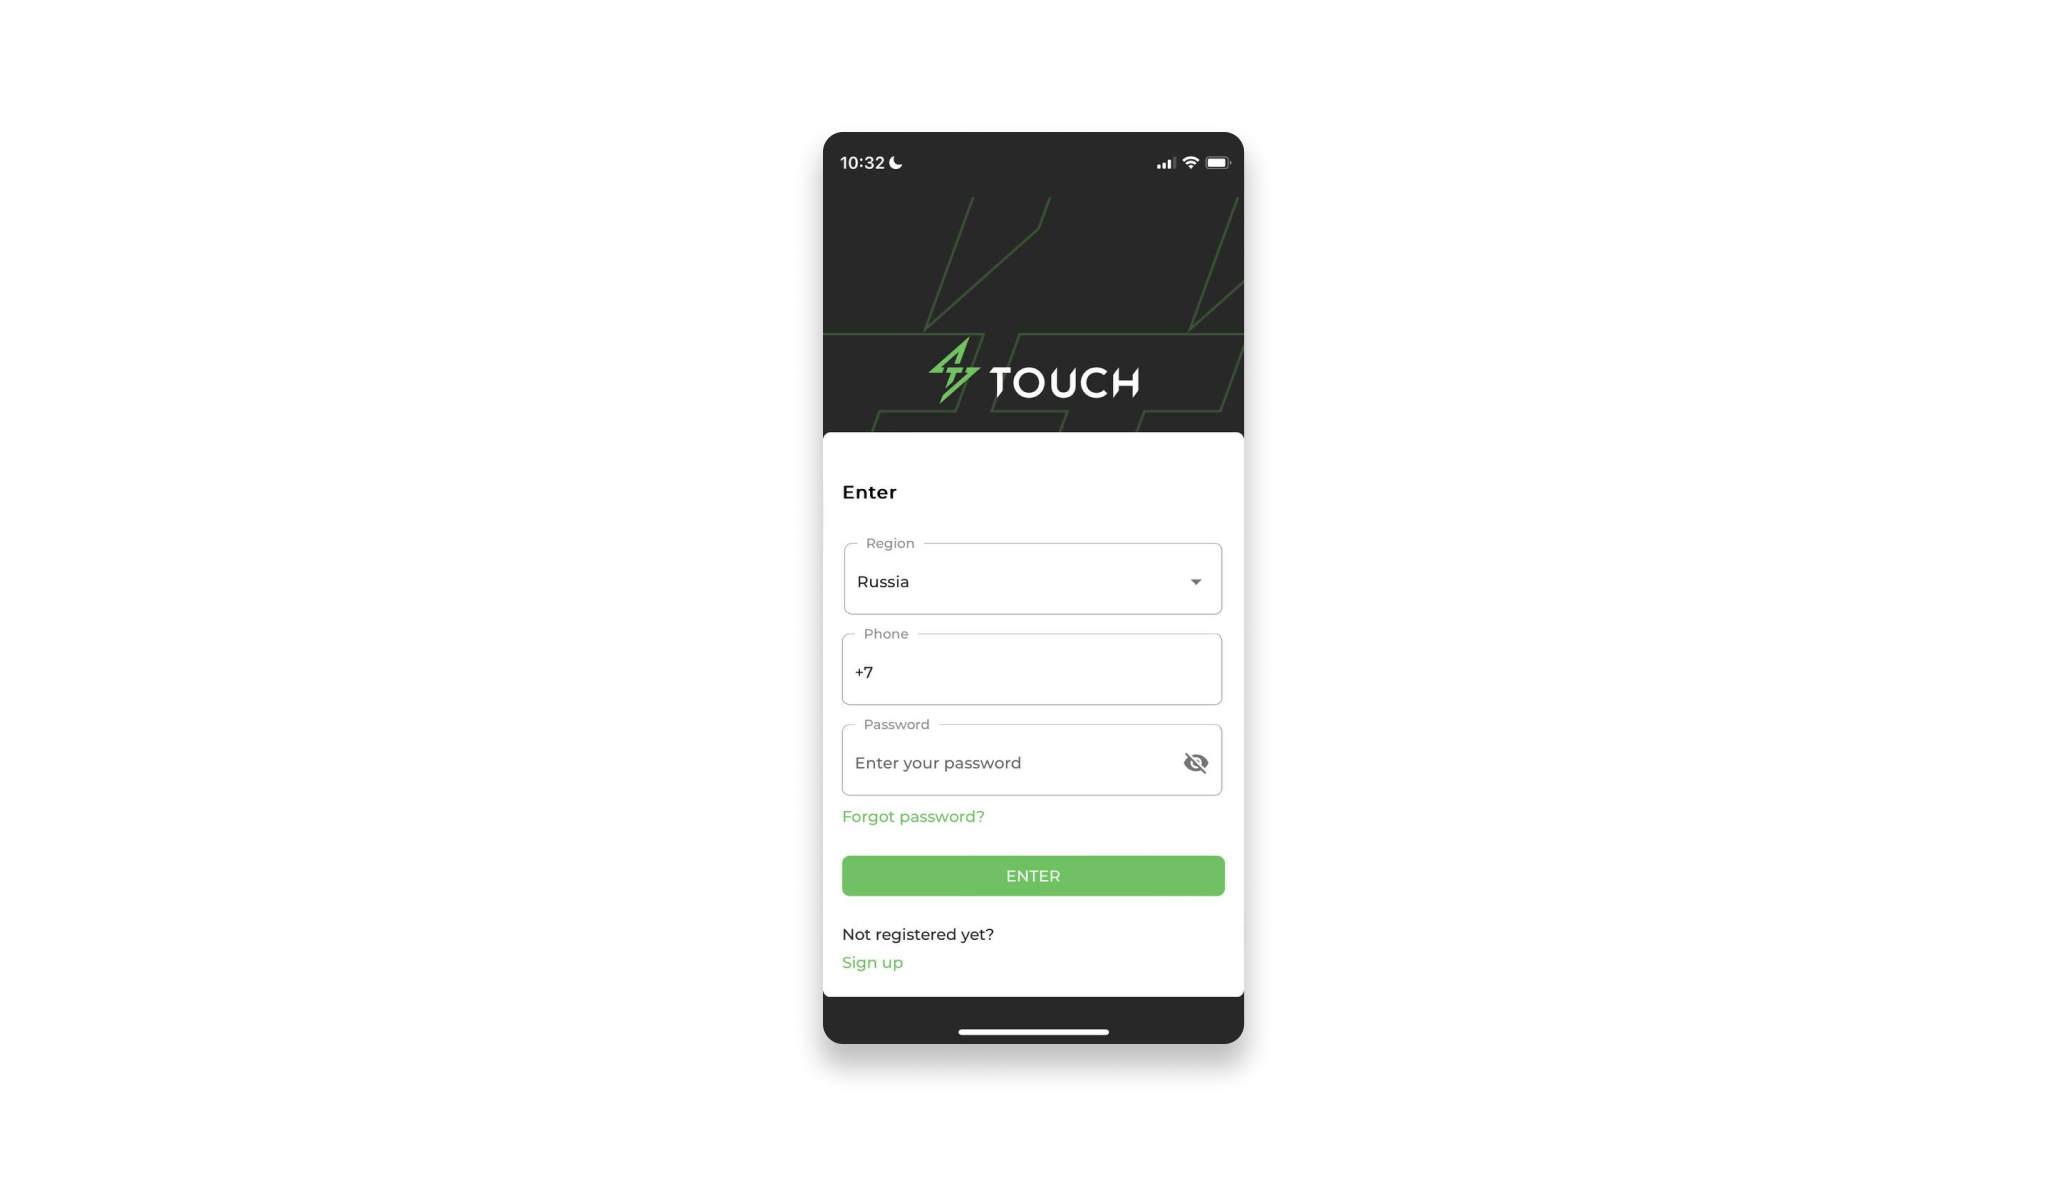
2.1 Forgot your password?
If the user has forgotten the password, but during registration or later specified his E-Mail in the Profile, the password recovery function is available to him, for this:
- On the login page, click "Forgot your password?".
- In the phone browser, an email filling form opens, in which the mail is indicated and when you click "Send", an email with a special link to reset the password arrives at the user's email.

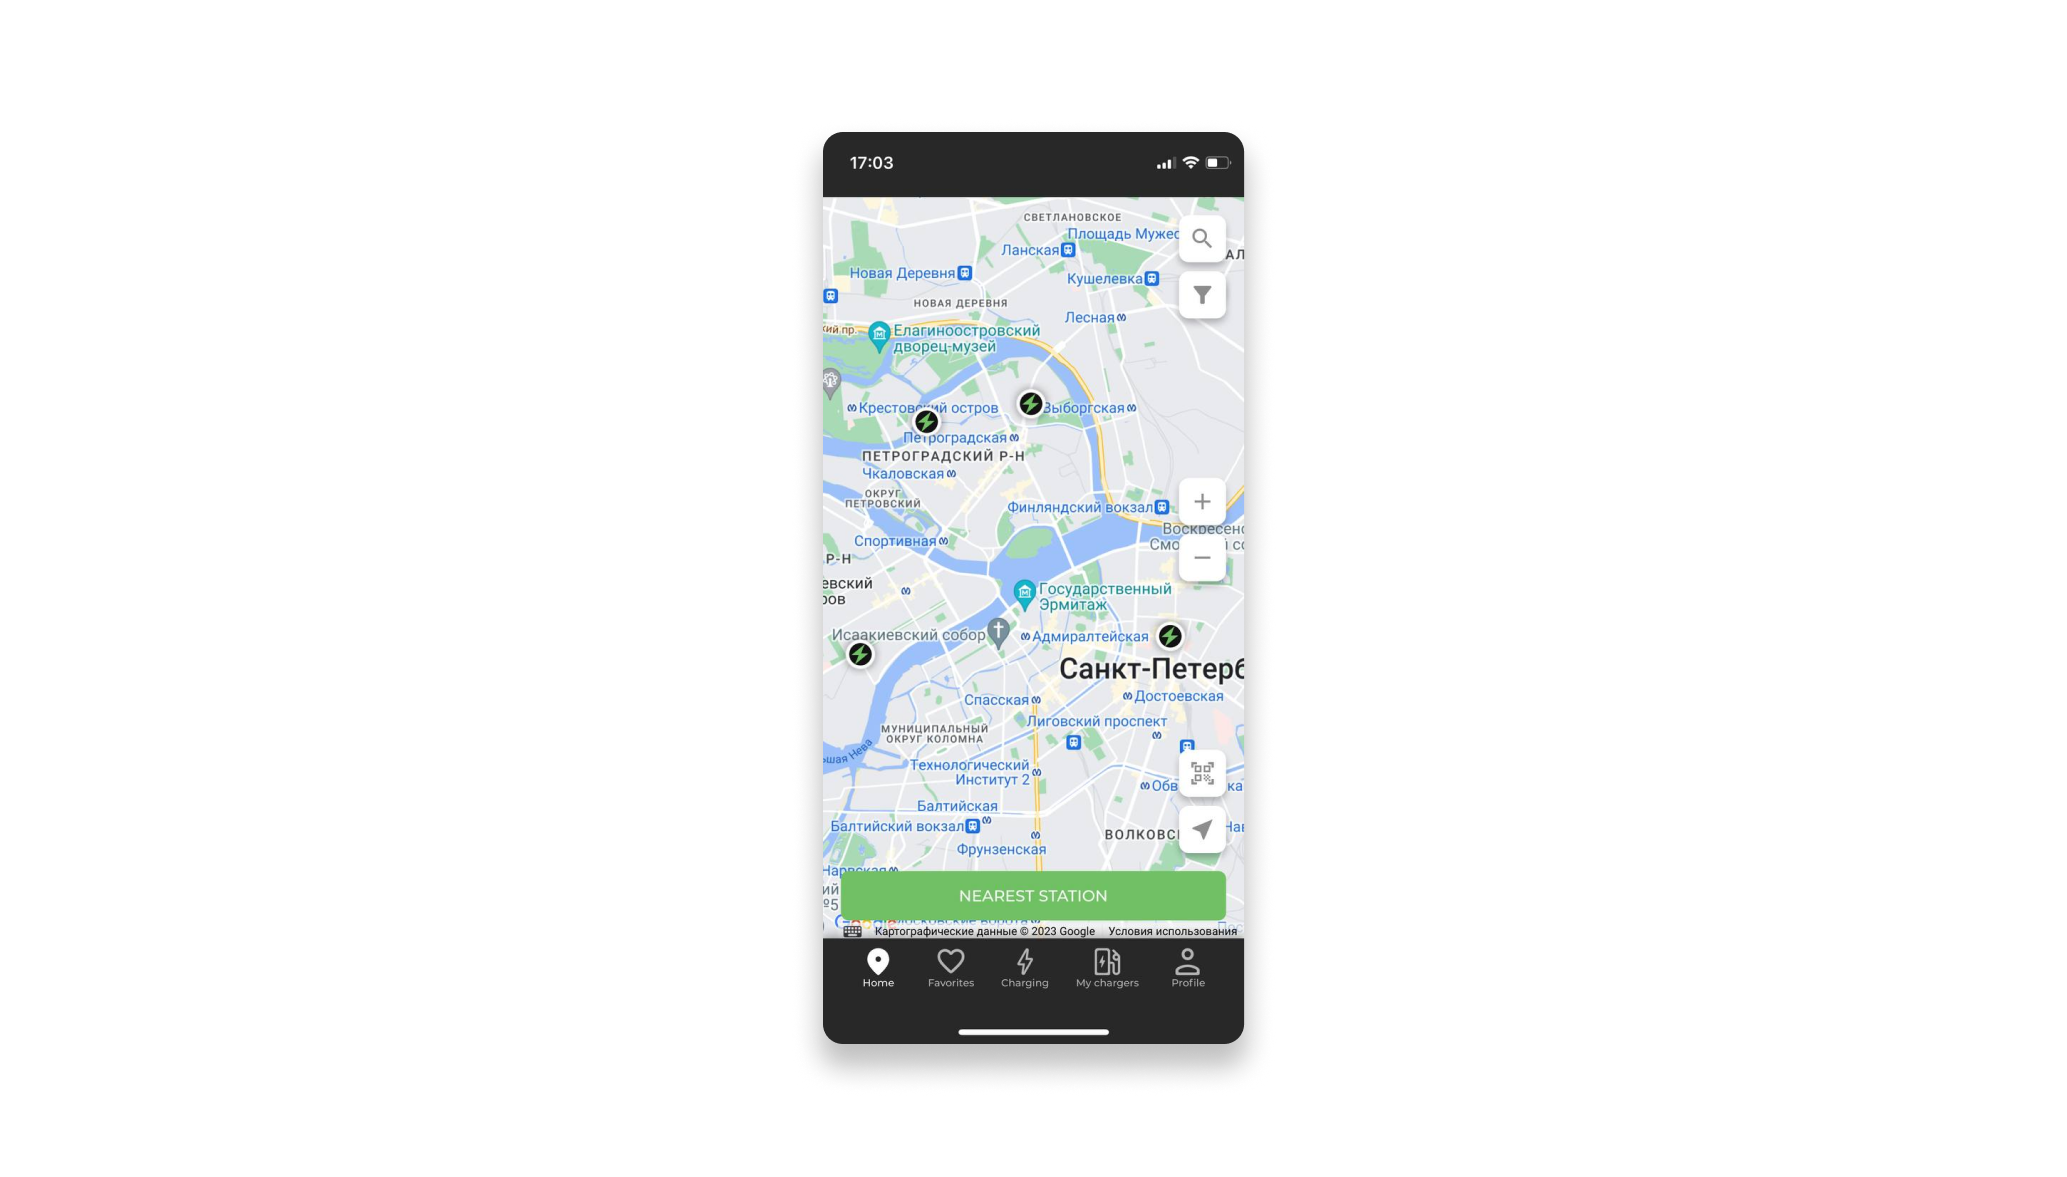
3. The "Map" section
Displaying stations on the map and the main features of the section:
- Map display showing locations with optional grouping depending on the current scale;
- The ability to search for locations by name and/or address and open a card;
- The ability to filter the displayed locations by the types of required connectors and/or the minimum required power;
- The ability to view a list of locations closest to the displayed position via the "Nearest stations" widget;
- The ability to open a location card.
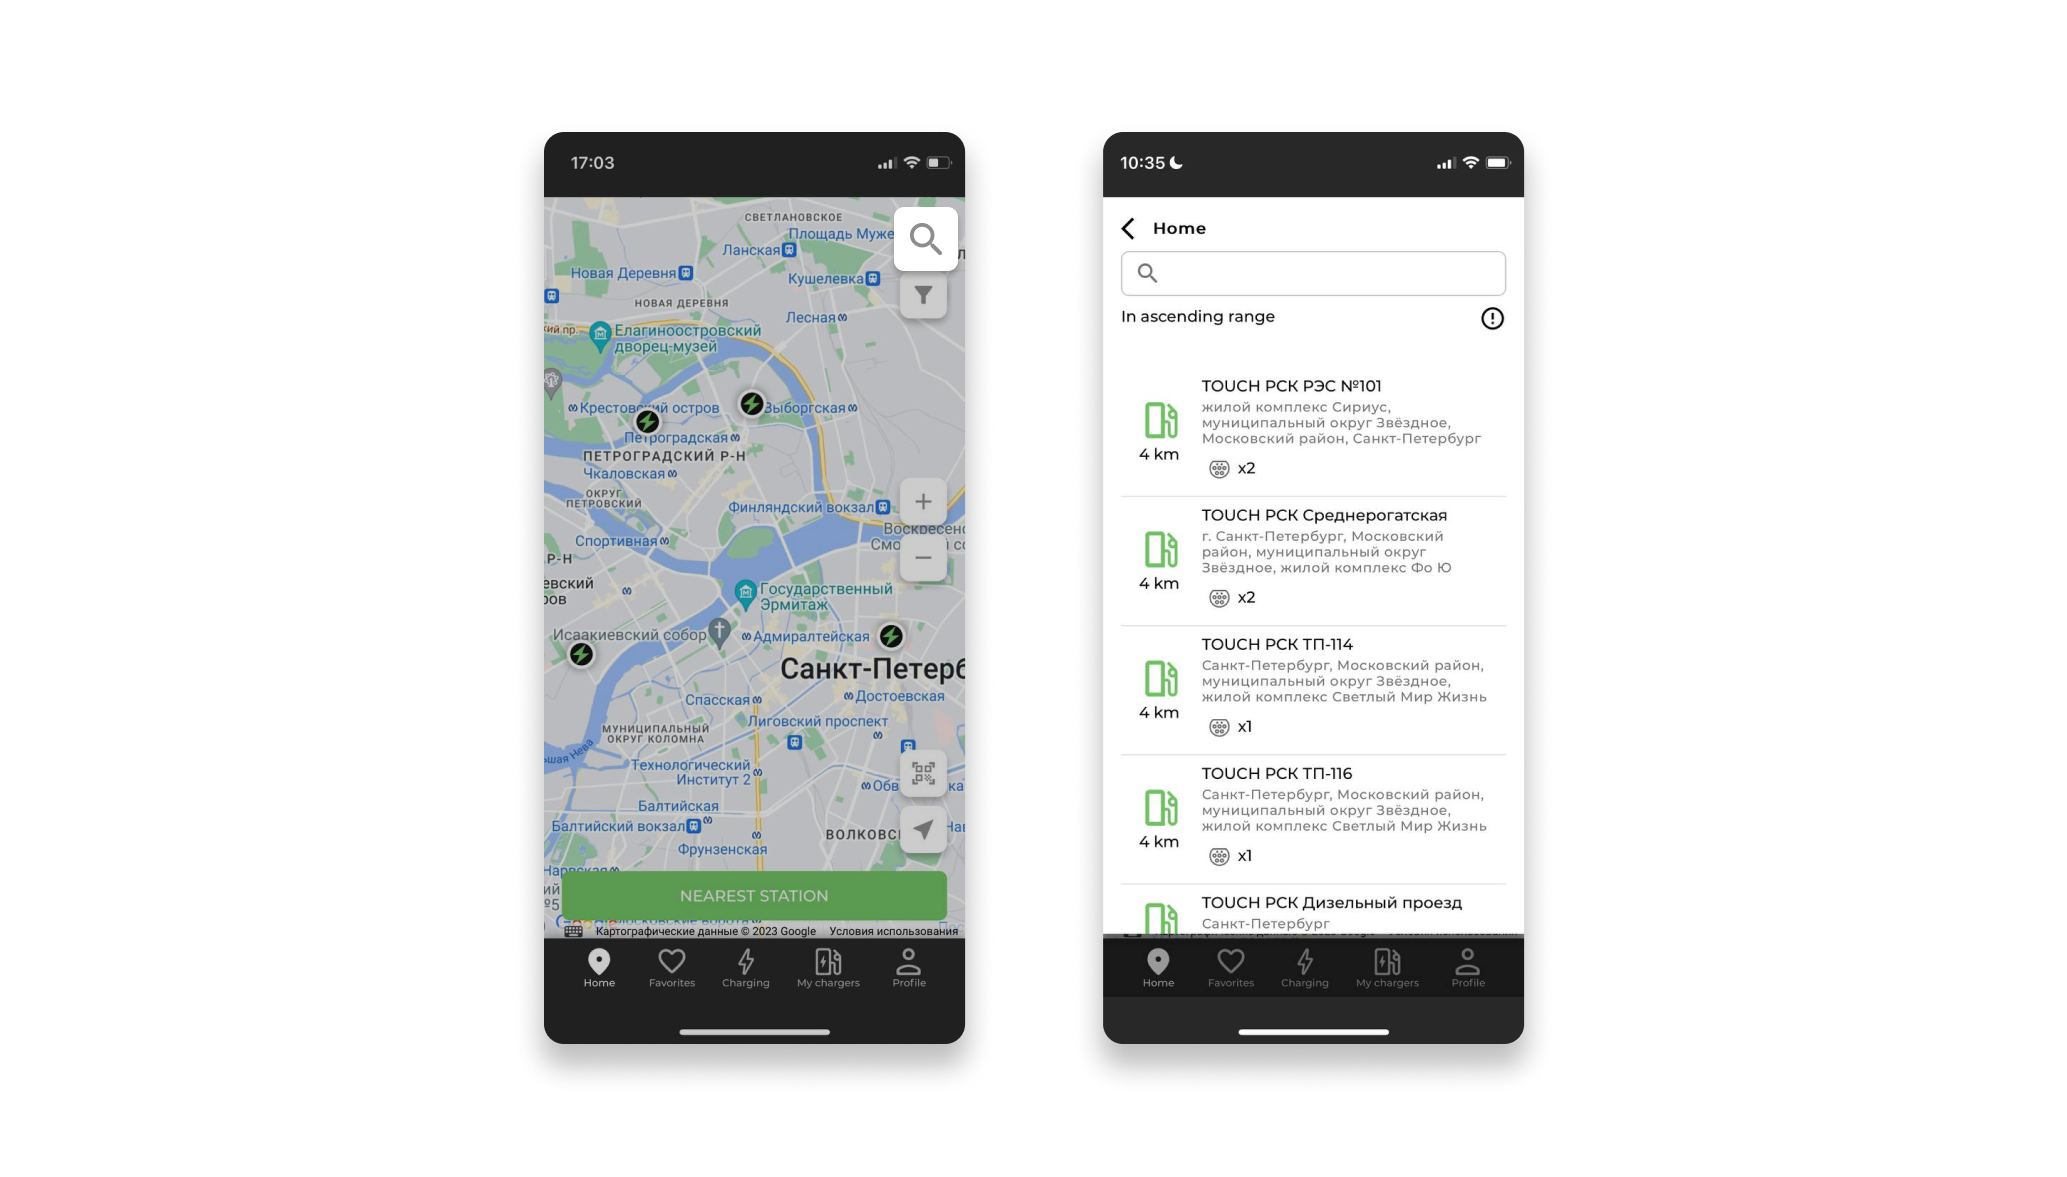
3.1 Search
Location search is carried out in the "Search" window by name and/or address with the possibility of opening a card of the selected location.
The system displays locations "In ascending range".
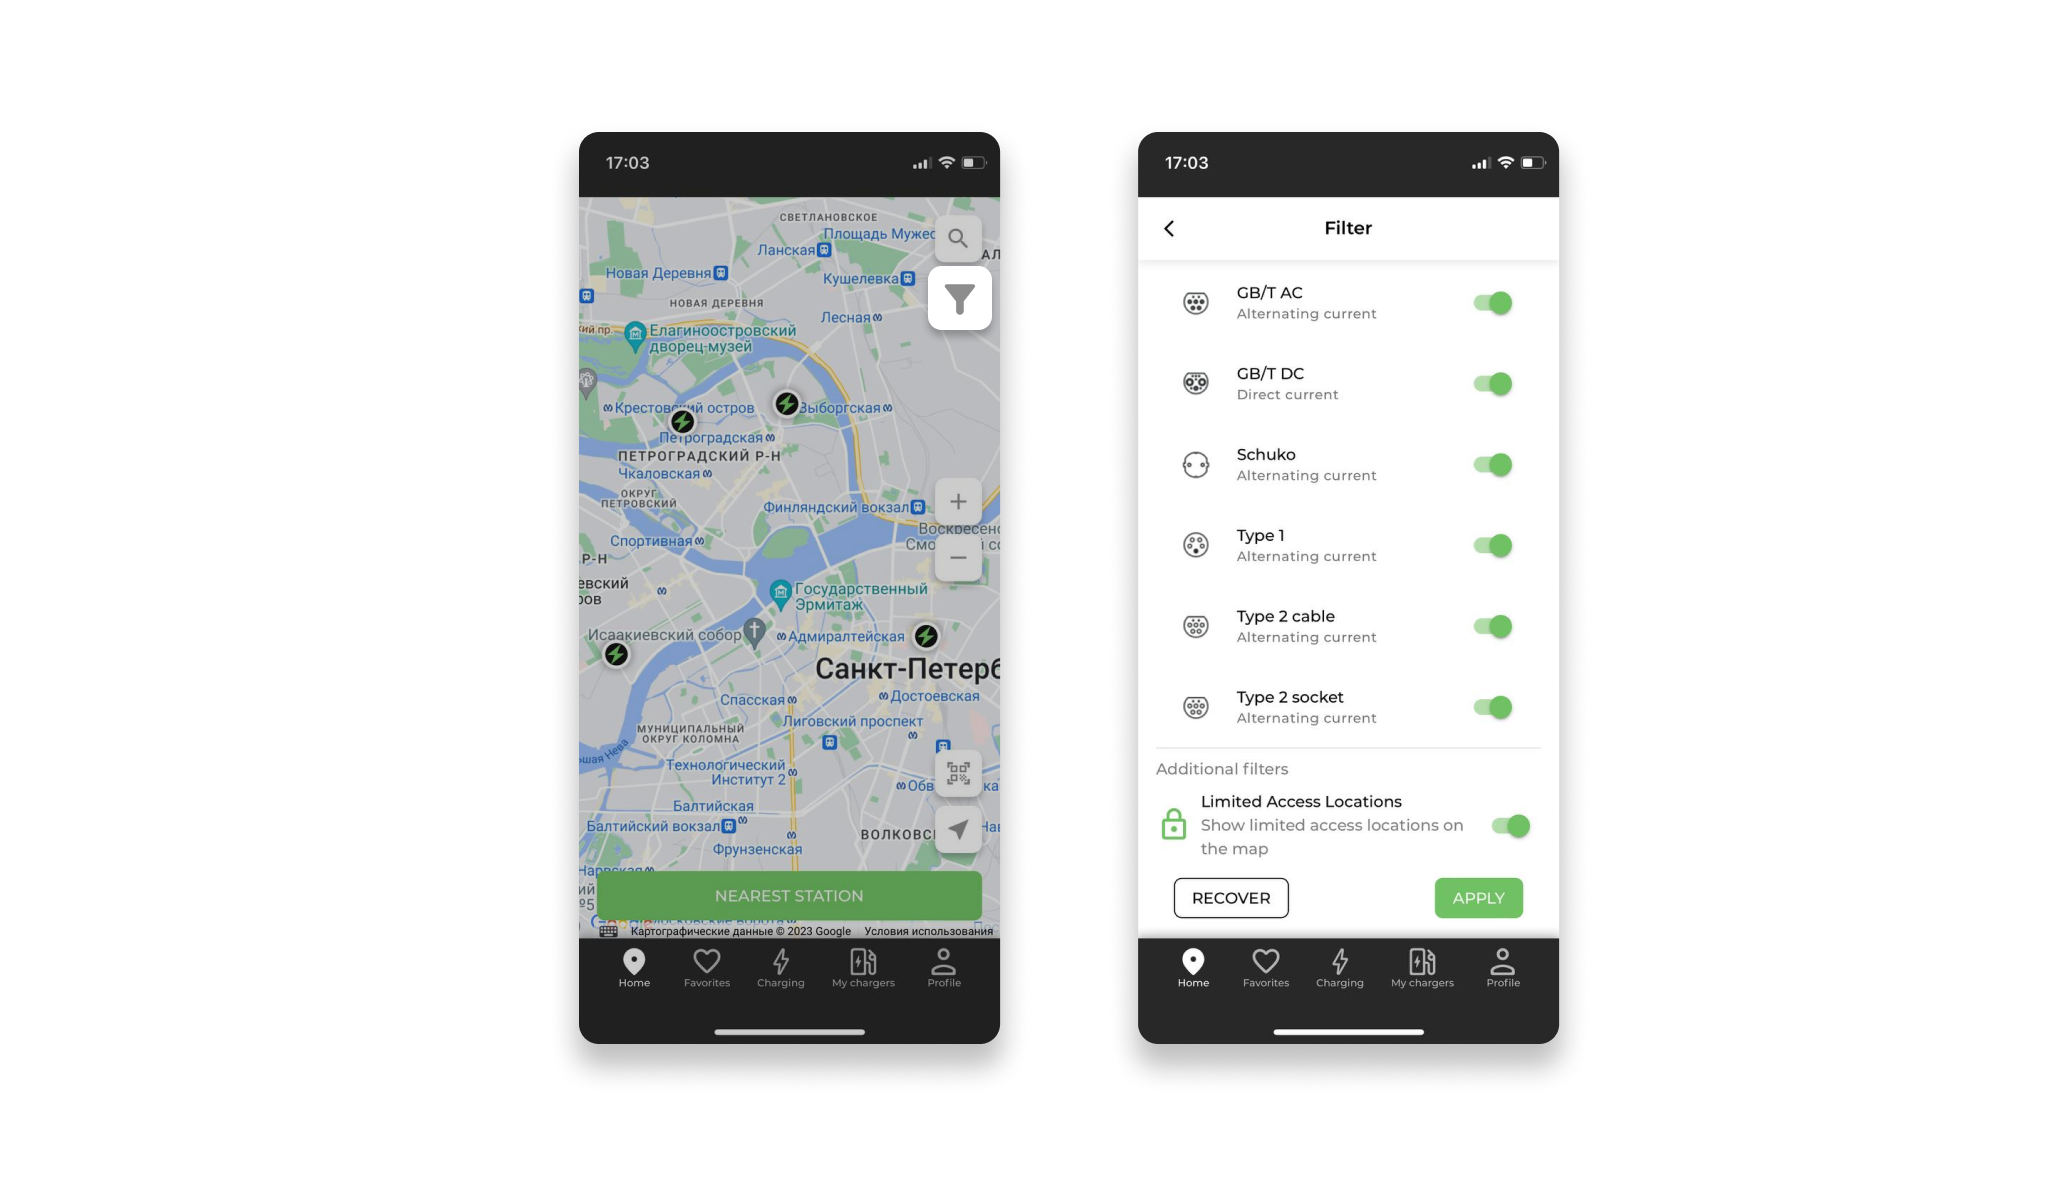
3.2 Filter
Filtering of the displayed locations is carried out in the "Filter" window, the user can:
- Select by type of required connectors;
- Select according to the minimum required power;
- Put the "Restricted access locations" flag - restricted access locations will be displayed only if the user has access to restricted locations.
Click the "Apply" button, the system will save and remember the user's settings. The settings can be changed at any time.
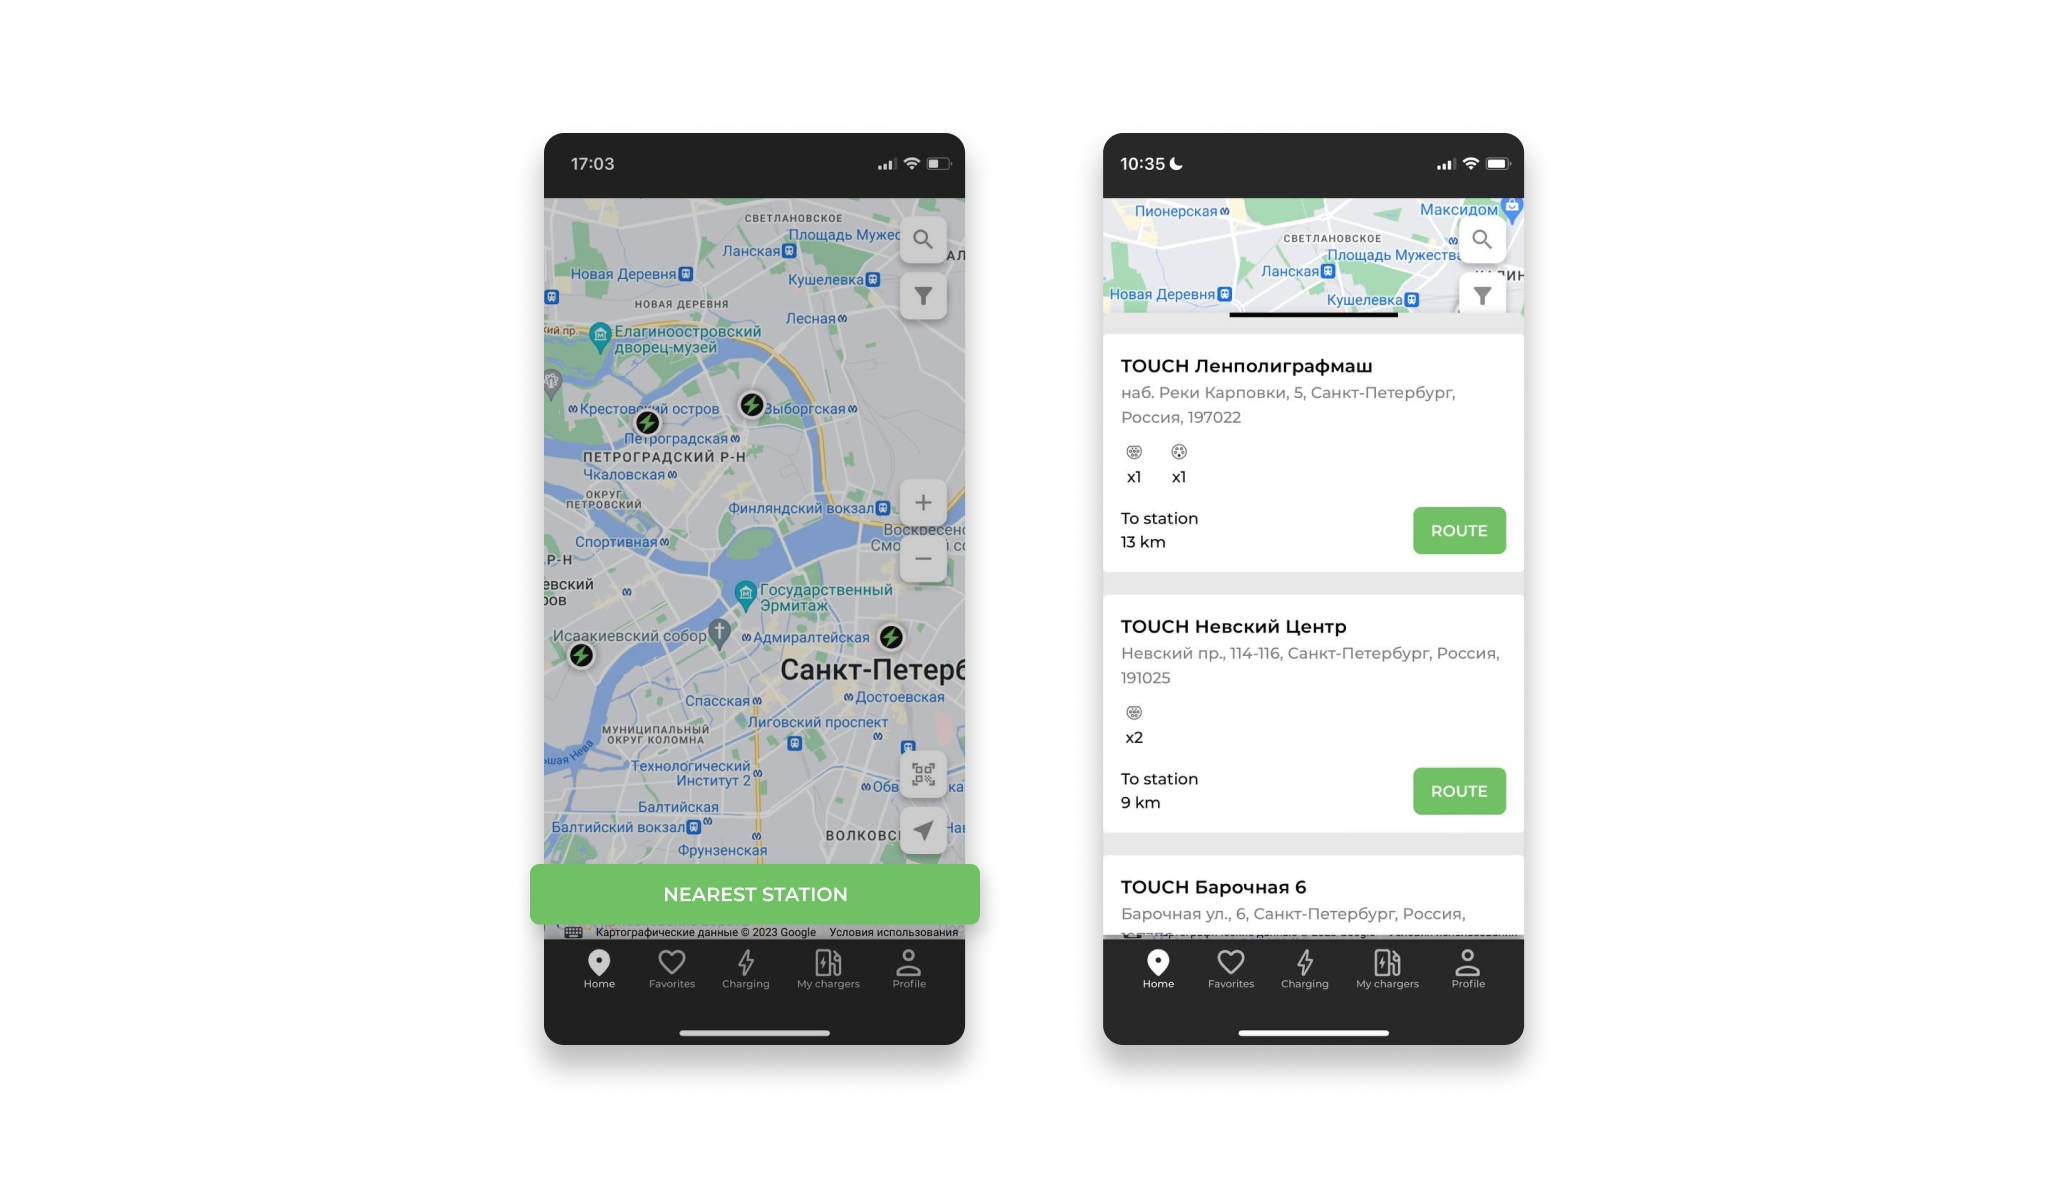
3.3 Widget "Nearest stations"
The widget is called by the "Nearest stations" button in the "Map" section.
Filtering settings of the displayed locations are made by the "Filtering" button.
The widget allows the user to:
- Quickly find a location near the current position on the map;
- Quickly build a route to the location selected in the list:
- In the iOS app and Web version, the route building function is implemented through opening Google Maps or the default navigation application;
- In the Android application, a selection of the navigation application installed by the user opens.
- View the main parameters and attributes of the location:
- Name;
- Address;
- Distance to the location from the user's location;
- Available connectors.
- Open the full location card to start charging or booking.
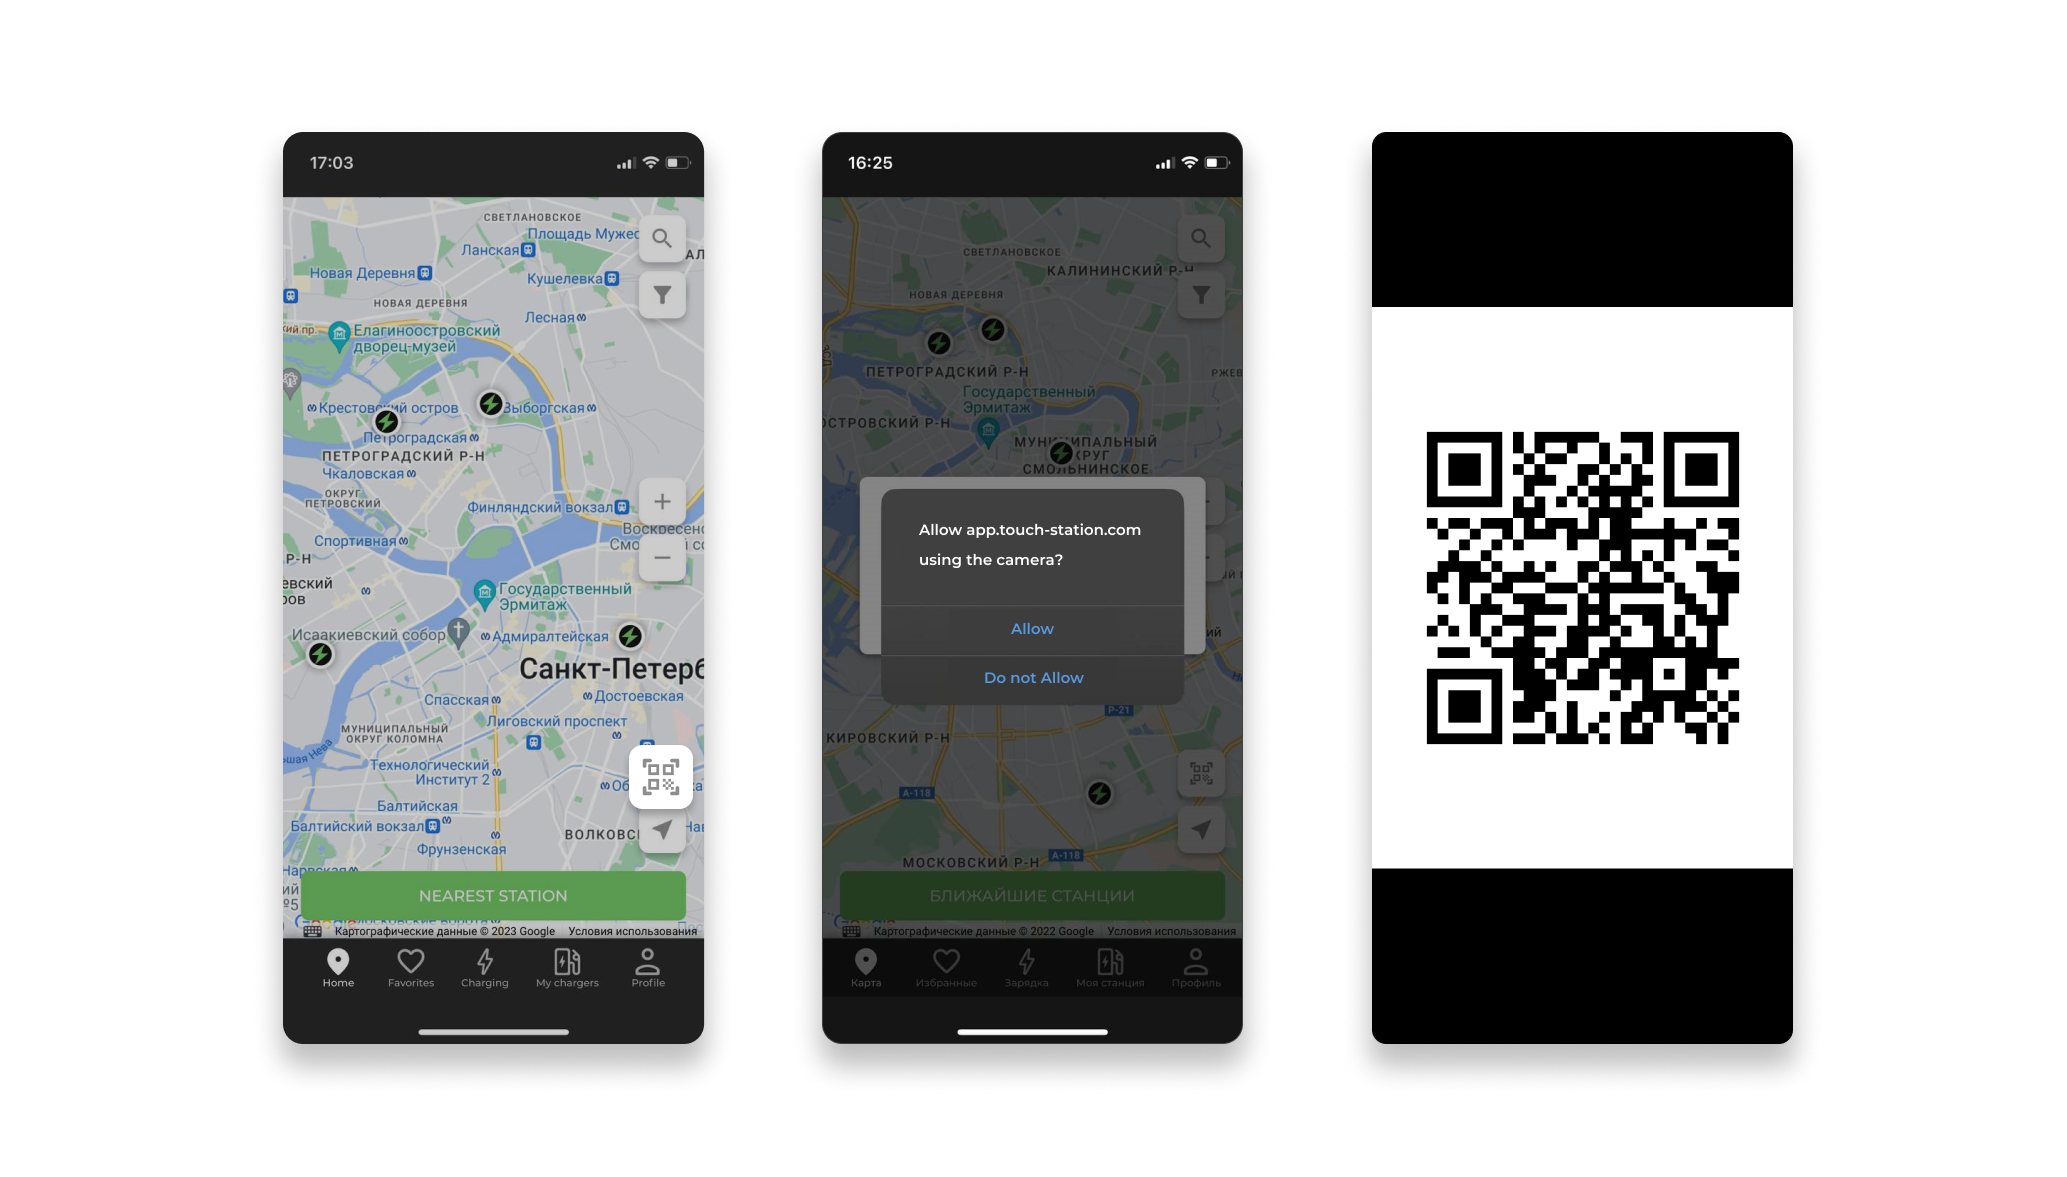
3.4 Opening a Location Card by scanning a QR code
The user can open the Location Card, next to which he is currently located, by scanning the QR code, which is called by the "Scan QR Code" button.
The system requests permission to use the camera and opens the camera for scanning:
- If the user has chosen not to give permission to use the camera, the system opens a window for manually entering the station ID;
- In case of successful scanning, the system opens the location card;
- In case of a failed scan, the system closes the camera and an error is displayed.
4. Location
4.1 Opening a Location Card
The card can be opened by clicking on the location icon:
- From the "Map" section;
- From the "Nearest Stations" widget;
- From the "Favorites" section;
- From the "Search" window.
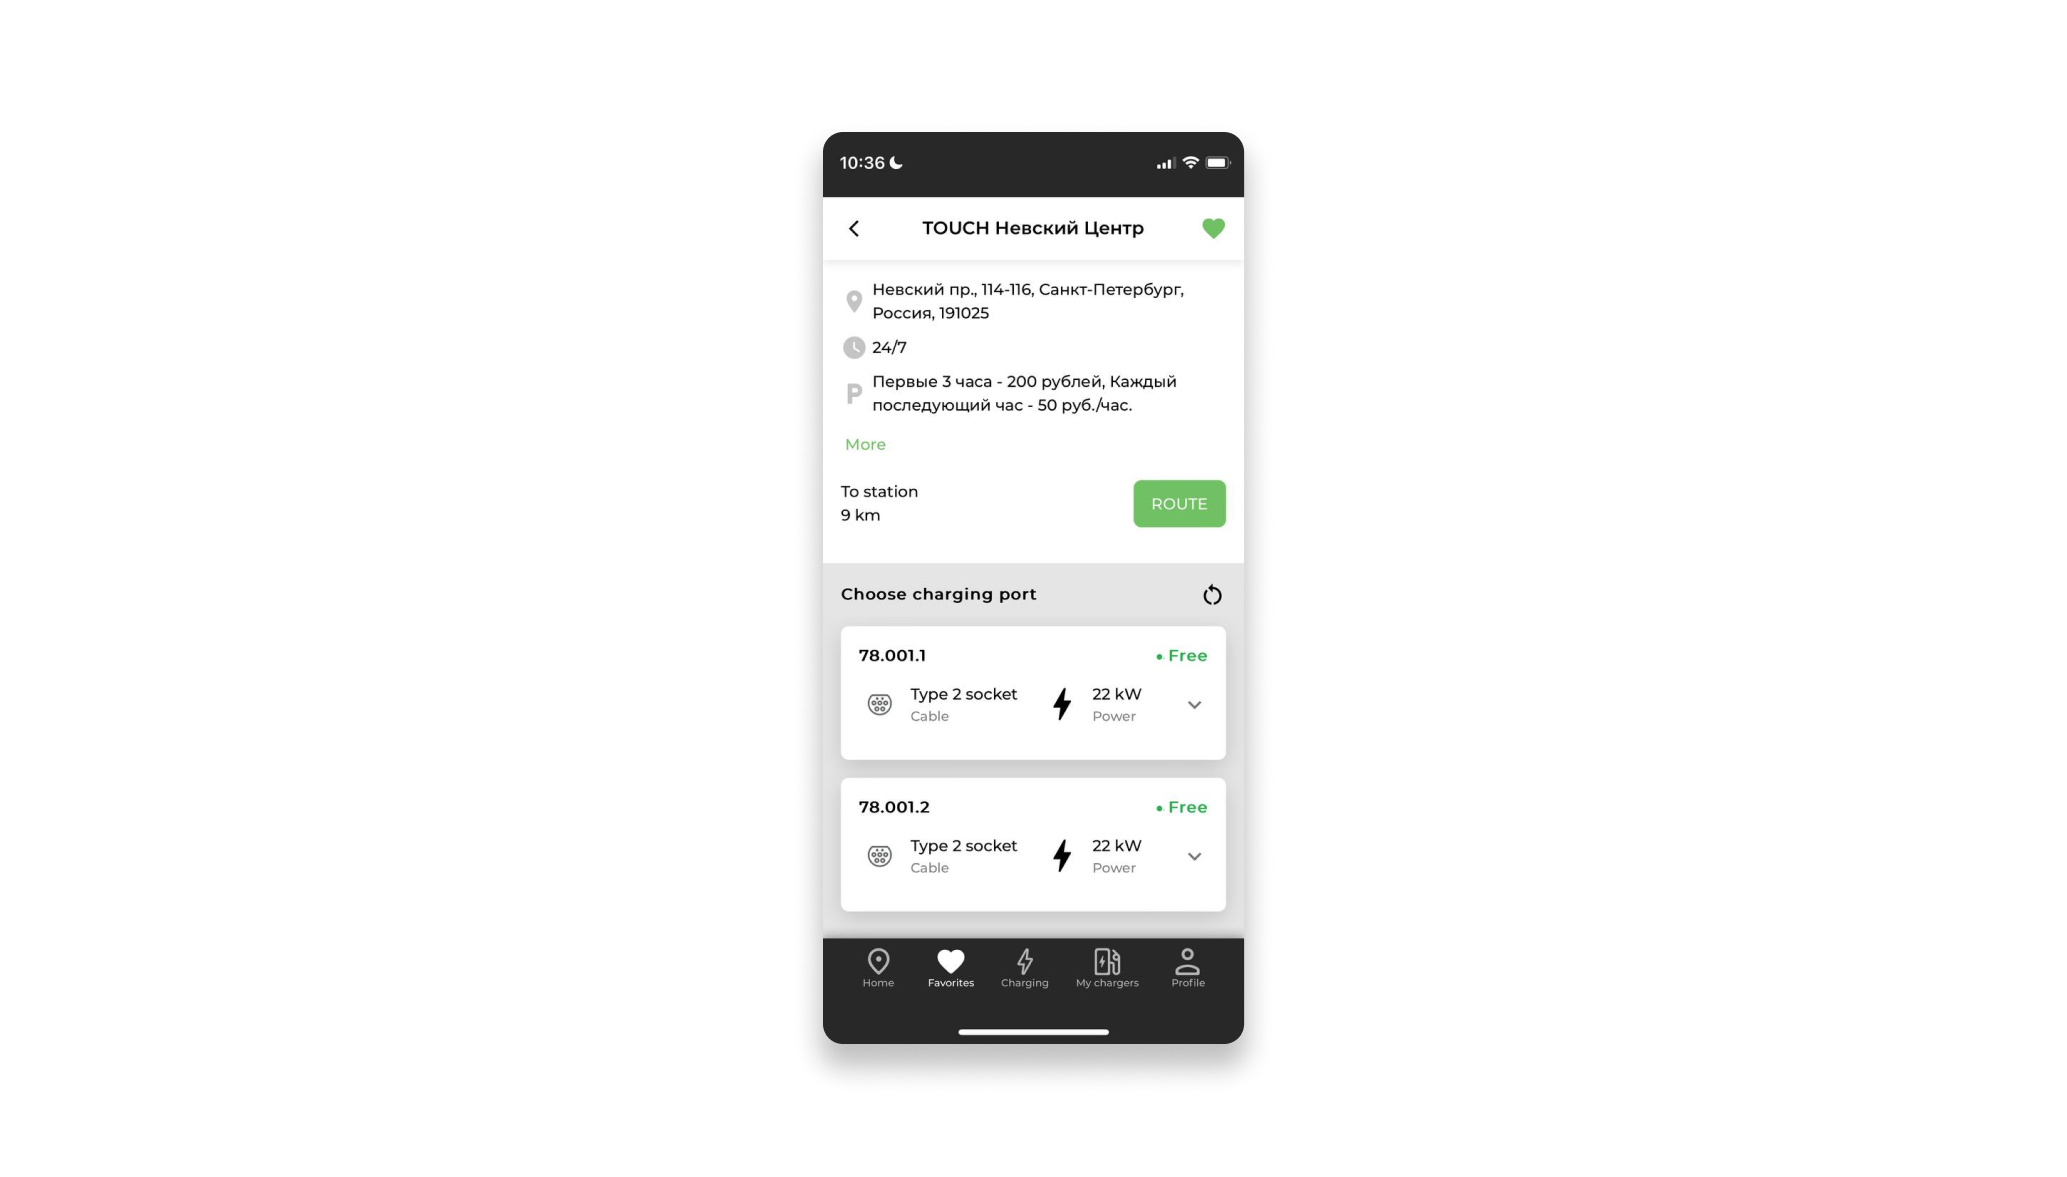
4.2 Main features of the Location Card
The main features of the Location Card:
Display of the name and address of the charging station;
The cost of parking, as well as the opening hours of the station;
Adding/removing a charging station to/from the Favorites section;
Display the distance from the user's current location to the station;
Call to build a route to the station:
- In the iOS app and Web version, the route building function is implemented through opening Google Maps or the default navigation application;
- In the Android application, a selection of the navigation application installed by the user opens.
Display of photos of the station, if any;

Display information about all charging ports of the station:
- Status;
- ID;
- Type;
- Power;
- Cost of operations;
- Station booking button;
- Start charging button.
The ability to go to a chat with technical support;
Ability to open the application User Manual;
The ability to view all the reviews about the station and write your own review.
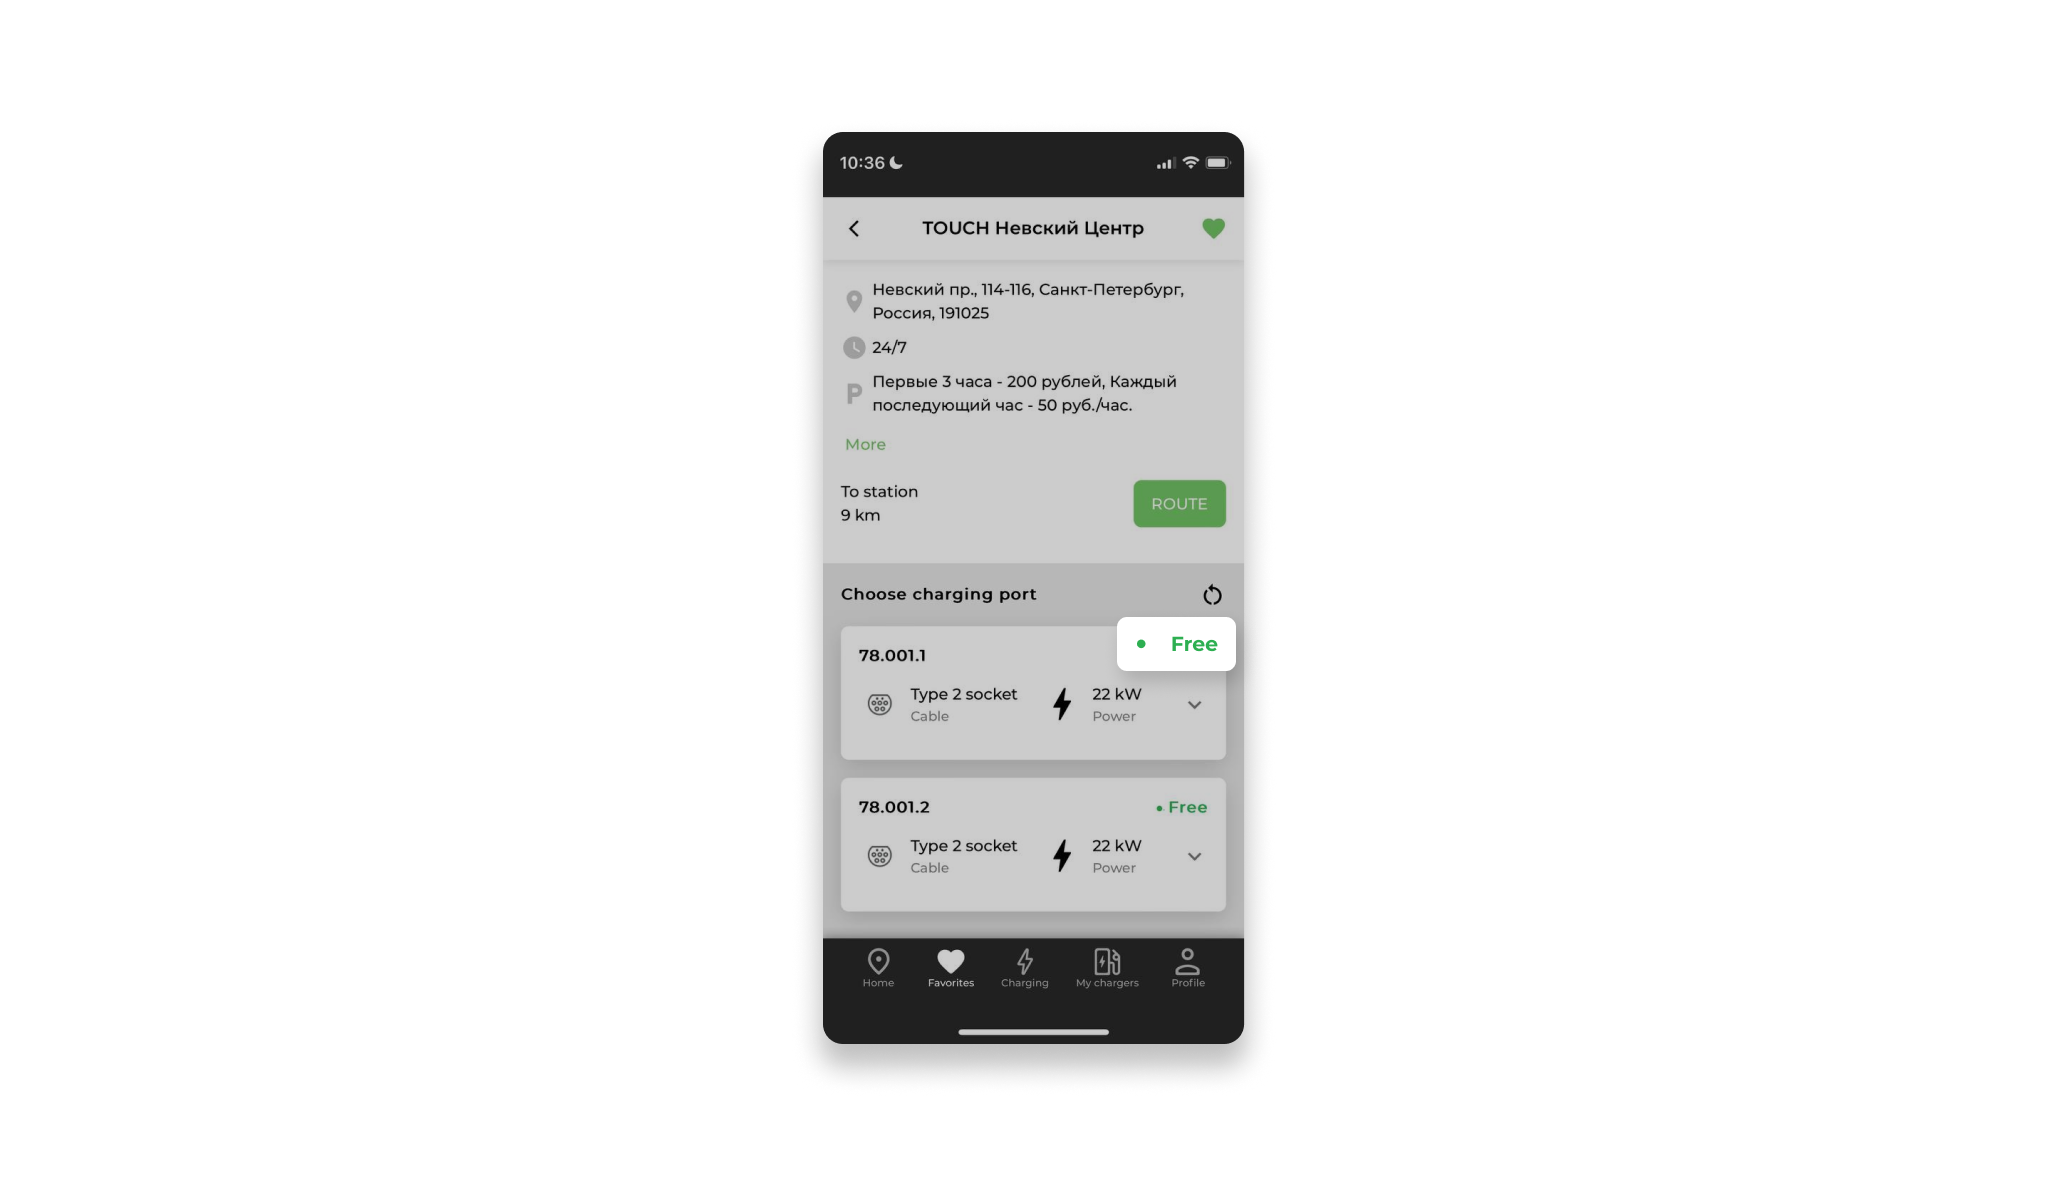
4.3 User statuses
The displayed charging connectors can have 4 user statuses:
- The station does not work - the station is turned off or is in an inoperable state;
- The station is ready for charging - the station is free and in working condition;
- The station is reserved - the station is in a reservation state;
- The station is booked - another user is already charging at the station.
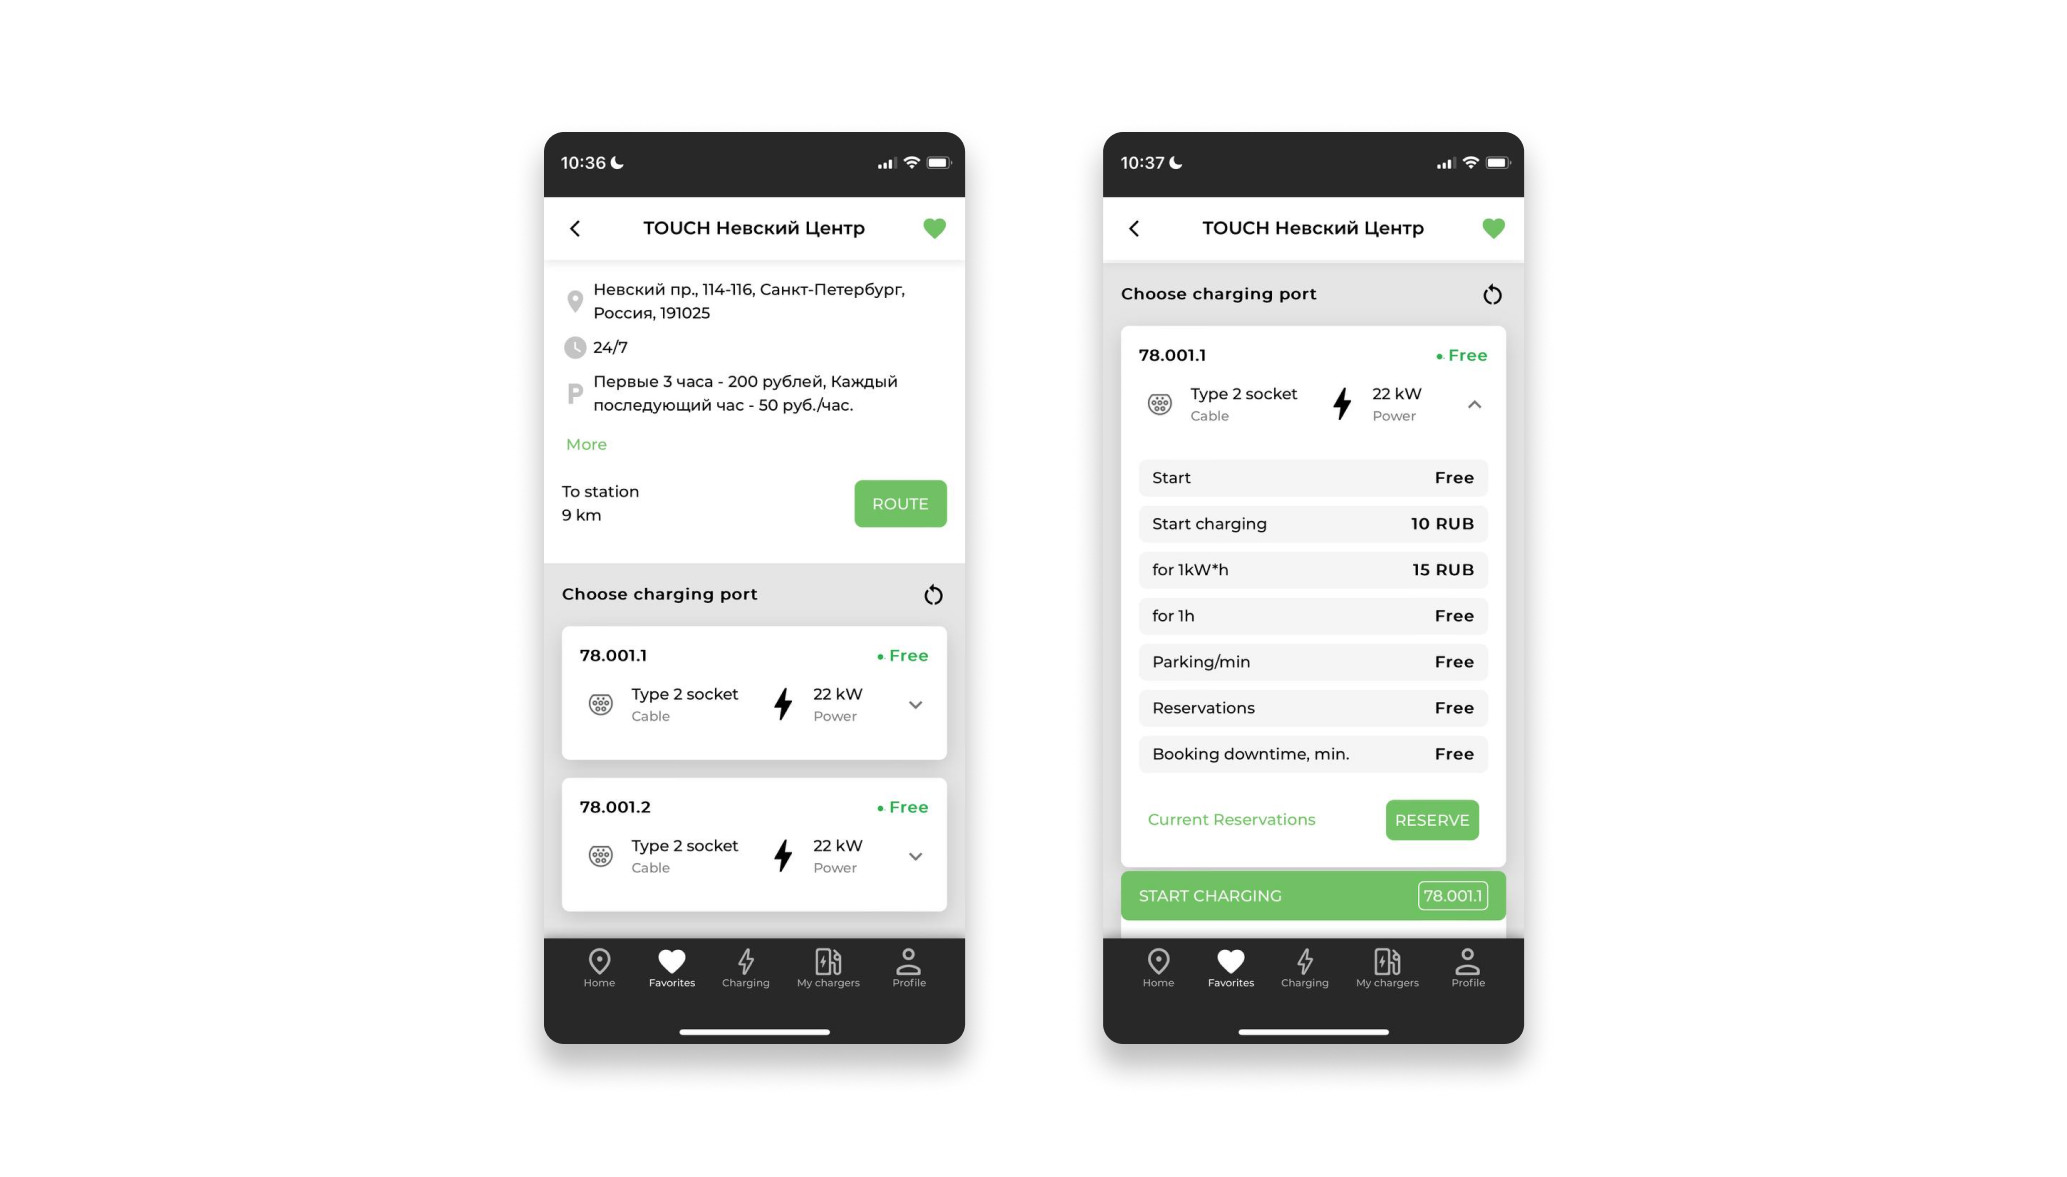
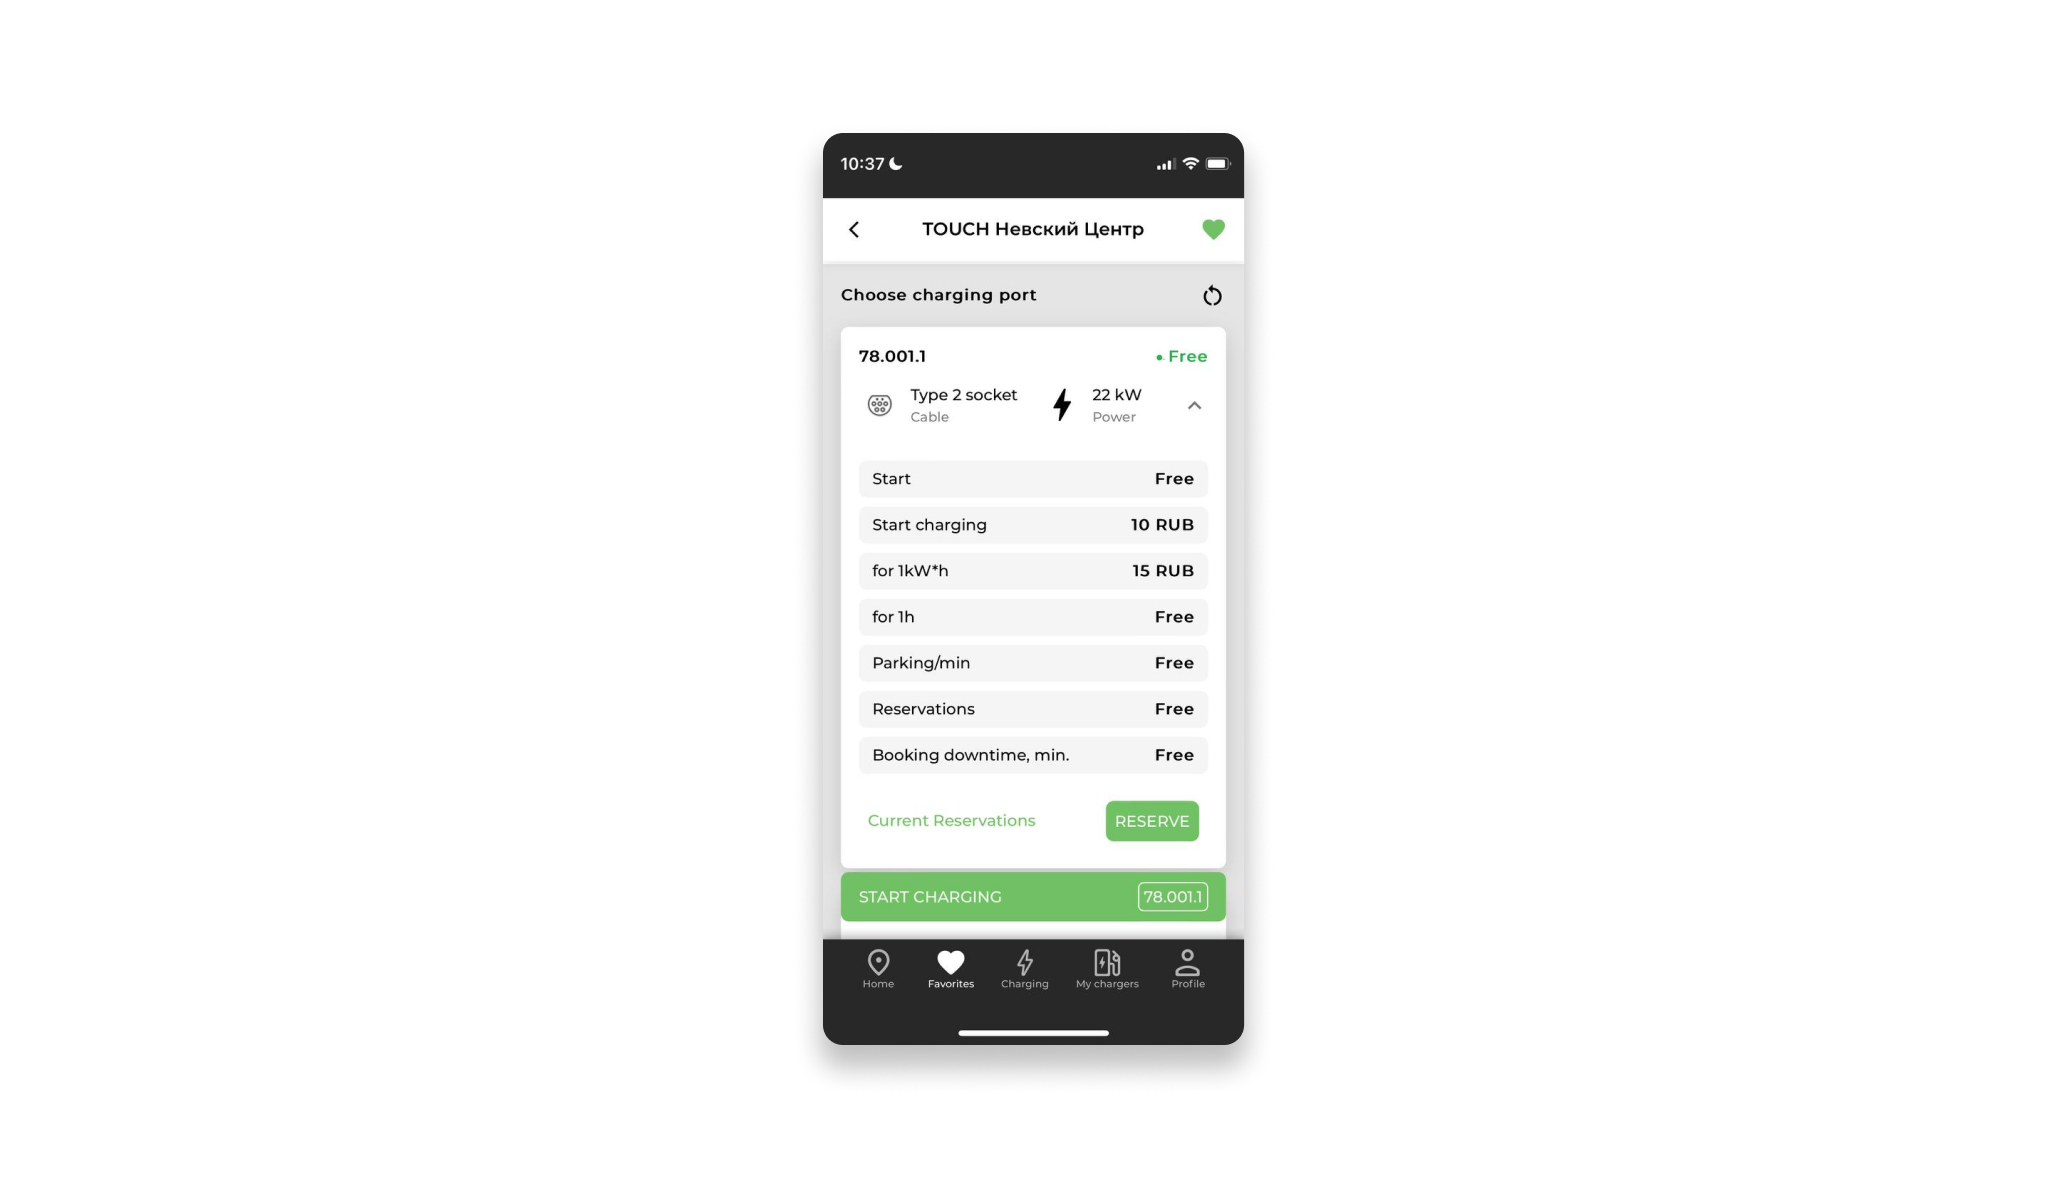
4.4 Connector selection and tariff display
When selecting a specific connector, the Card shows detailed information about the charging and booking tariff, as well as when the port status is available, the commands for booking this connector or starting charging become active.
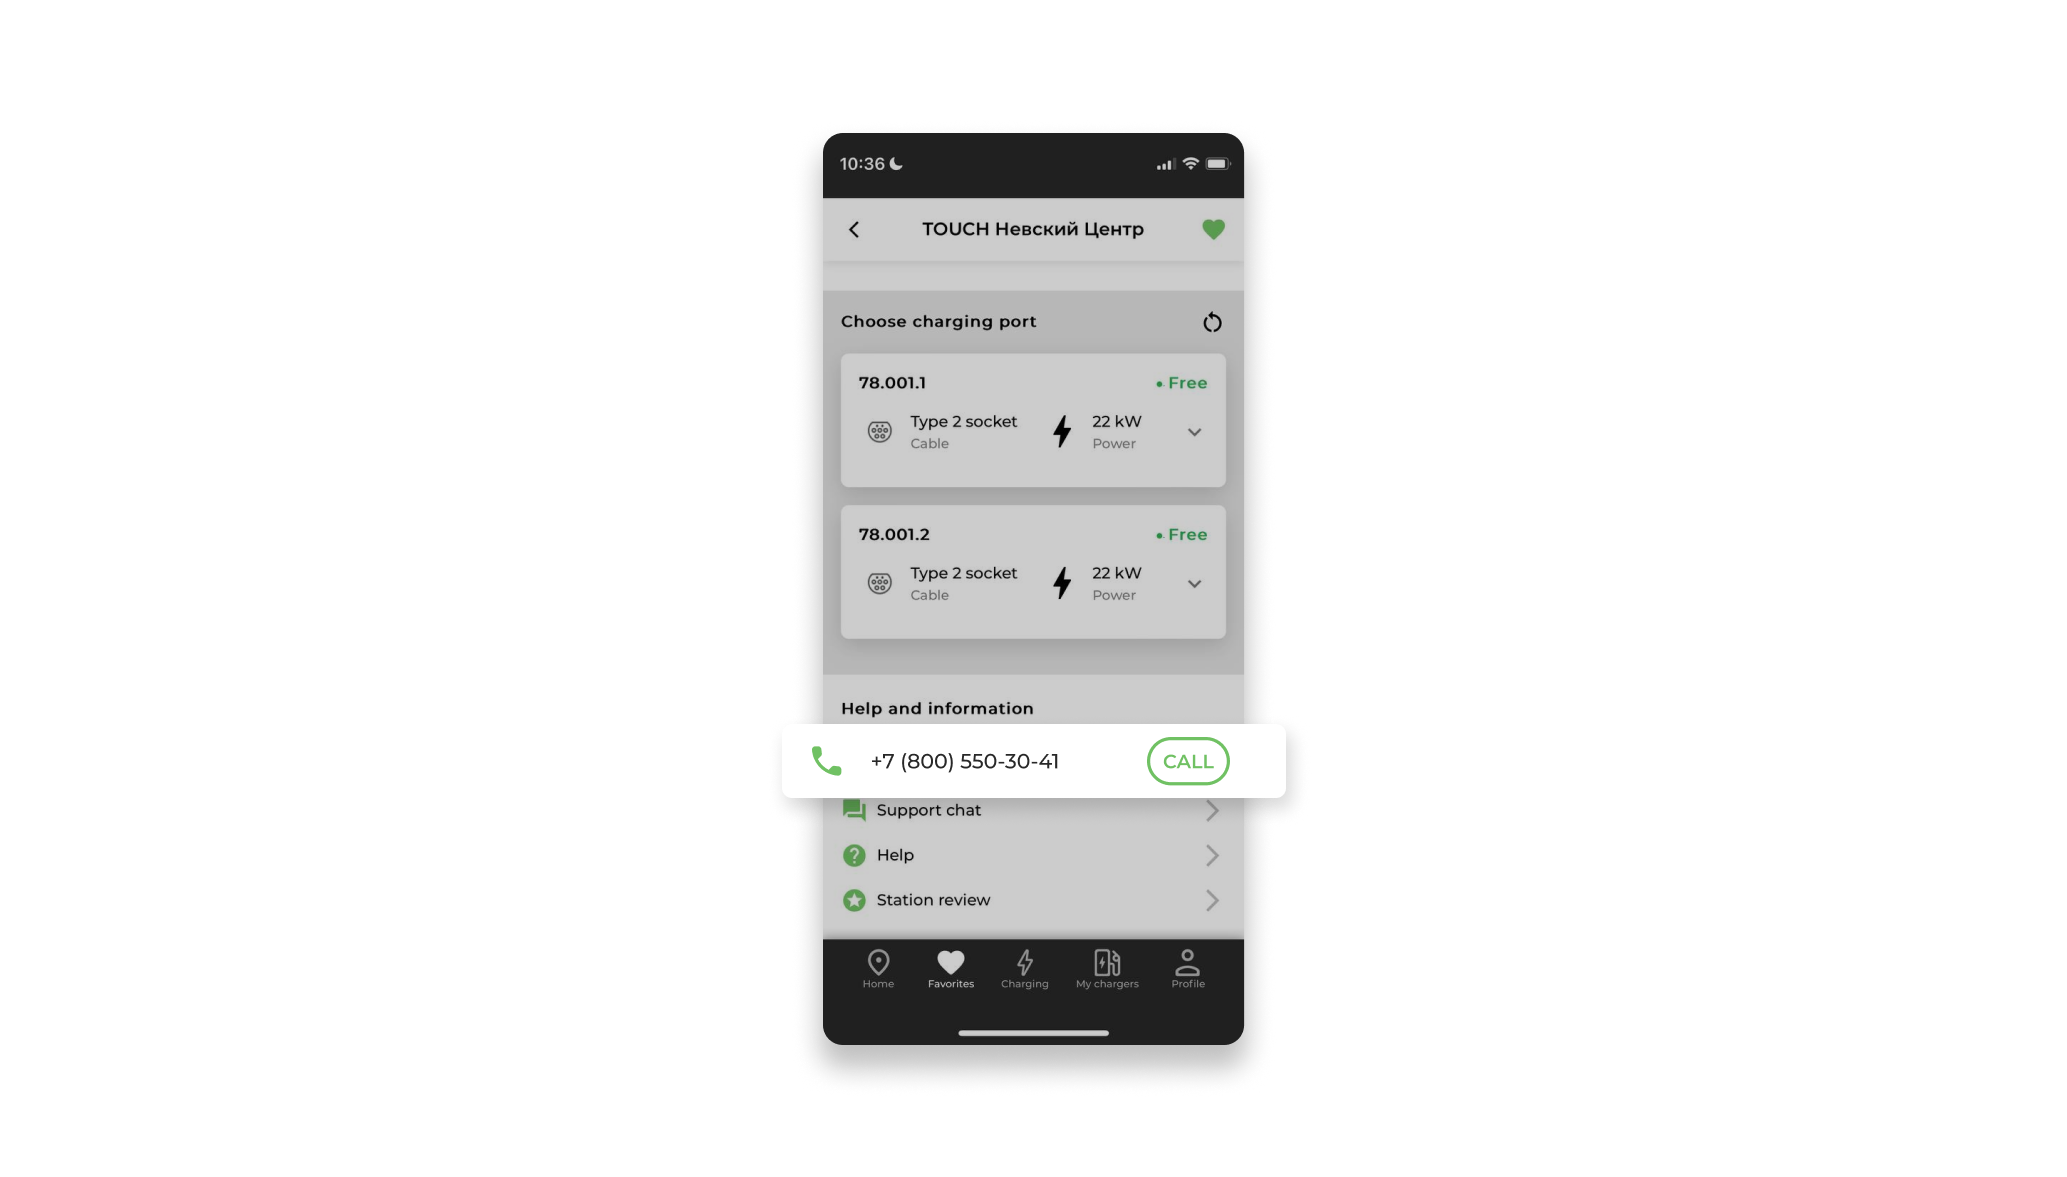
4.5 Technical Support Number
The Card displays the technical support number. The system supports an interactive button for calling "Call".
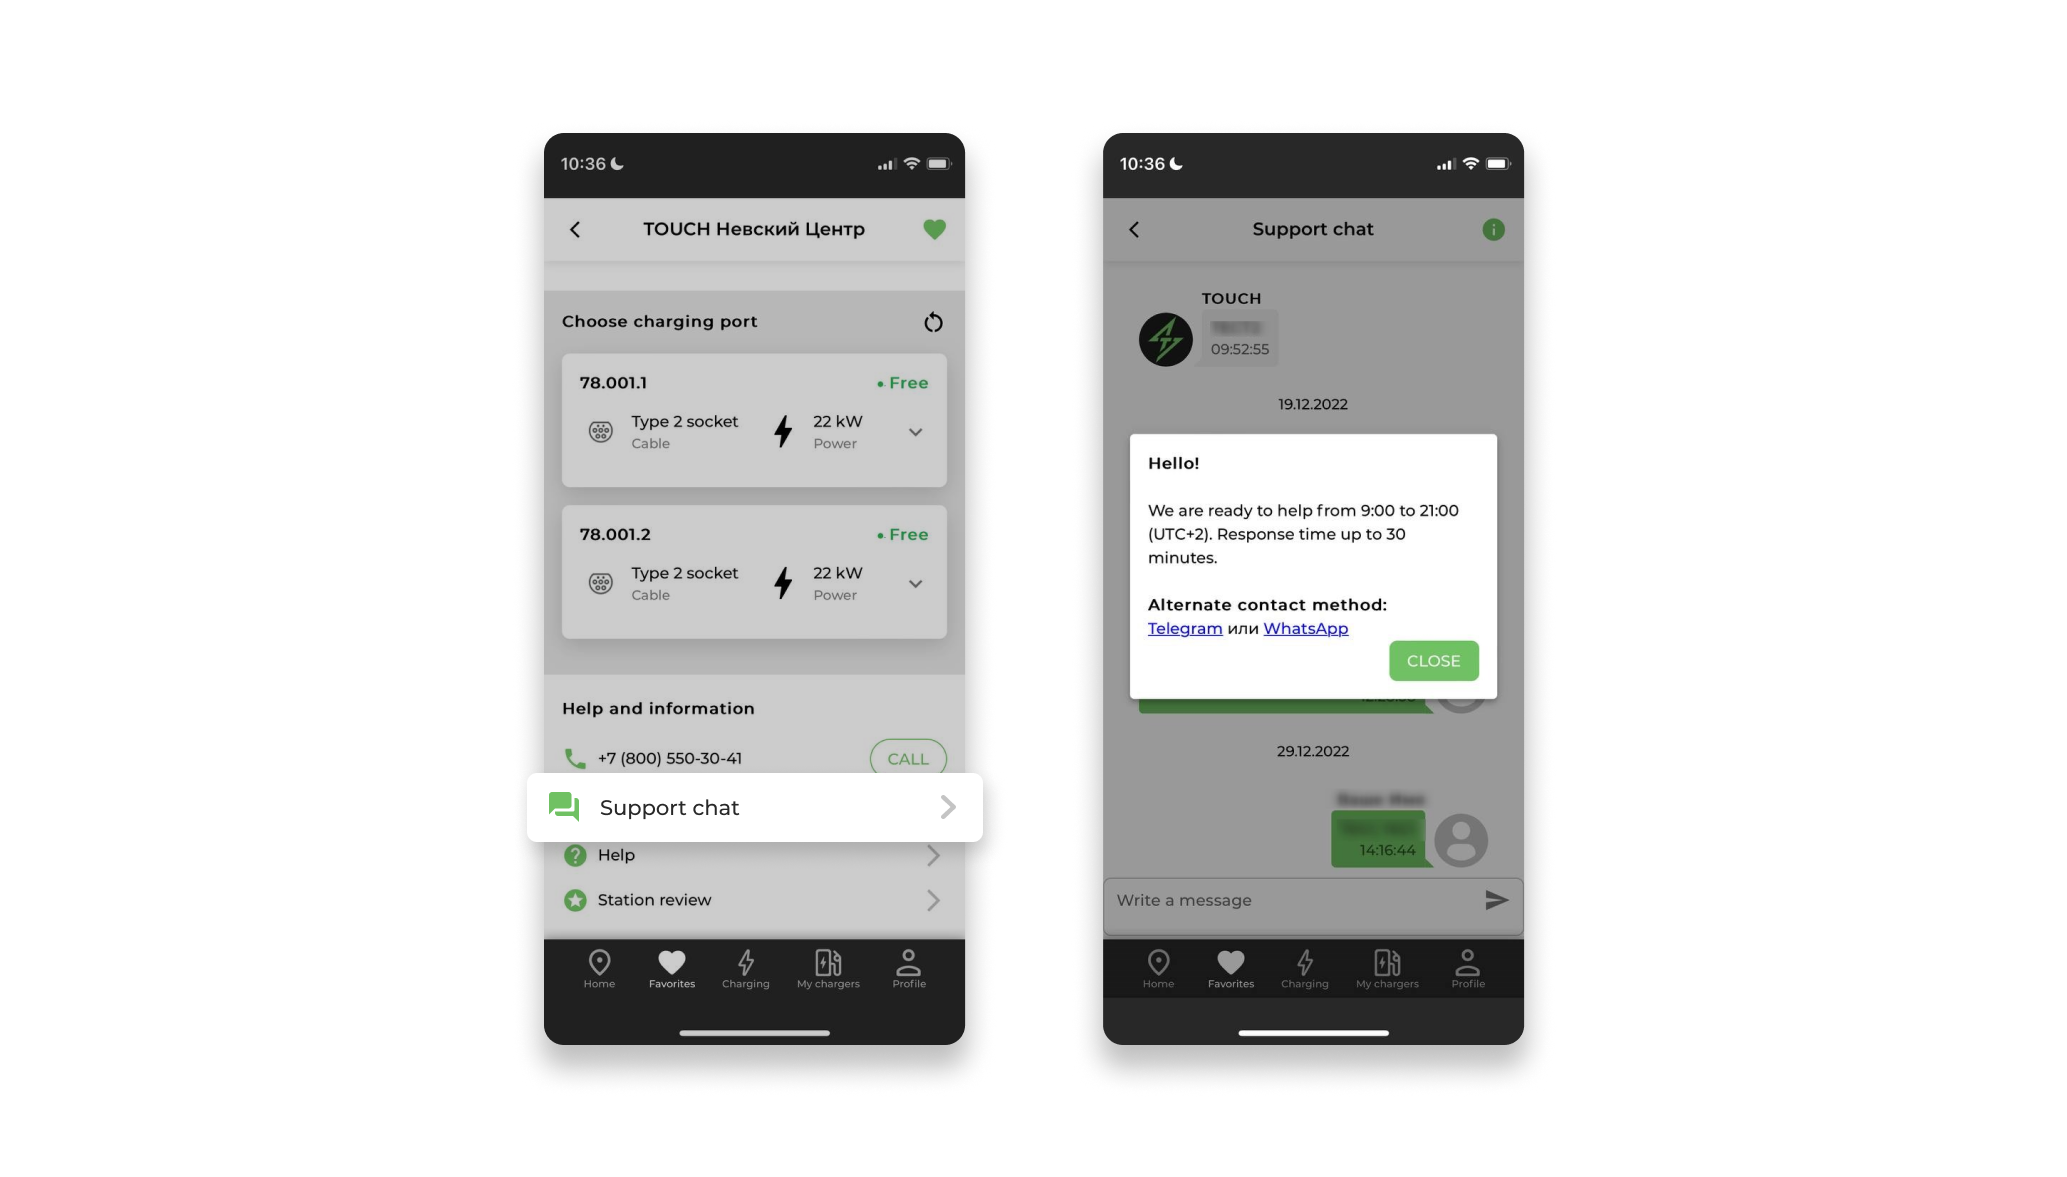
4.6 Chat with support
The user can go to the technical support chat subsection in two ways using the link "Chat with support":
- From the Location Card;
- From the "Profile" section.
The application opens a chat with support and displays the information:
- Technical support working hours and response time;
- Alternate communication methods: Telegram or WhatsApp.
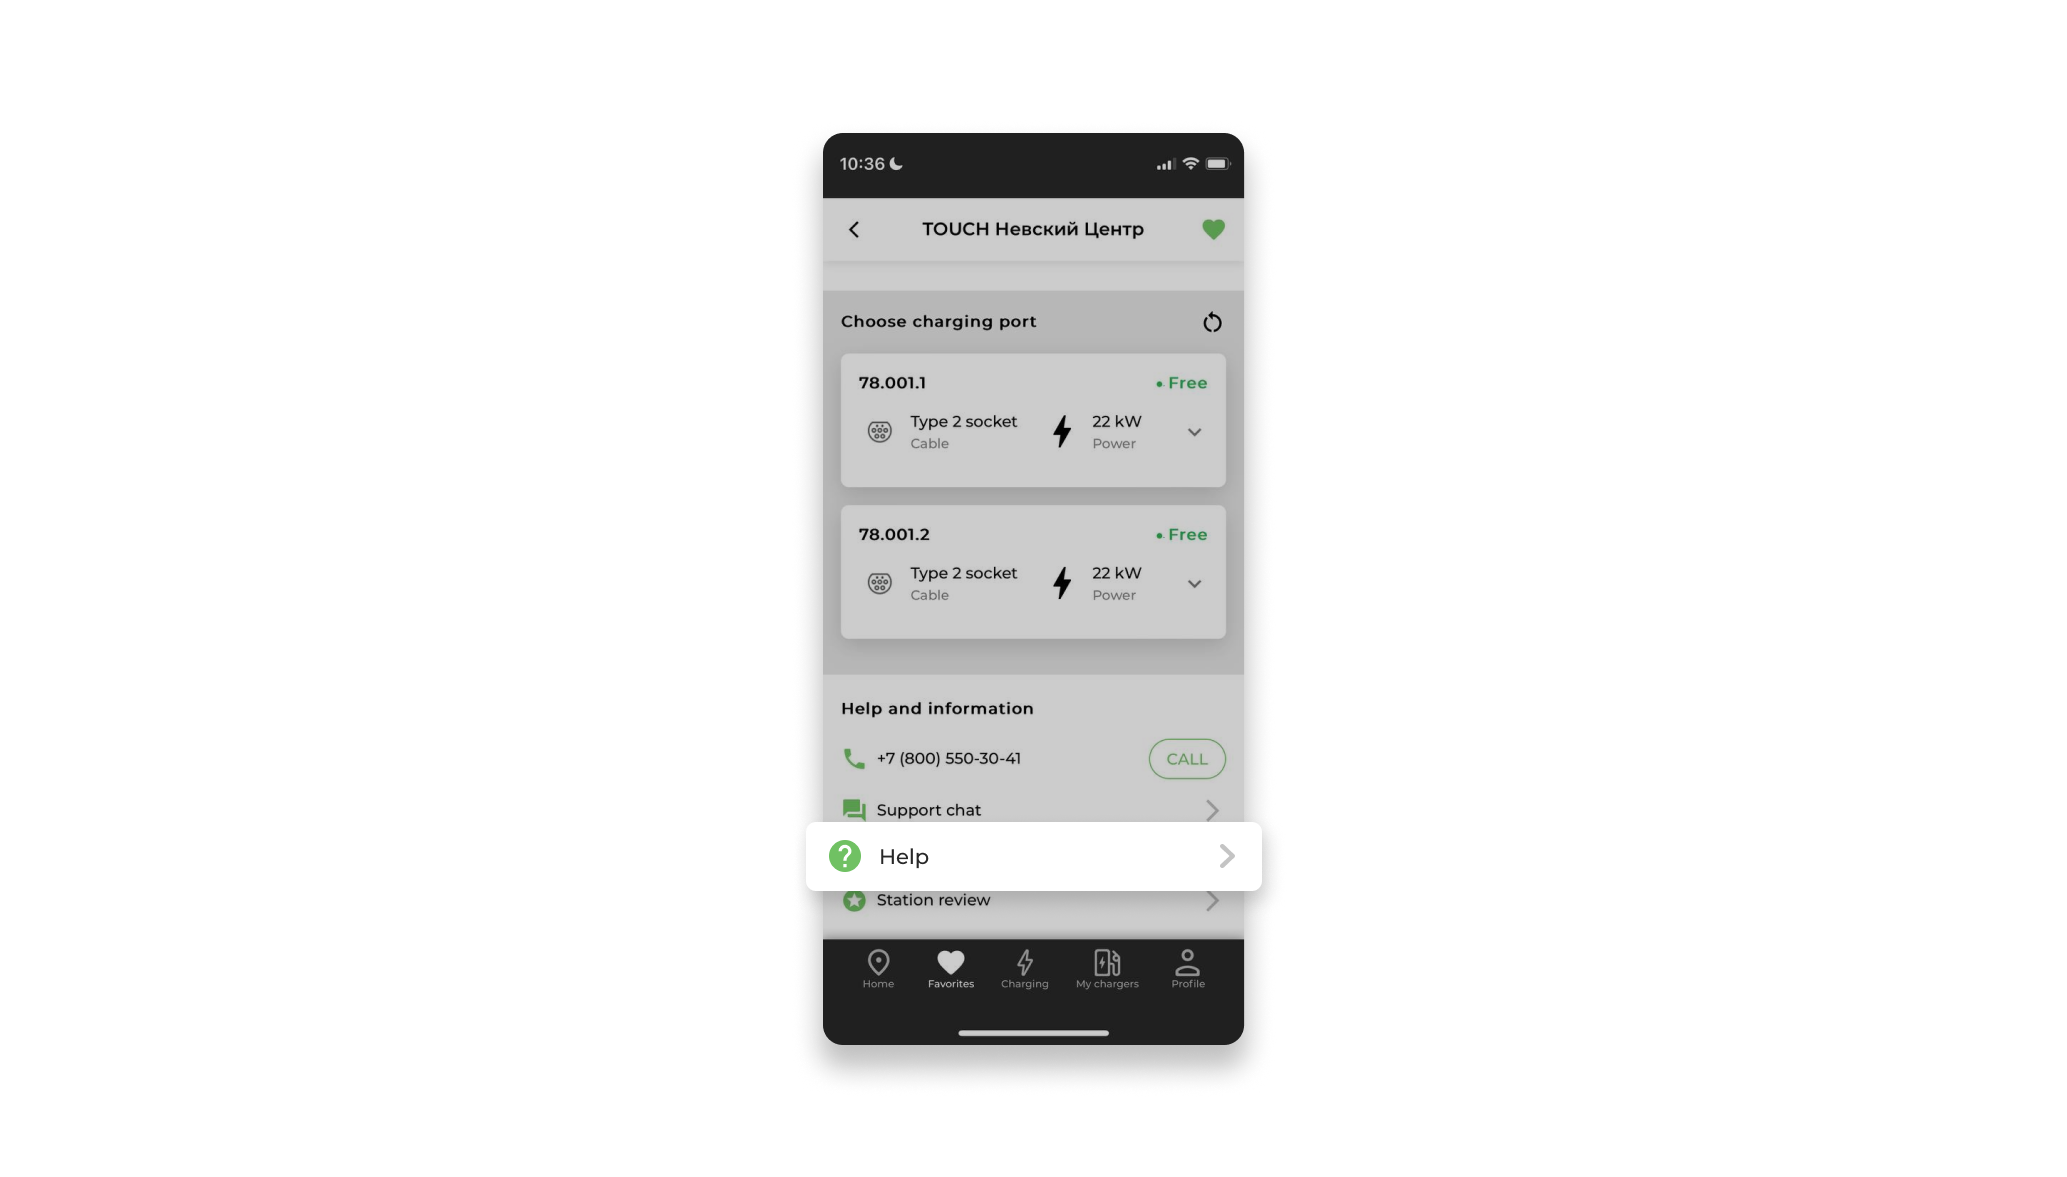
4.7 Application Help
The user can open the online version of the User's Guide in two ways by clicking on the link "Application Help":
- From the Location Card;
- From the "Profile" section.
5 Section "Charging"/"Booking"
5.1 Station booking and cancellation
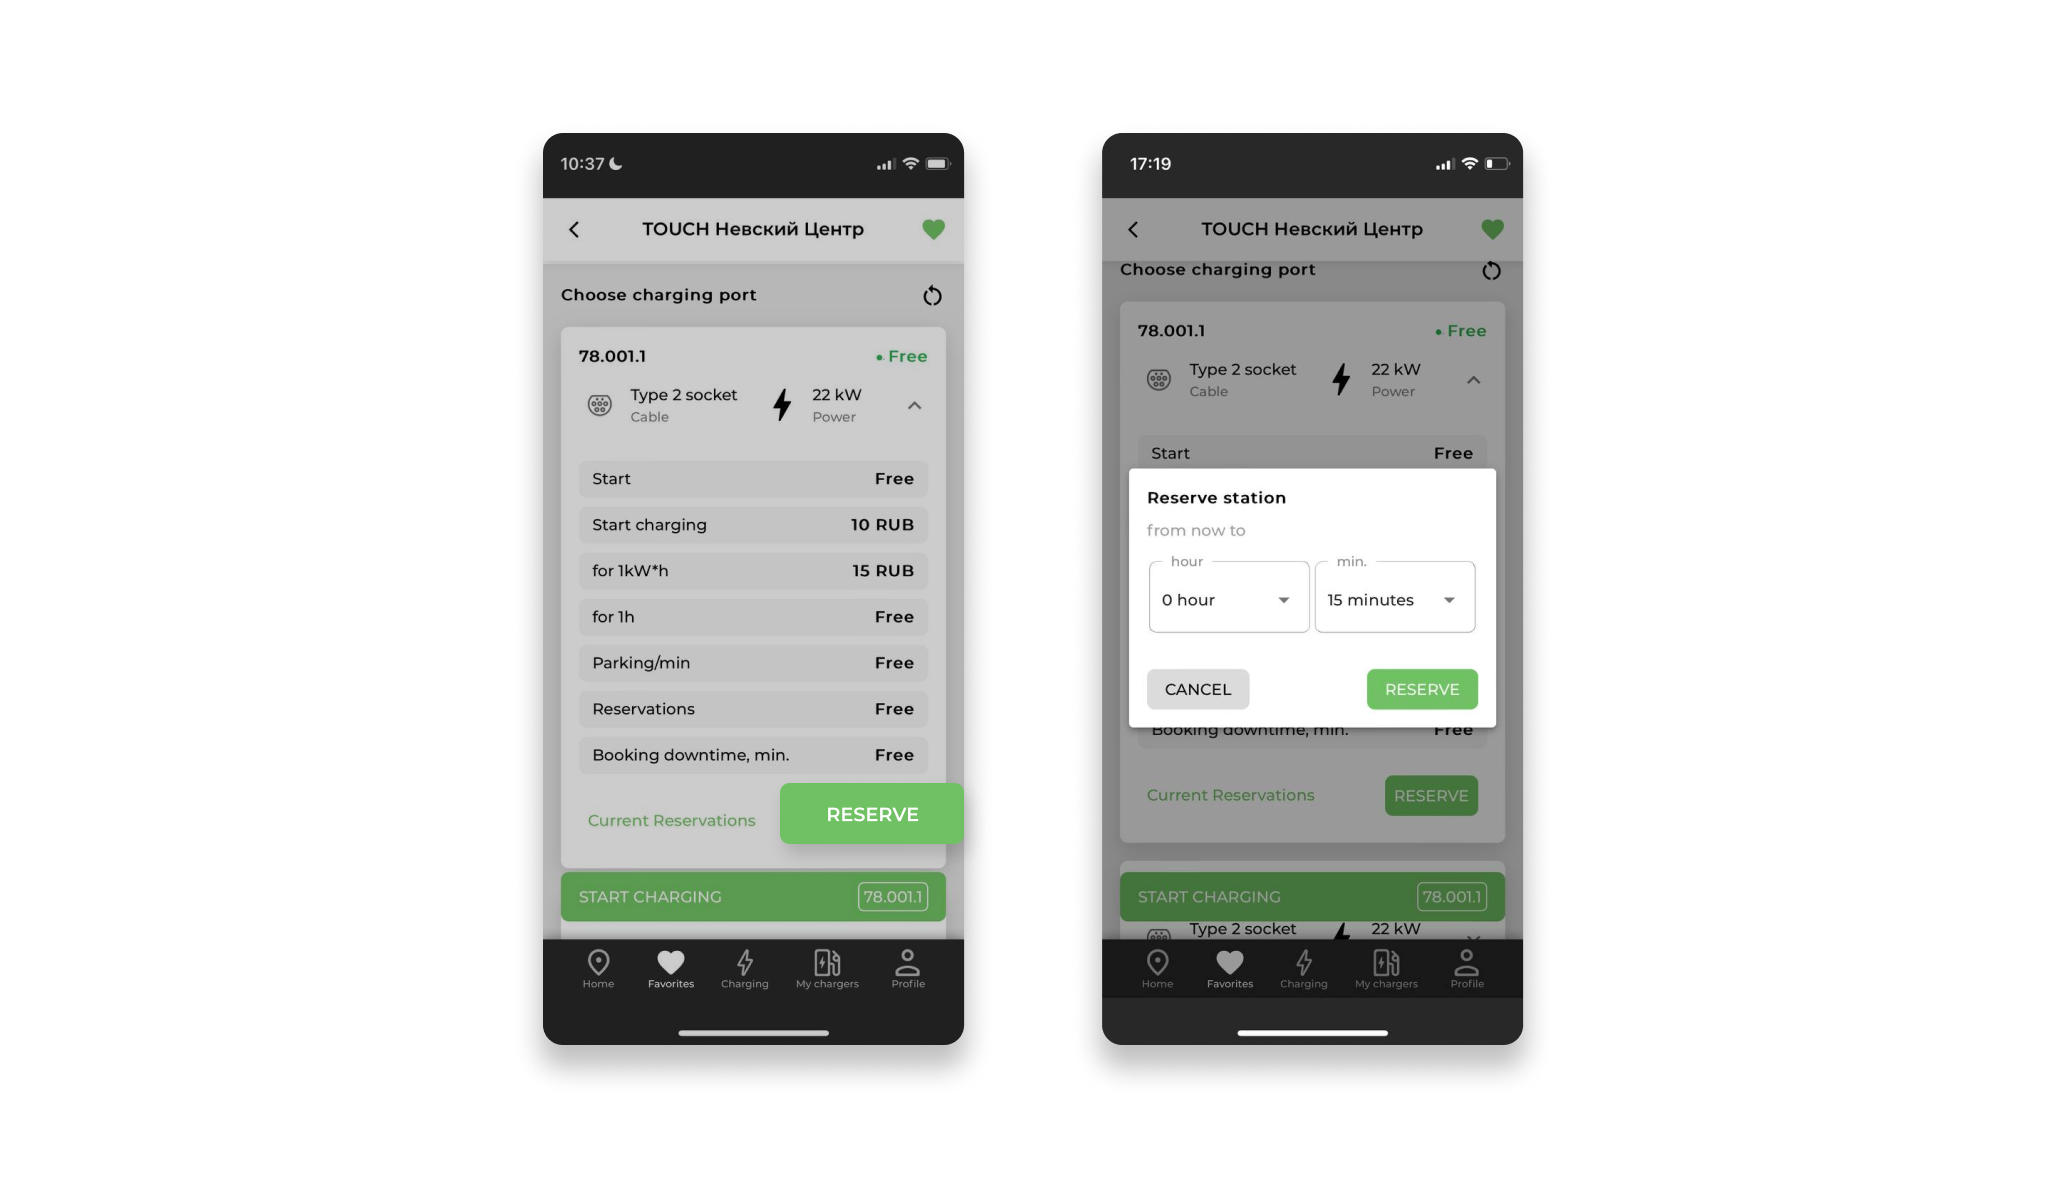
5.1.1 Booking stations
The "Book" button is available in the Location Card for a specific selected connector under the description of the charging rate:
Click the "Book" button:
The application opens the "Book station" window, where you need to select the time for which the port will be booked:
- 15, 30 or 45 minutes;
- 1 hour (you can specify the number of minutes if necessary);
- 2 hours (you can specify the number of minutes if necessary).
Click "Book".
The system reserves the selected port.
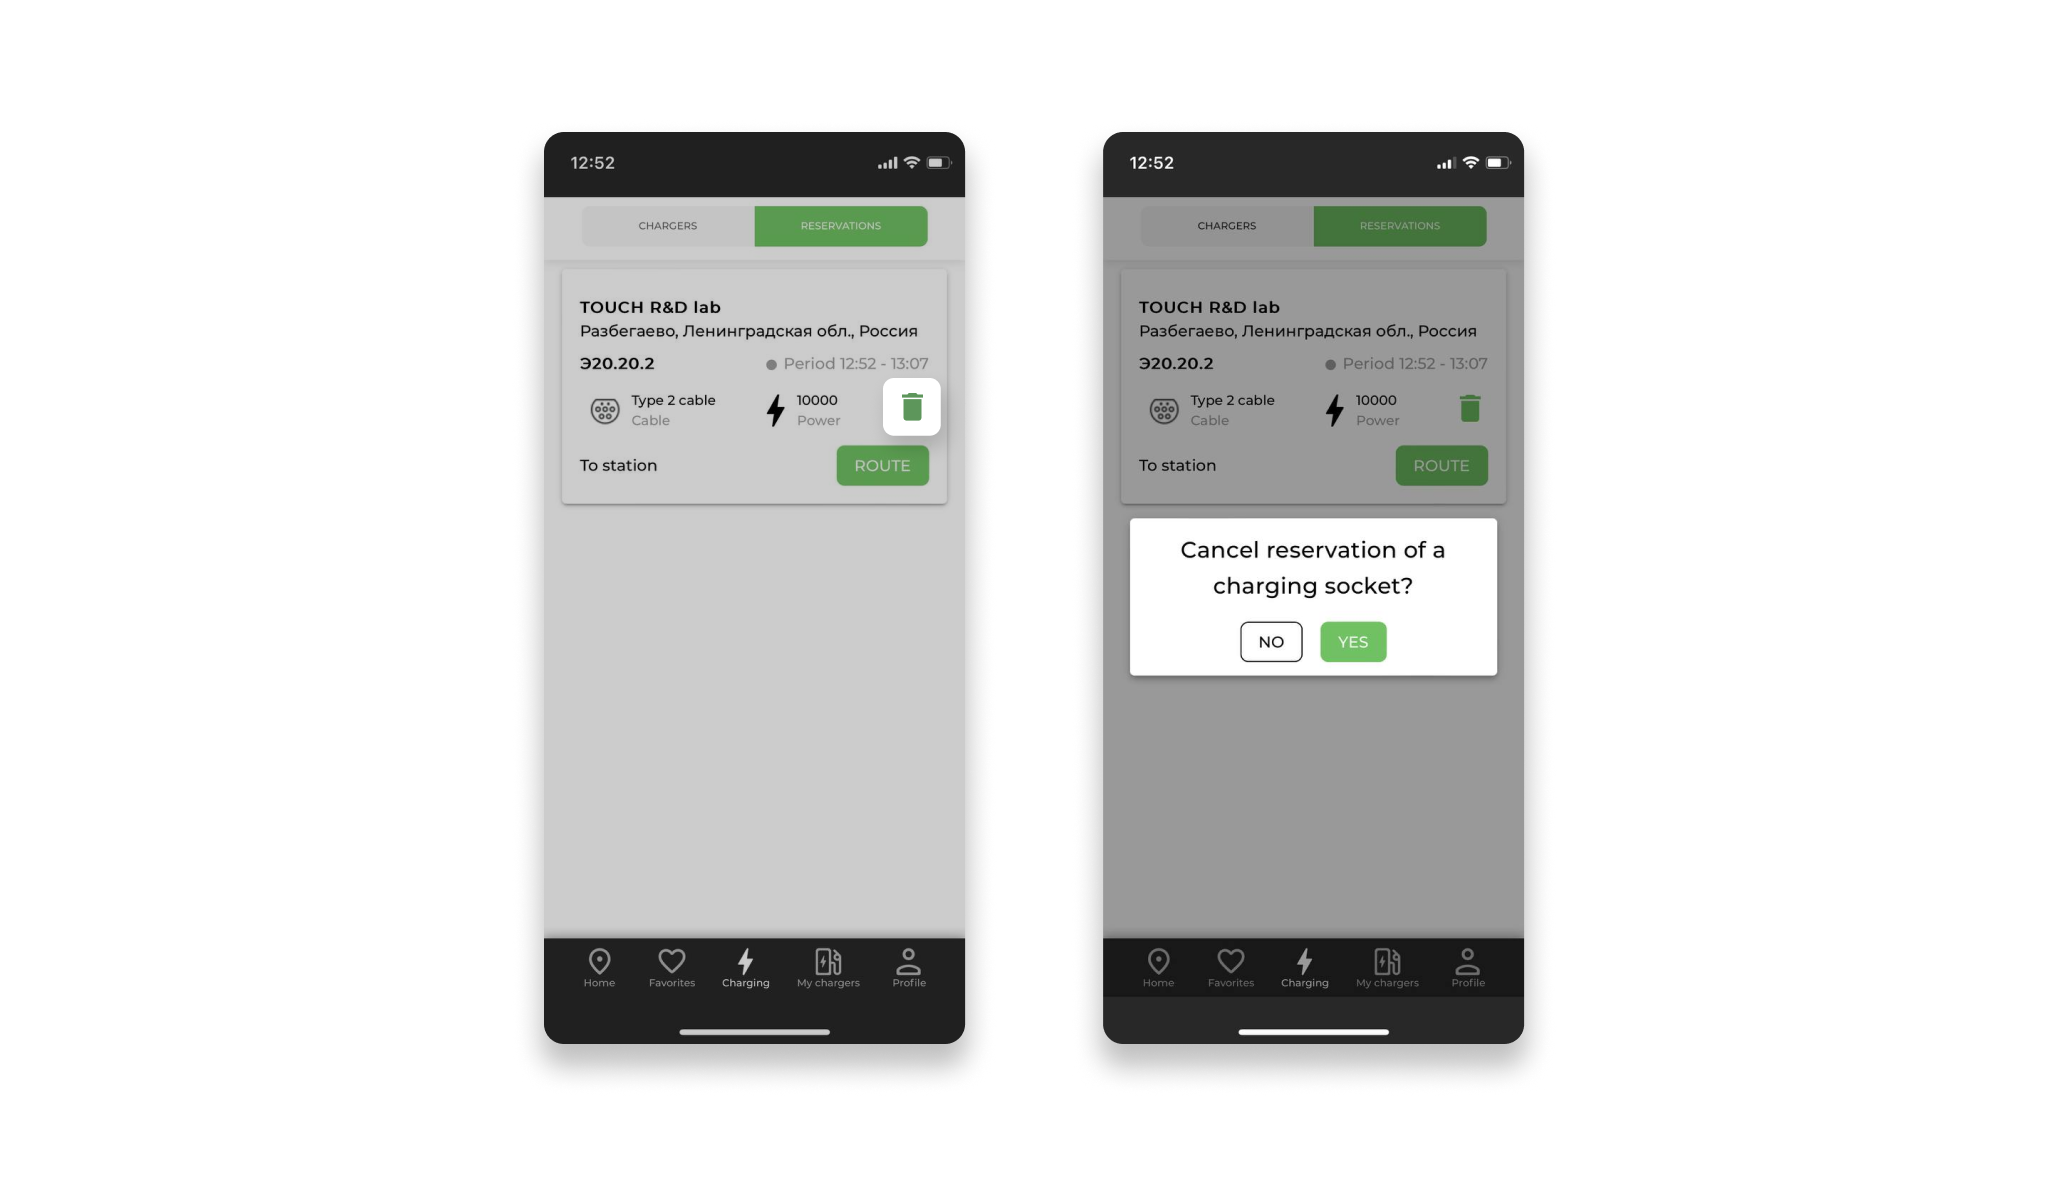
5.1.2 Cancellation of booking
If necessary, the user can cancel the booking of the station. To cancel a reservation, you must:
- Go to the "Charging" section;
- Go to the "Reservations" tab;
- Click the "Cancel booking" button;
- In the window that opens, click "Yes".
The app will automatically cancel the booking and release the station.
5.2 Charging an electric car
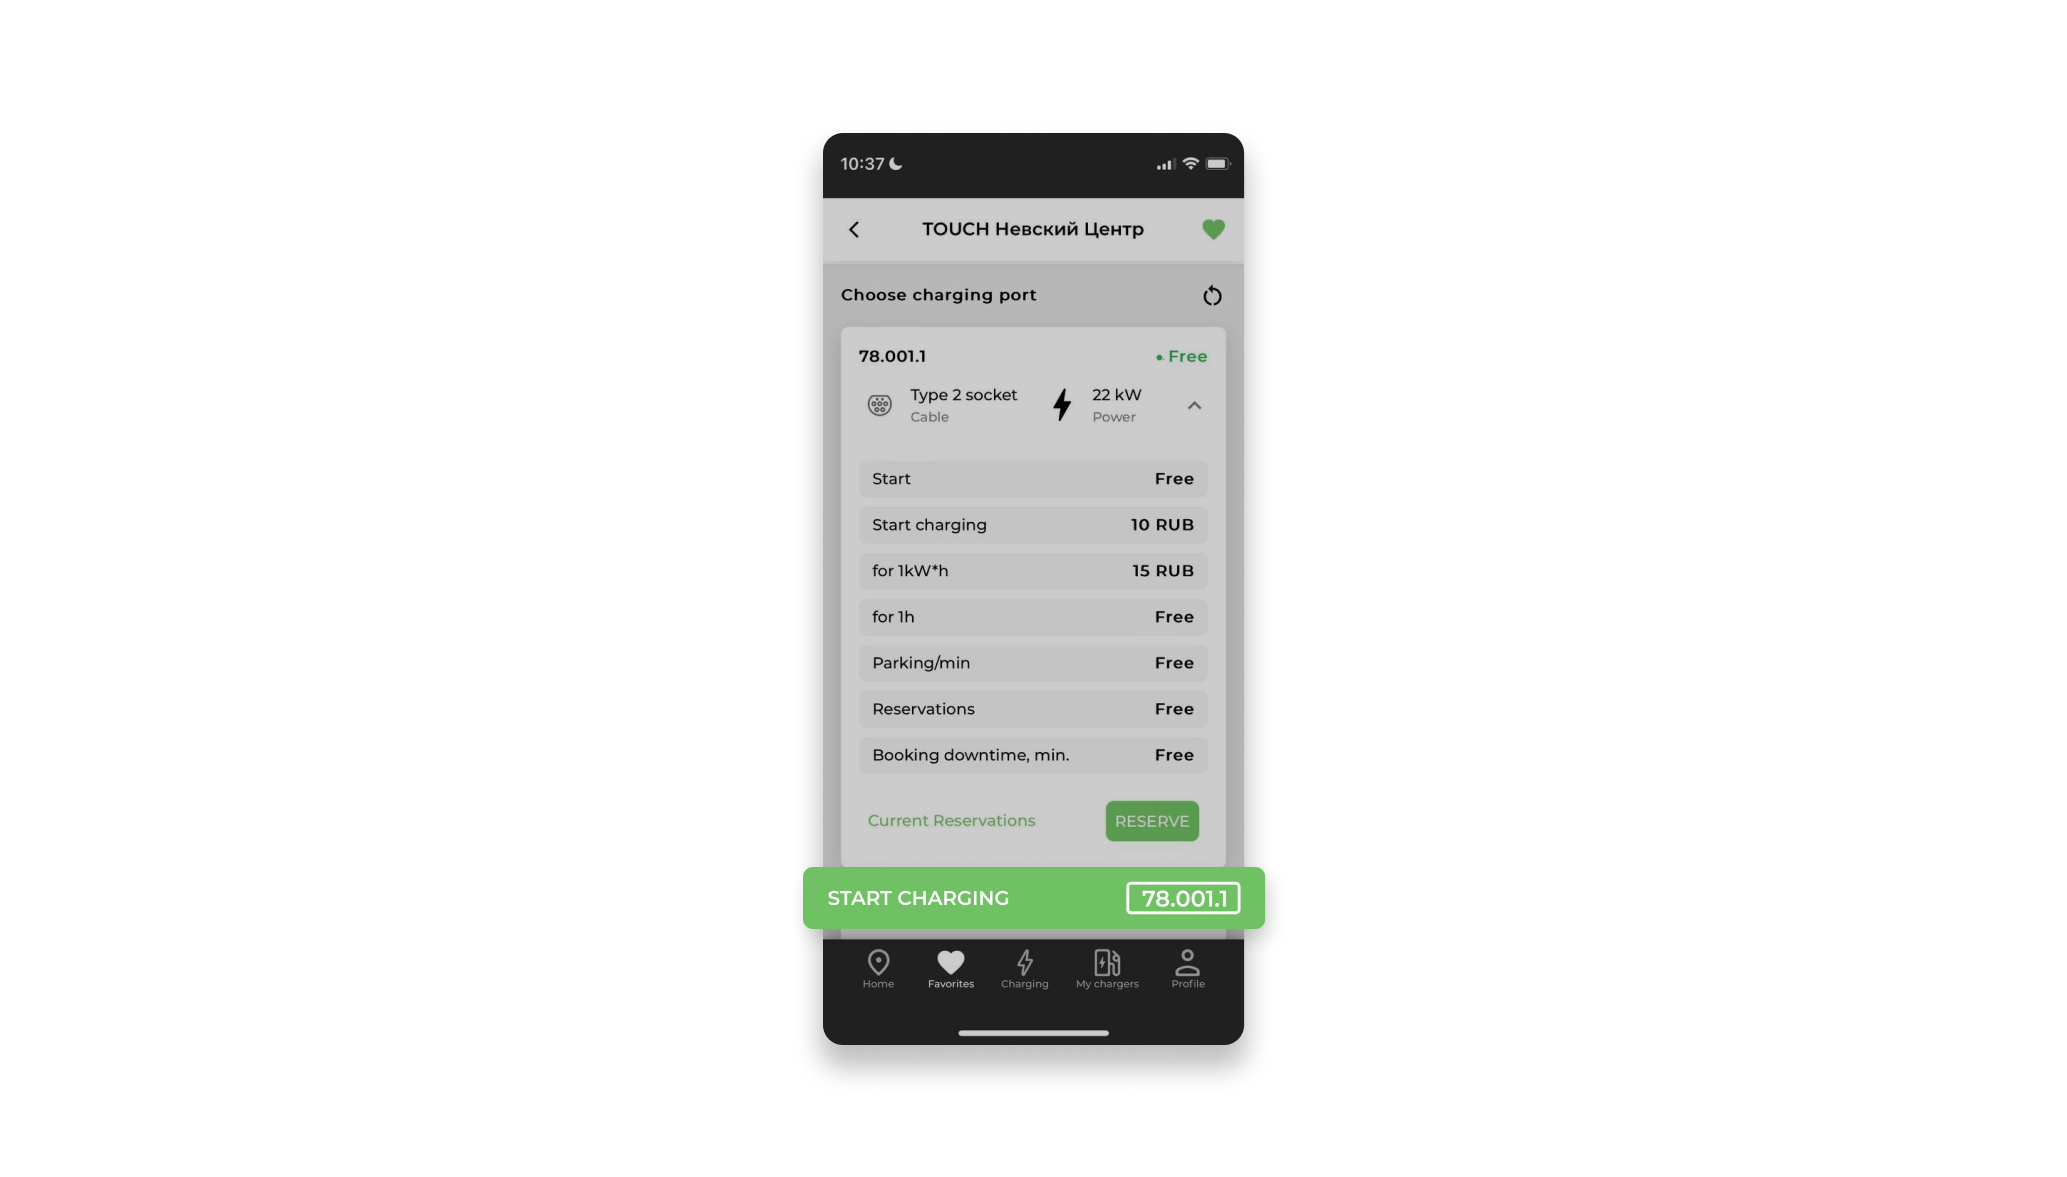
5.2.1 Start charging
To start charging the electric vehicle, the user selects the connector (port) and presses the "Start charging" button.
Before charging, the availability of a linked bank card is checked, if such a binding has not yet been carried out, the user is redirected to the "Payment Methods" subsection of the "Profile" section with the output of the corresponding message.
5.2.2 Selecting charging limits
The first step of the charging process is to select the charging limits. The user can start charging with the following restrictions:
- Up to full charge - without restrictions with the possibility of manual stop if necessary.
- Restriction on the consumed electricity (kWh) with the possibility of manual shutdown if necessary.
- Time limit (minutes)with the possibility of manual stop if necessary.
- Cost restriction (rubles) with the possibility of manual stop if necessary.
After selecting the parameter, press the "Start charging" button.

5.2.3 Starting the charging process
After confirming the start of the charging process through the "Start Charging" button, the charging process itself begins, the cable is expected to be connected, the charging start statuses at the station are passed.
The car starts charging.
After the start of the charging process, fields with counters are displayed:
- Start time - Charging start time;
- Duration - the current duration of the charging session;
- Power consumption, kW - current power consumption of electricity;
- Electricity consumed, kWh - electricity consumed;
- Charging cost - the current accrued charging cost.
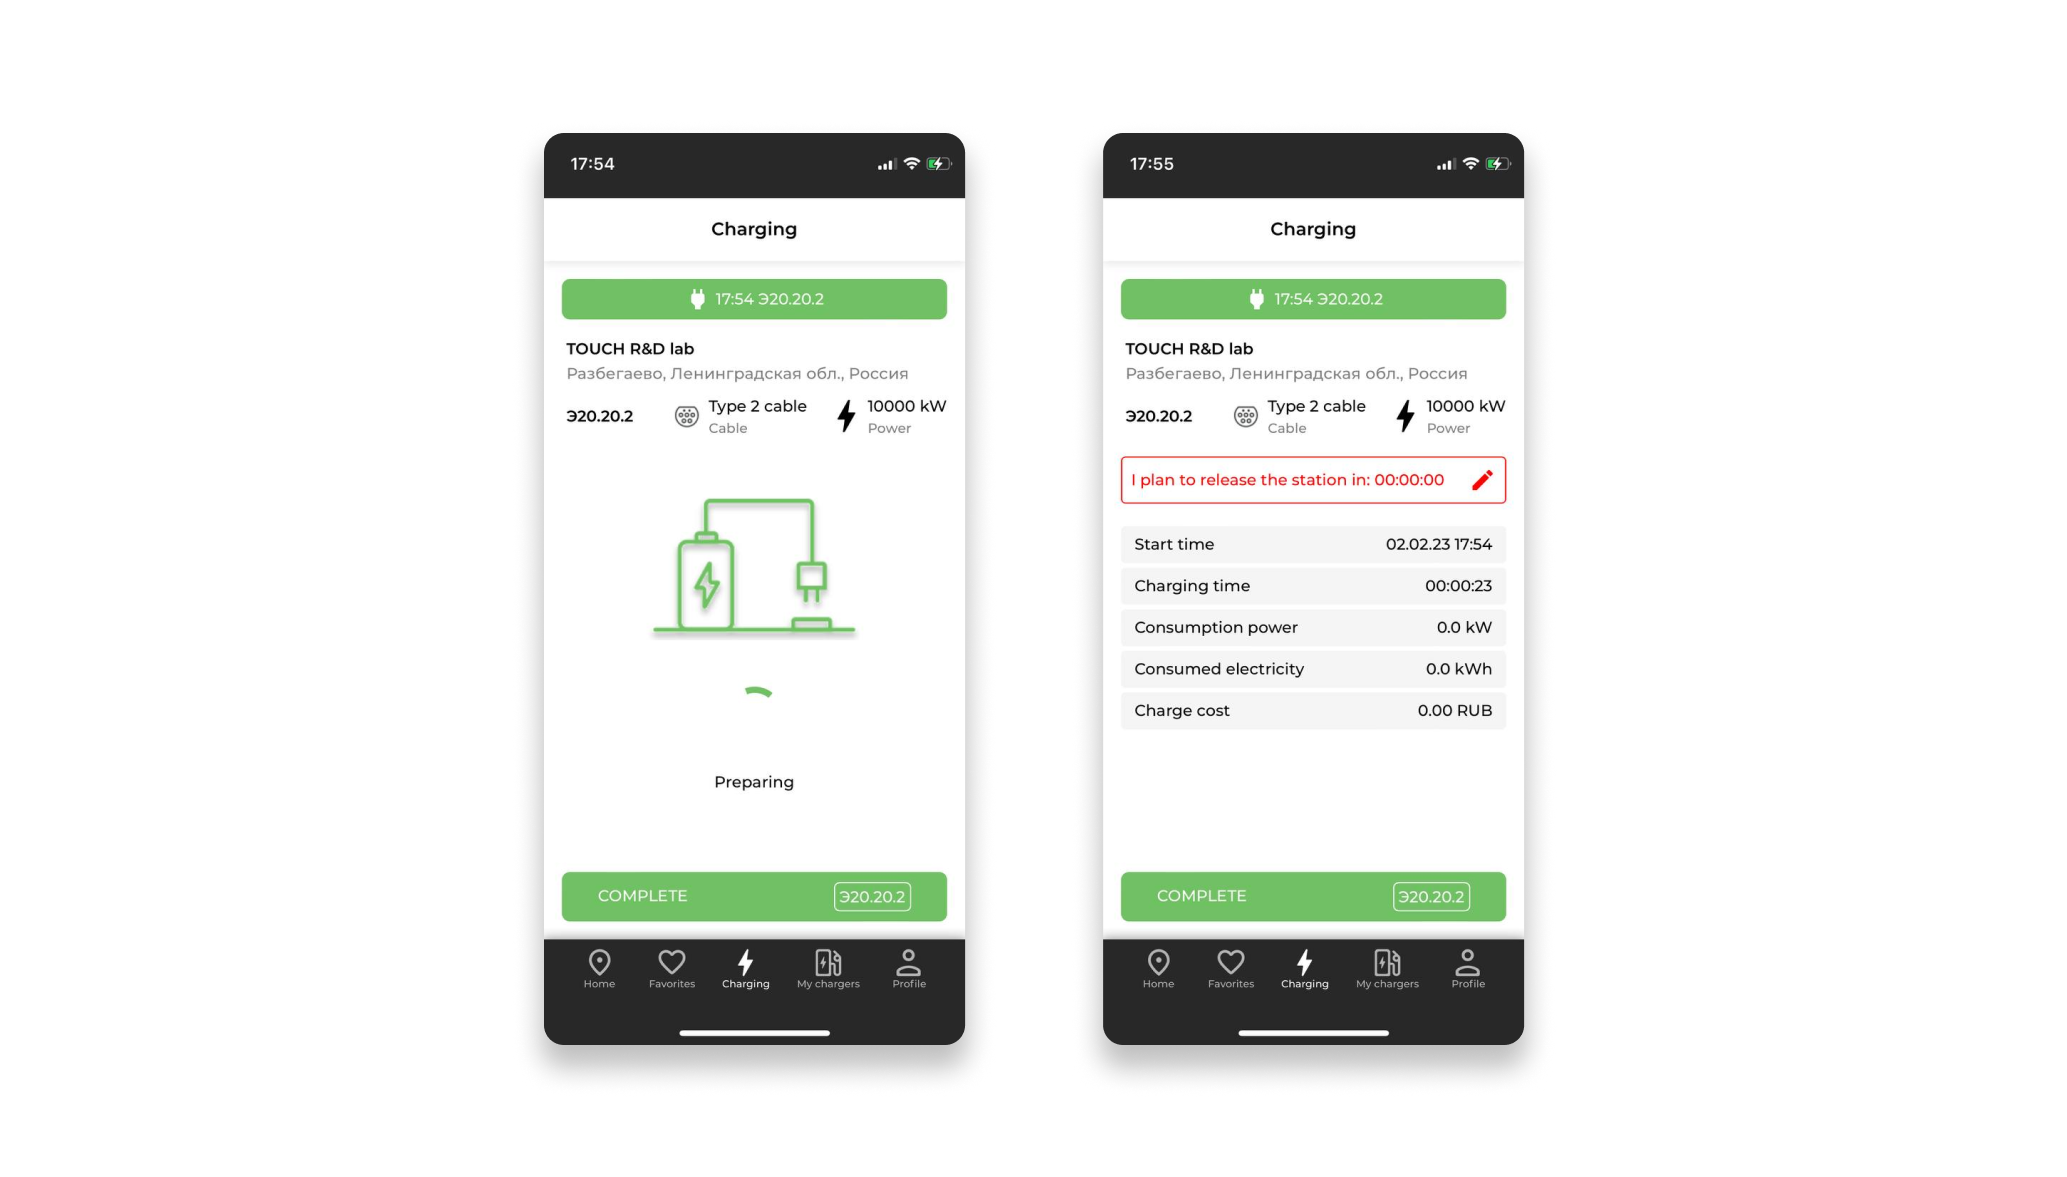
5.2.4 Charging process
The charging process will be displayed in the "Charging" section.
The function "I plan to release the station via" is available to the user. This function is NOT required for use. The user sets the approximate time of the station's release. The app is counting down the time.
THIS FUNCTION IS NEEDED FOR INFORMATION FOR OTHER USERS TO TRACK THE TIME OF STATION RELEASE.
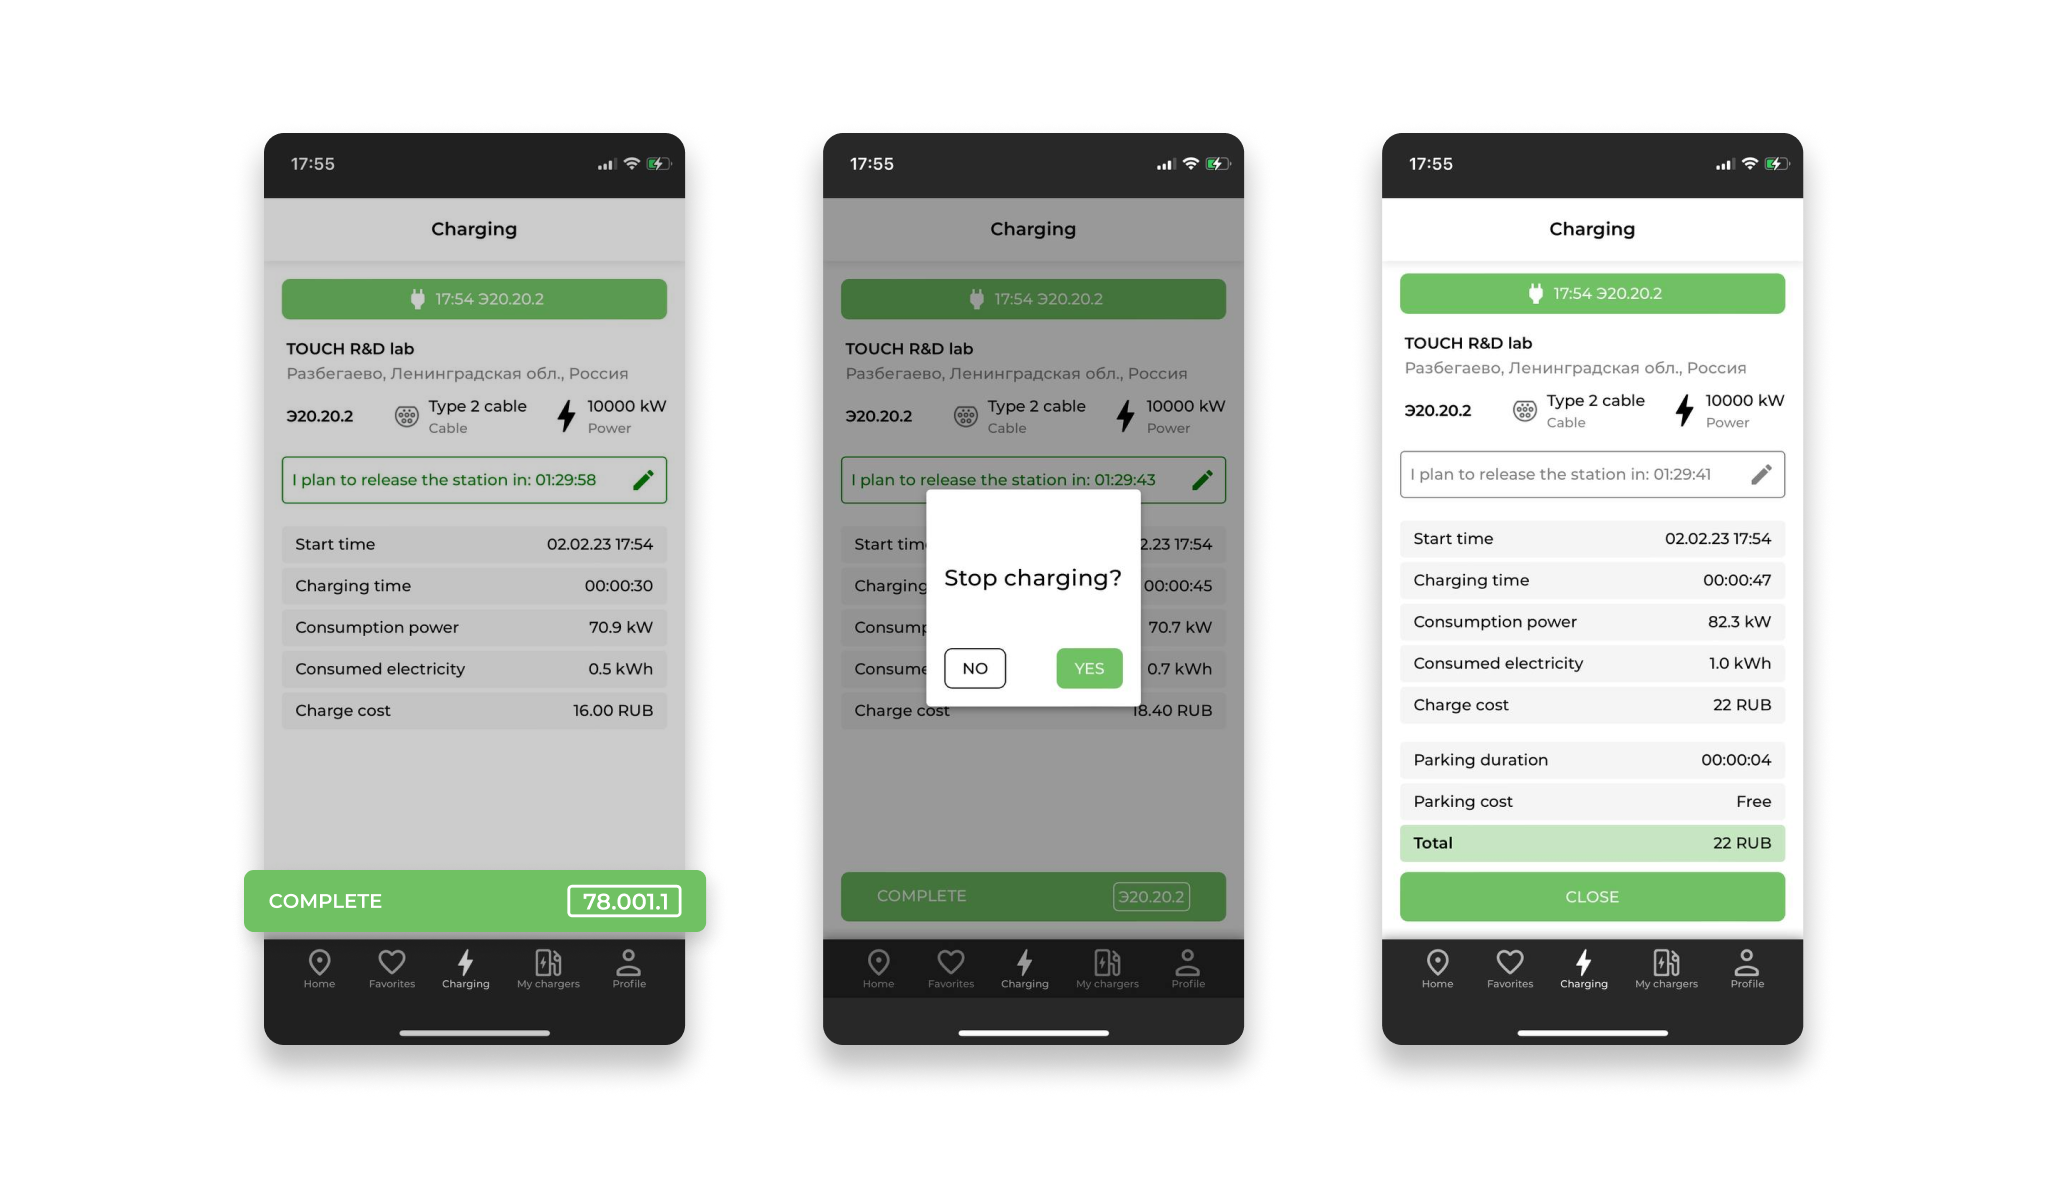
With any initial charging limitations, the user can manually stop charging at any time via the "End Charging" button.

5.2.5 Charging completion
To complete charging, click "Finish", in the window that opens, click "Yes".
Upon completion of the charging process, fields with the total values of the charging process counters will appear on the application screen:
- Start time - Charging start time;
- Duration - total charging duration;
- Charging cost - the total cost of charging;
- Electricity consumed, kWh - total electricity consumed;
- Parking duration - total parking duration;
- Parking cost - the total cost of parking.
Click "Close". The system will close the charging window.
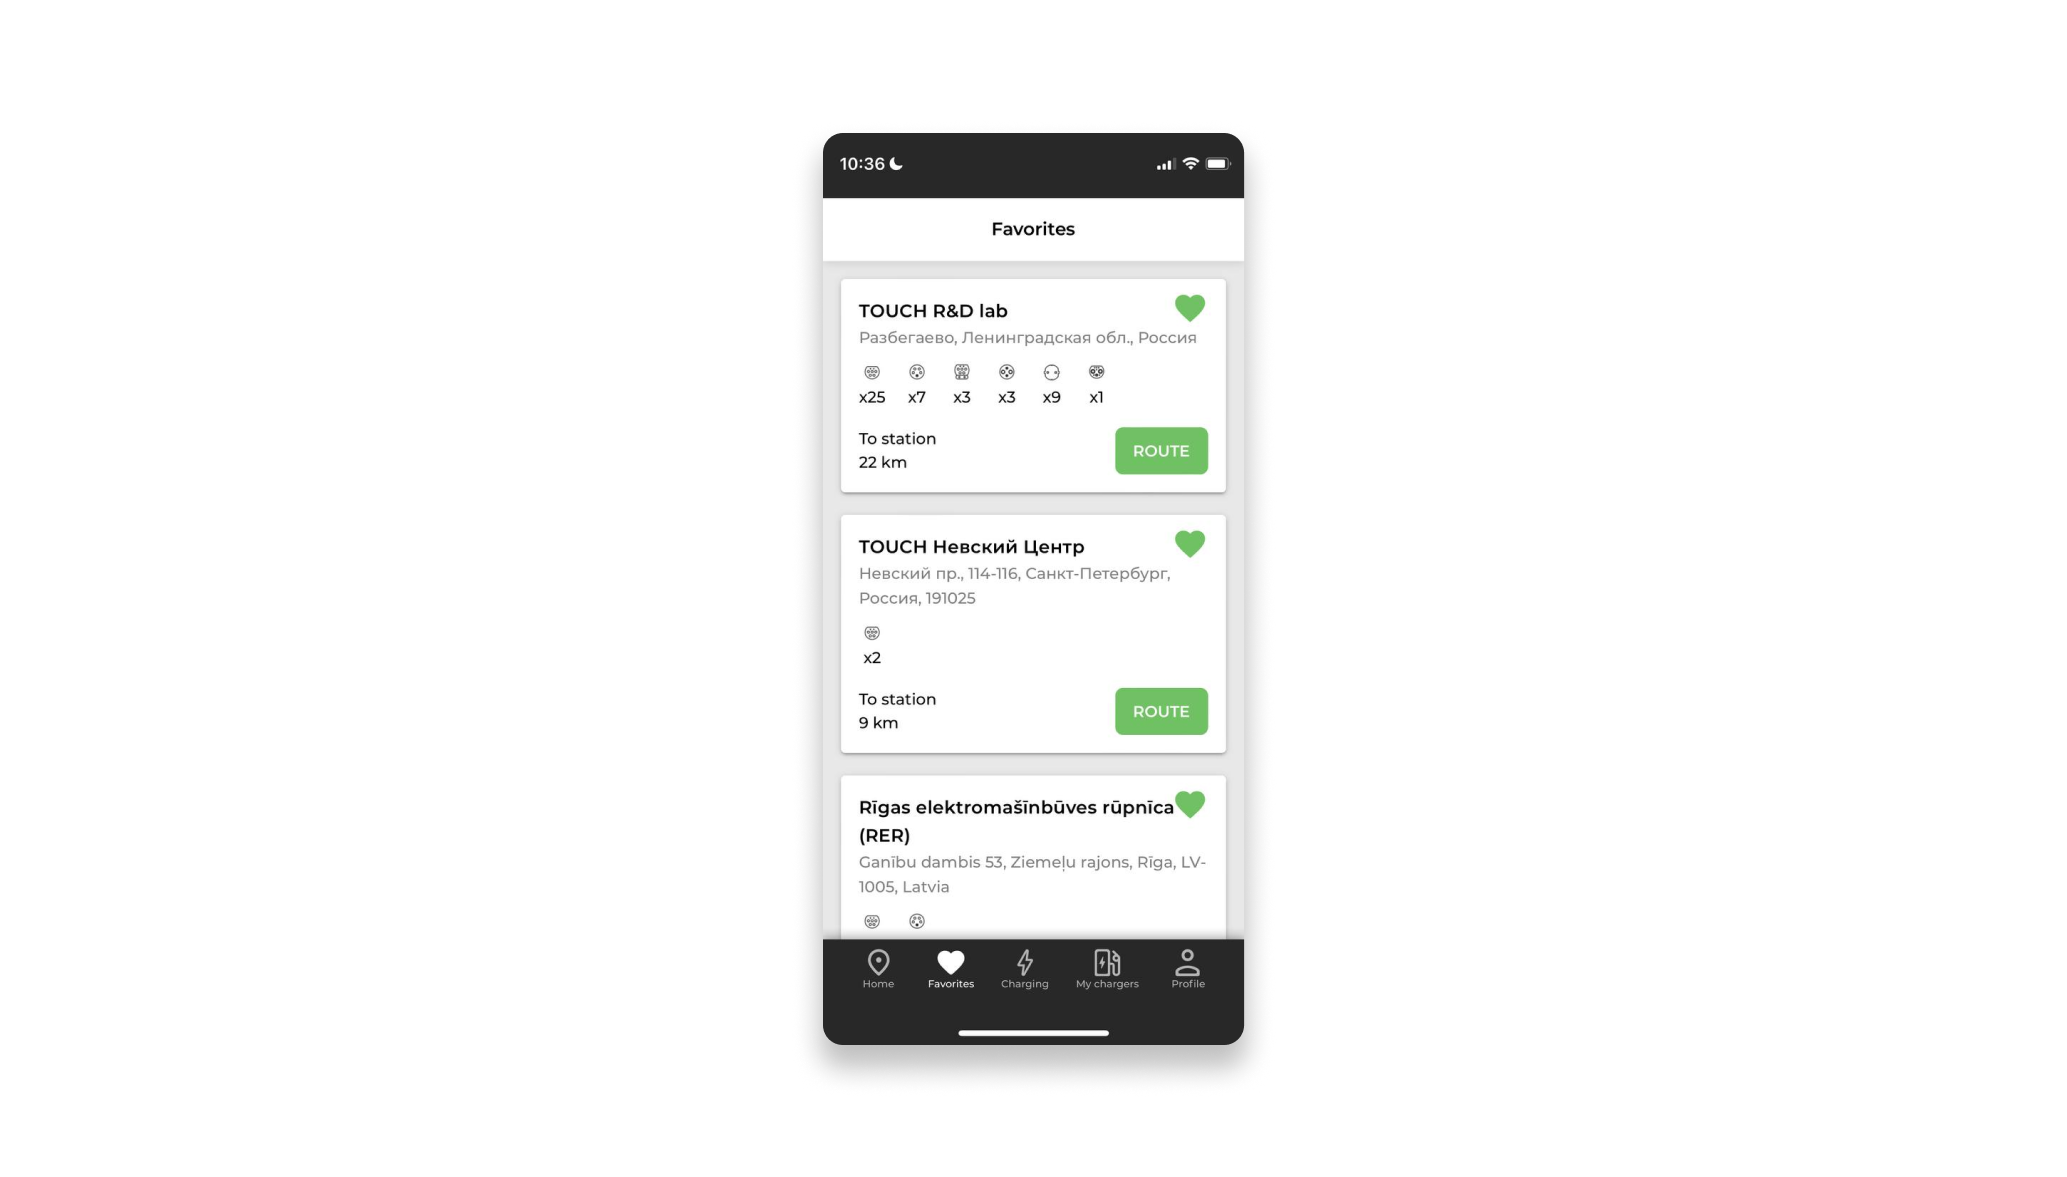
6. The "Favorites" section
Any commercial station can be added from the Location Card to the Favorites section, or excluded from Favorites in the Location Card or directly in the favorites list.
The section allows the user to:
- Quickly find a location in the list;
- Build a route to the selected location in the list:
- In the iOS app and Web version, the route building function is implemented through opening Google Maps or the default navigation application;
- In the Android application, a selection of the navigation application installed by the user opens.
- View the main parameters of the selected locations;
- Open the full Location Card to start charging, station booking or other operations.
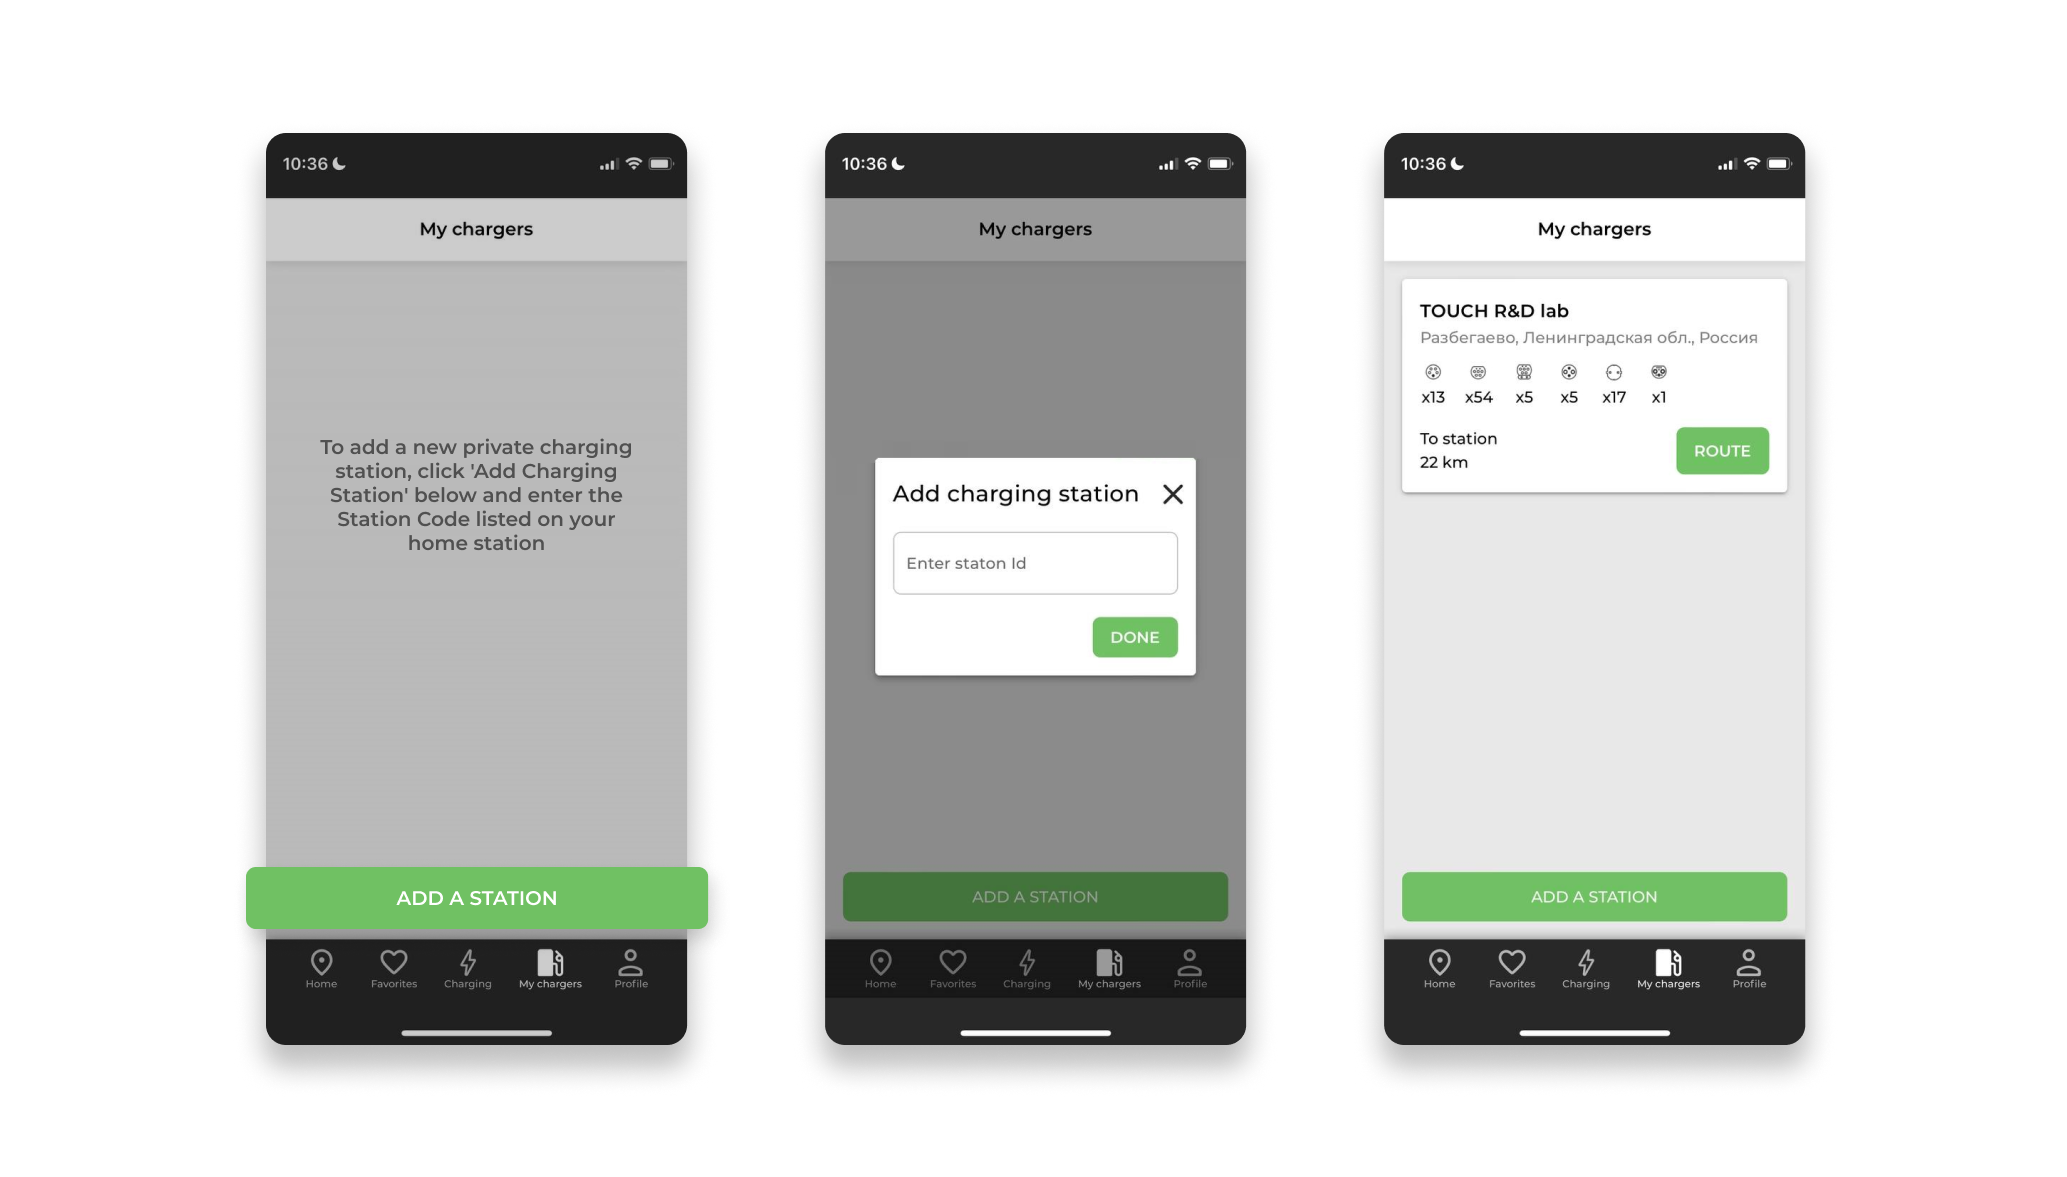
7. Section "My station"
If the user has purchased an Operator's home station with support for the OCPP v1 protocol.6j and wants to manage it through the application, it is added to the "My station" section by a special code that is indicated on the purchased station.
7.1 Adding a Home Station
To add a private charging station, the user must:
- Go to the "My station" section;
- Click "Add Station";
- In the window that opens, write a special code;
- Click "Done".
The system adds a private station to the "My Stations" list. The user can, if necessary, set a route to his station from the list.
If a new private station is purchased, the user also adds a station using the "Add Station" button.
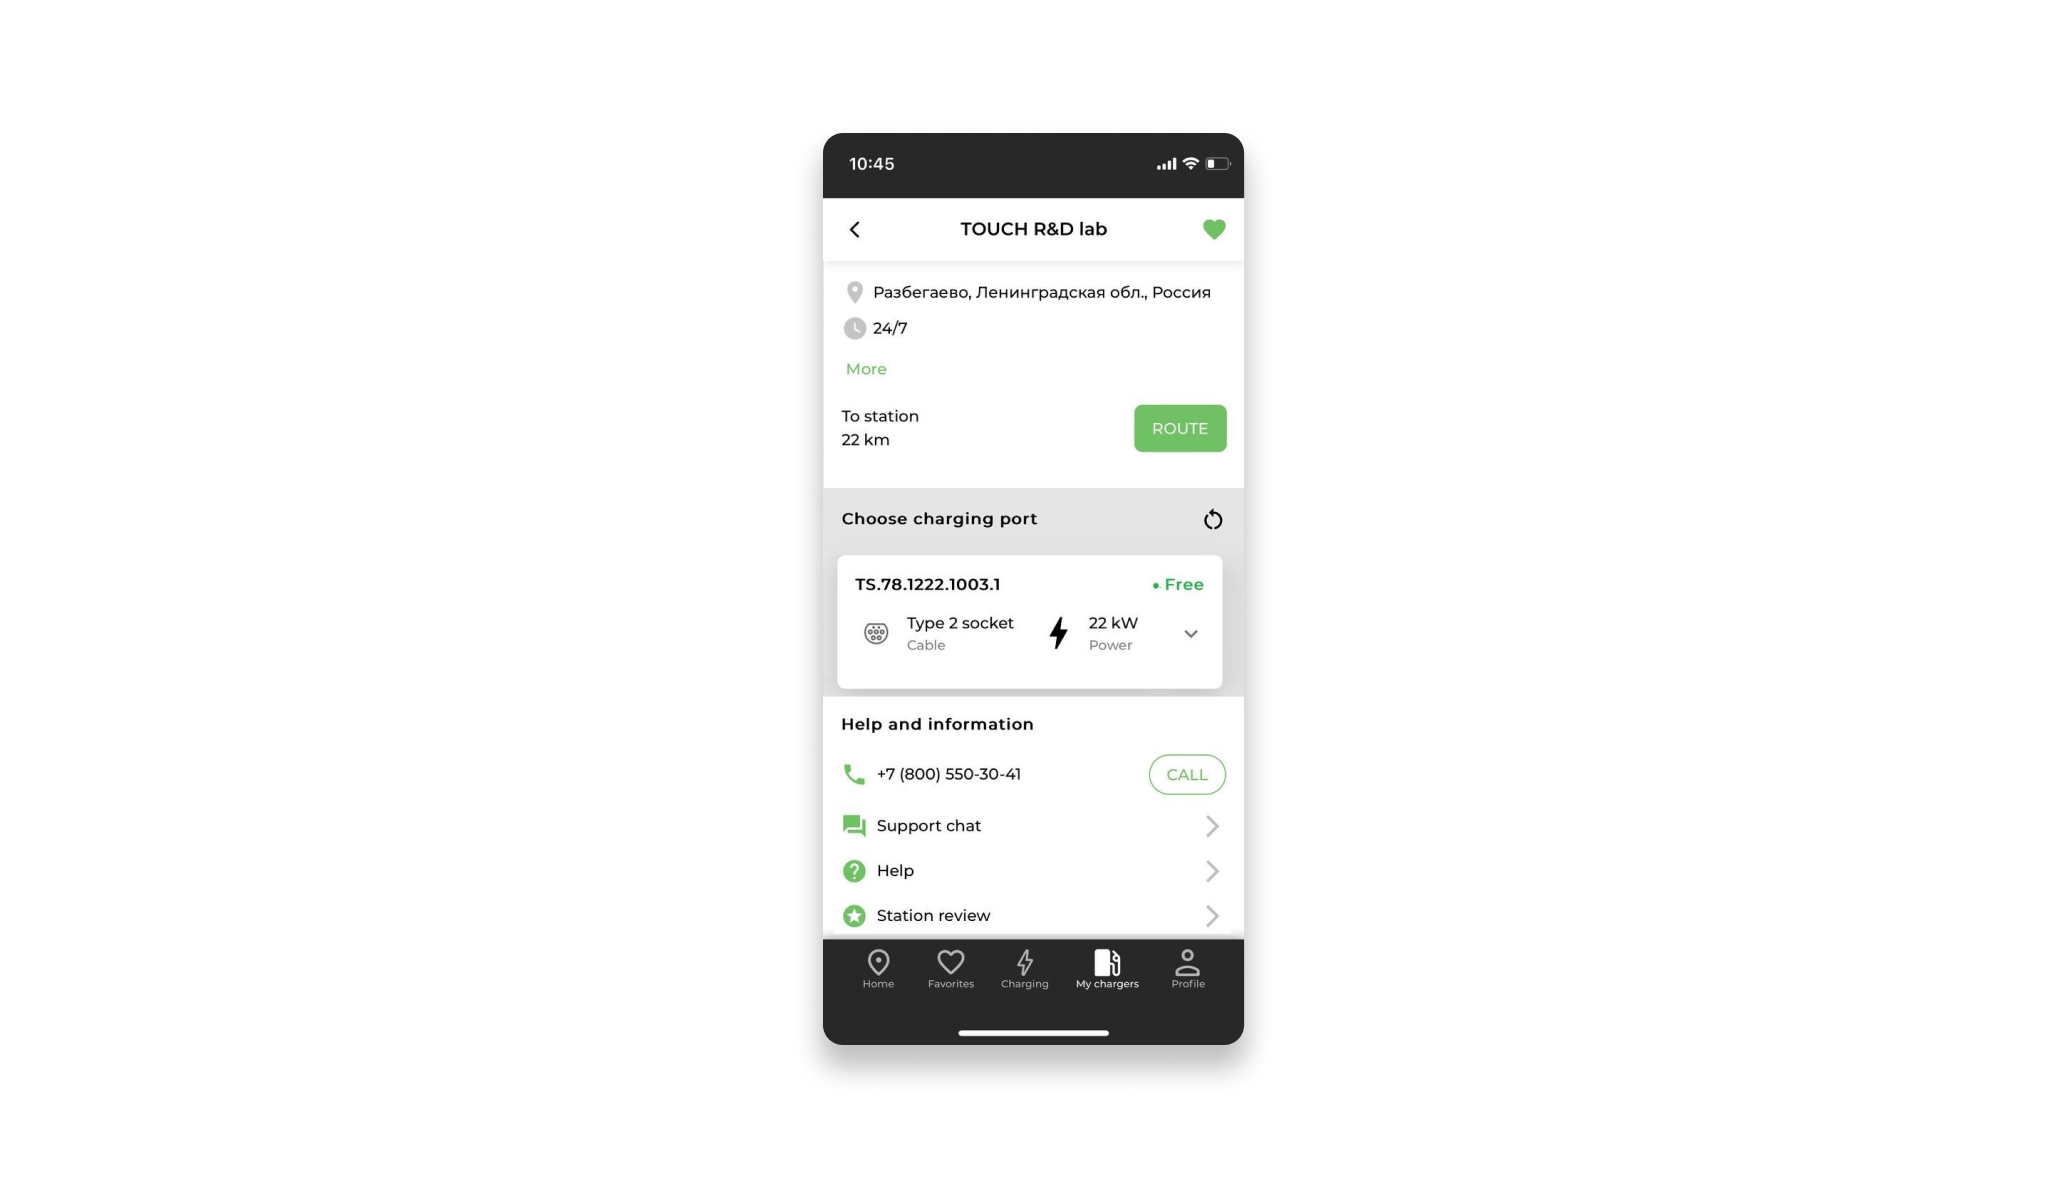
7.2 Home Station Management
The management of a private home charging station is similar to commercial stations, except for the lack of options that are associated with payment.
The user can from the station card:
- Start charging;
- Delete a private station using the "Delete" button;
- Set a route to the station;
- Go to the technical support chat;
- Open the help for the application.
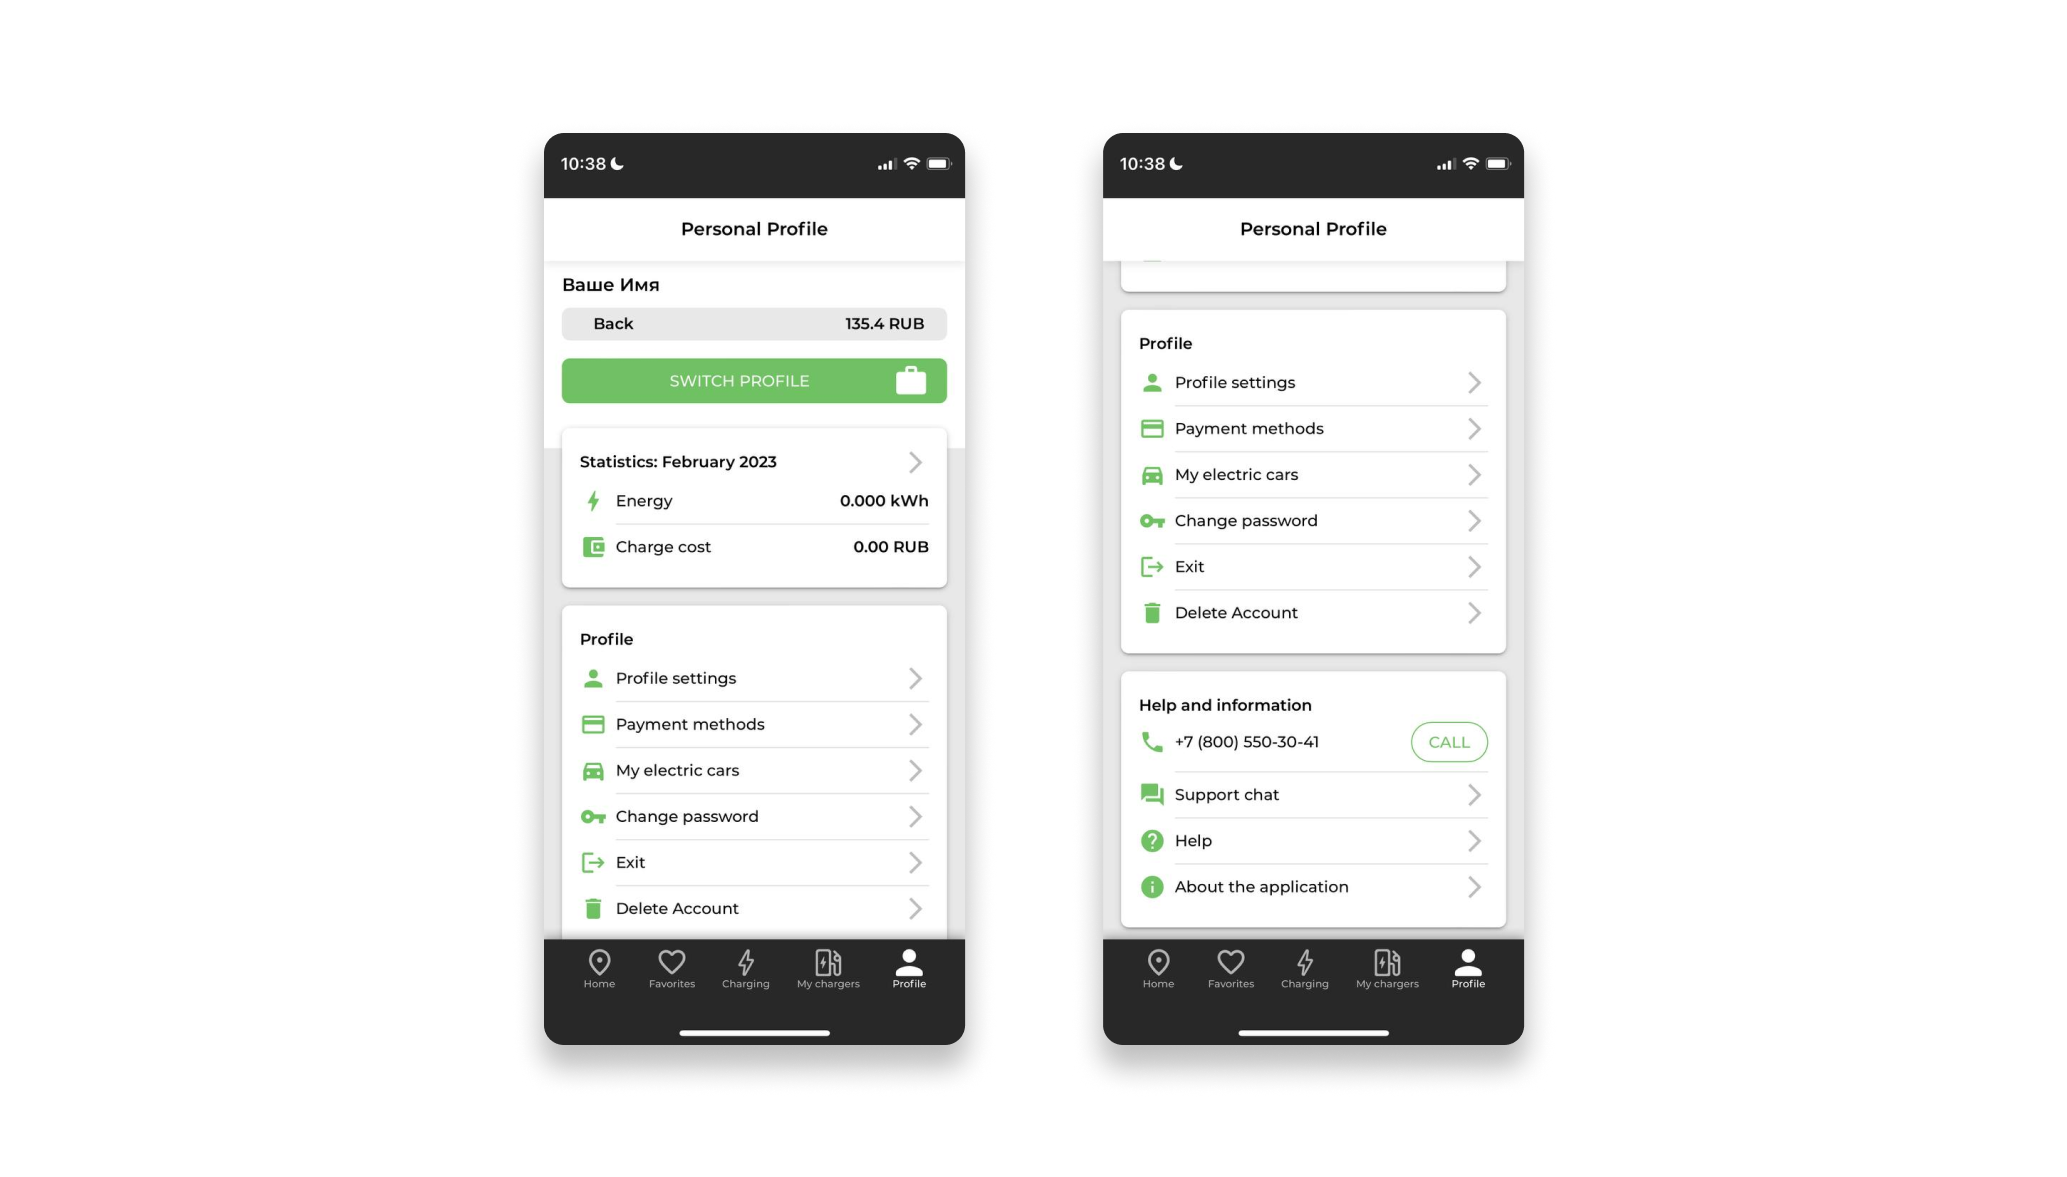
8. Section "Profile"
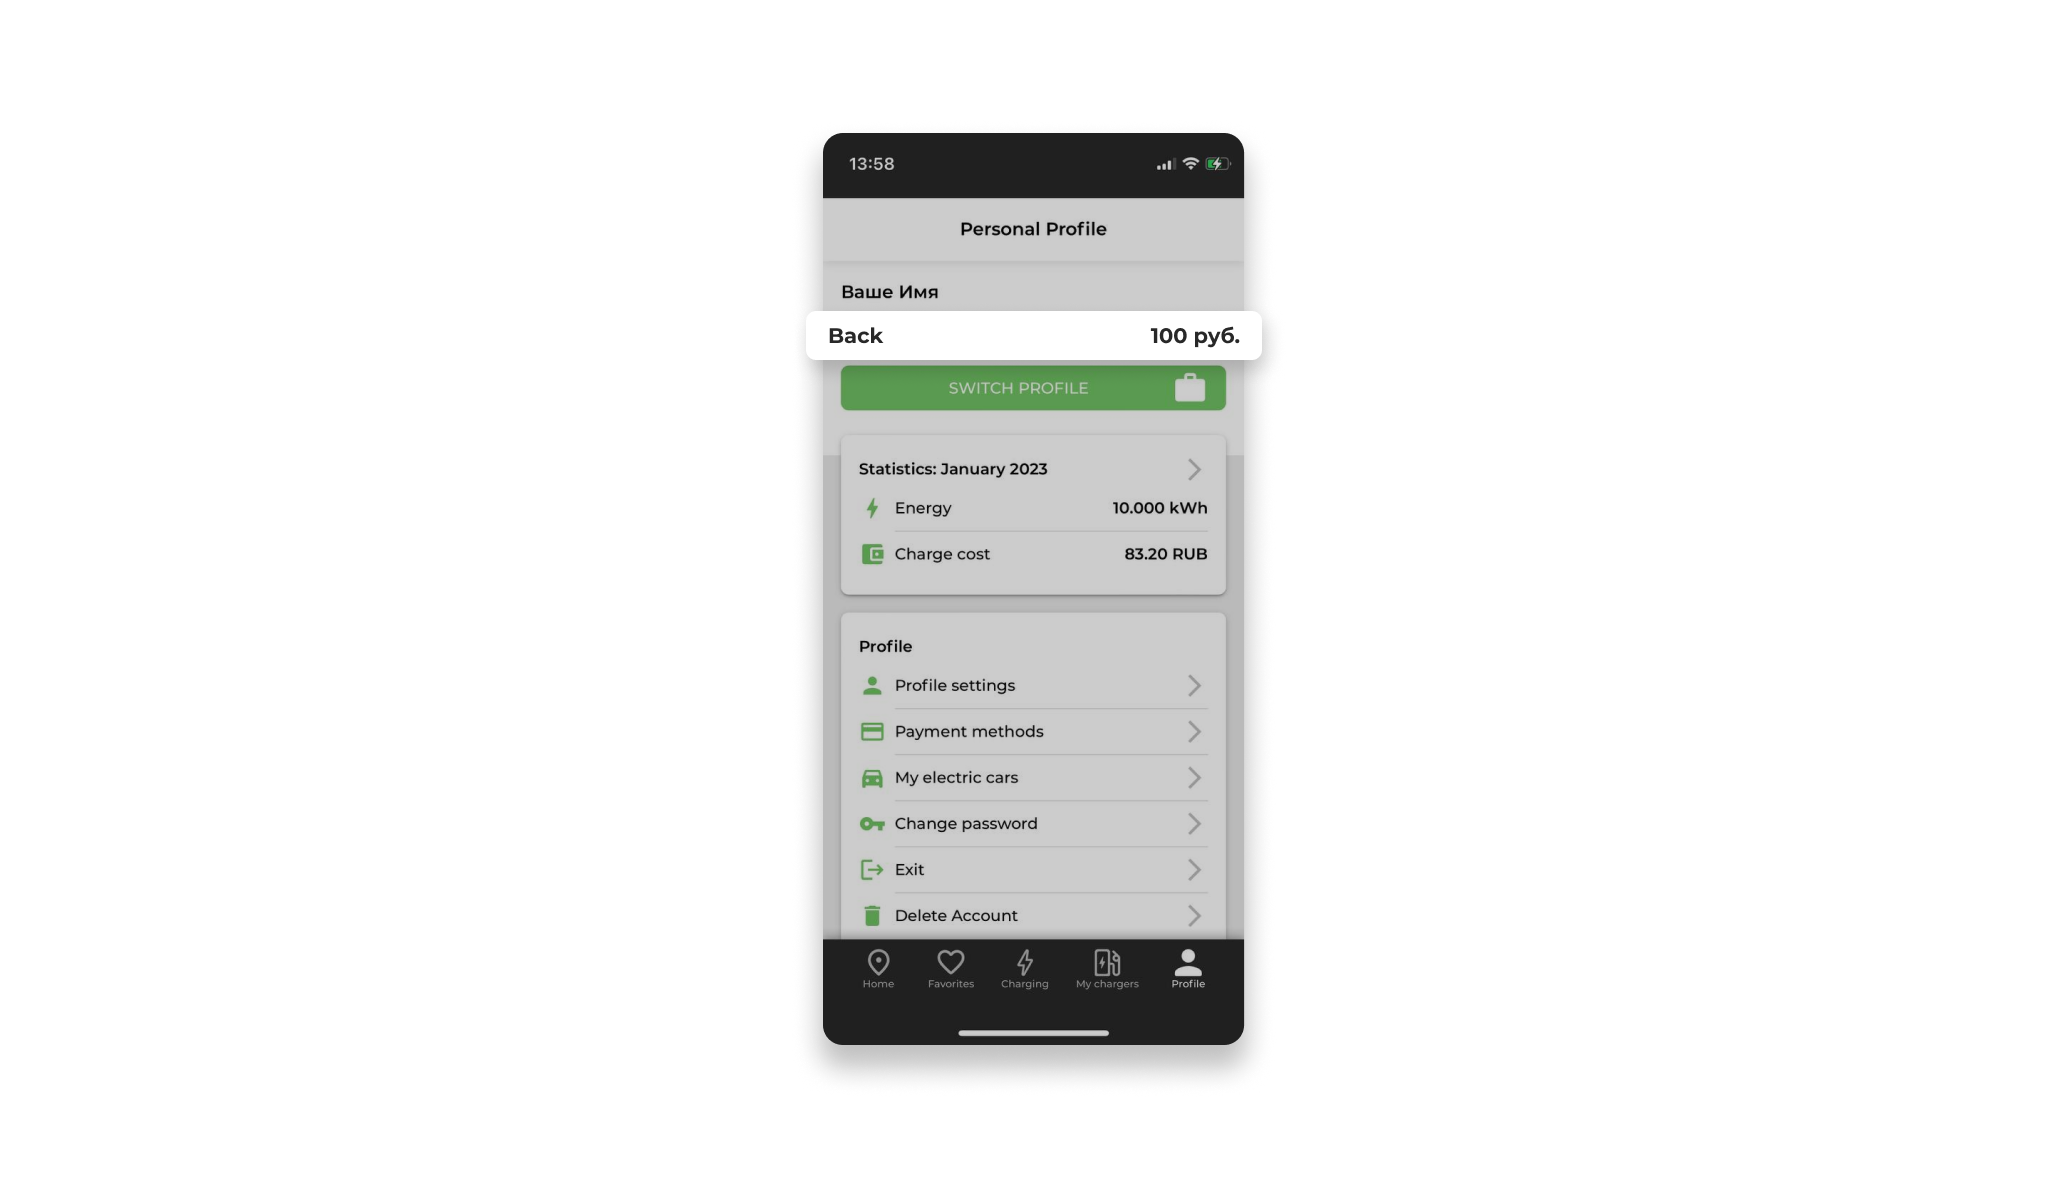
8.1 General view of the section and main features
The "Profile" section allows you to:
- View the user's charging statistics for the current month and, when disclosing statistics, see the entire history of their charges;
- Edit your profile:
- Username;
- E-Mail;
- Phone number;
- Change the language
- Change payment methods;
- Add information about electric vehicles;
- Change password;
- Exit the app;
- Delete account;
- Open a chat with support;
- Open User Manuals;
- Open program details:
- Privacy Policy;
- Terms of use of the application;
- Go to the website.
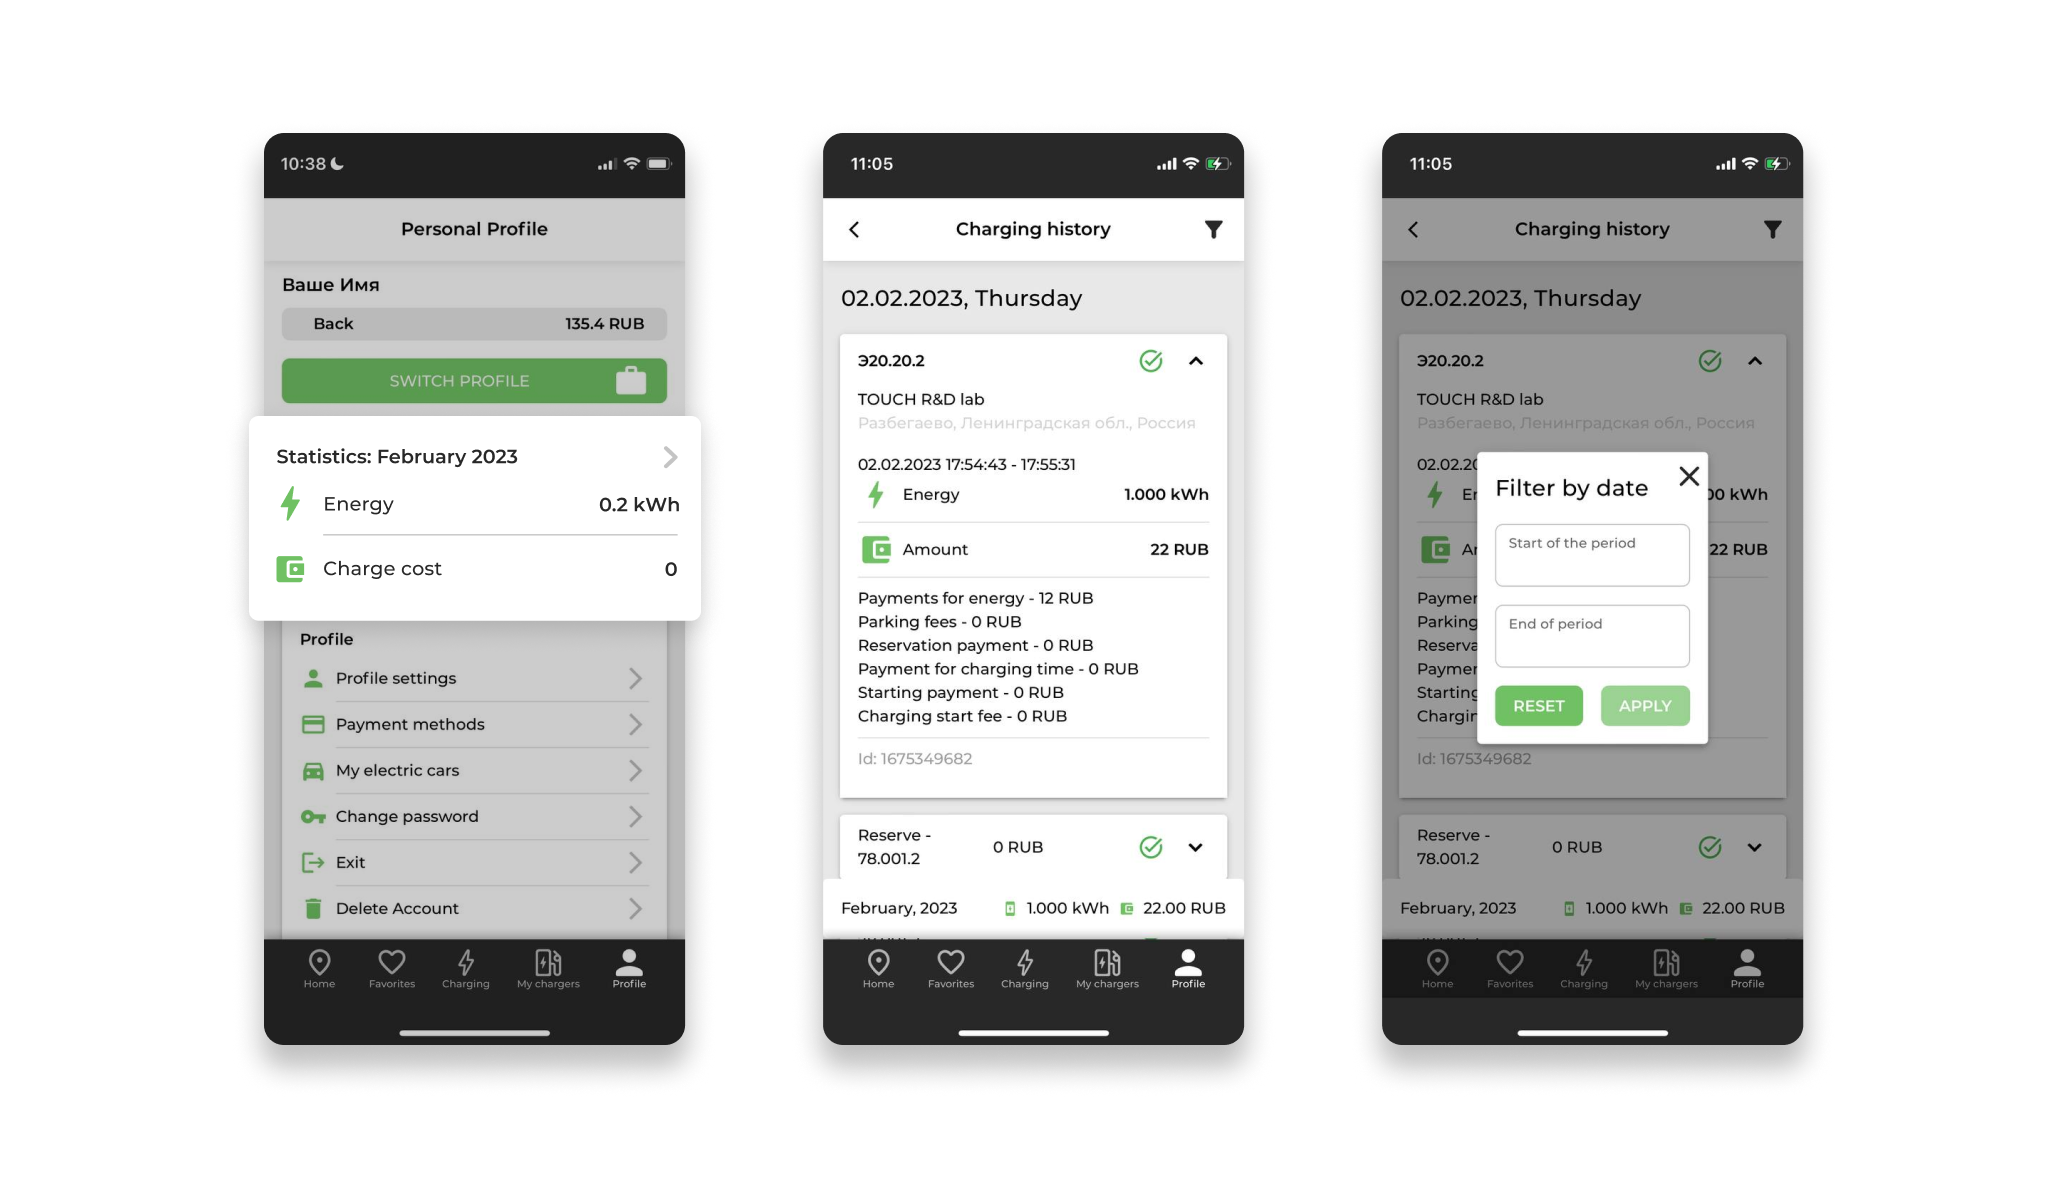
8.2 Charging History
The history of all user charges opens when you click on the statistics of charges for the current month in the "Profile" section.
Each record in the History can be further expanded by clicking on it and view detailed information about the charging time, the amount of electricity consumed and the cost of the session.
In the charging history, the ability to filter charging sessions by date is available.
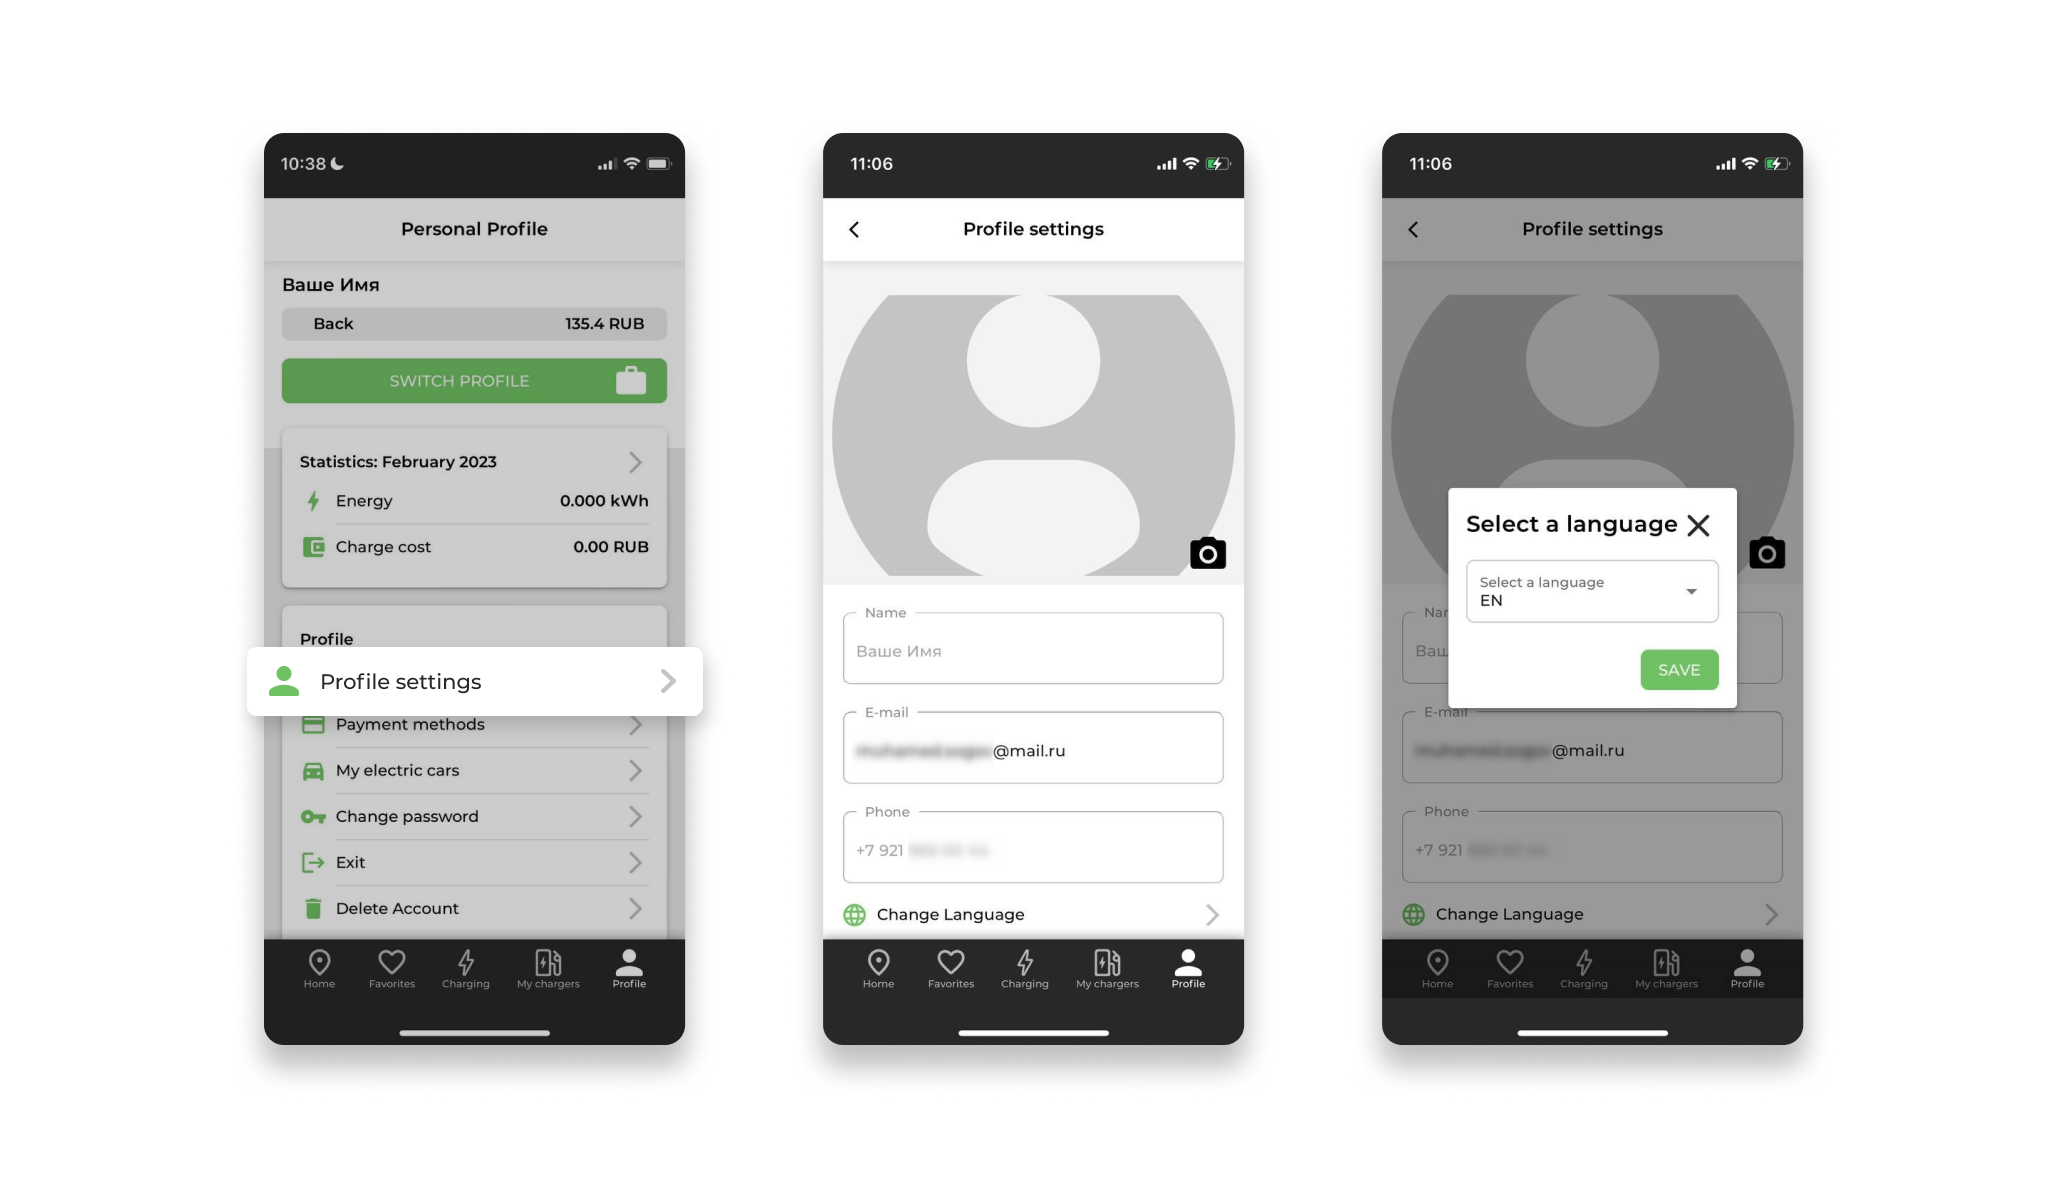
8.3 Profile Settings
Profile settings are available from the "Profile" section. The user can change:
- User Name;
- E-mail;
- Phone;
- Change the language.
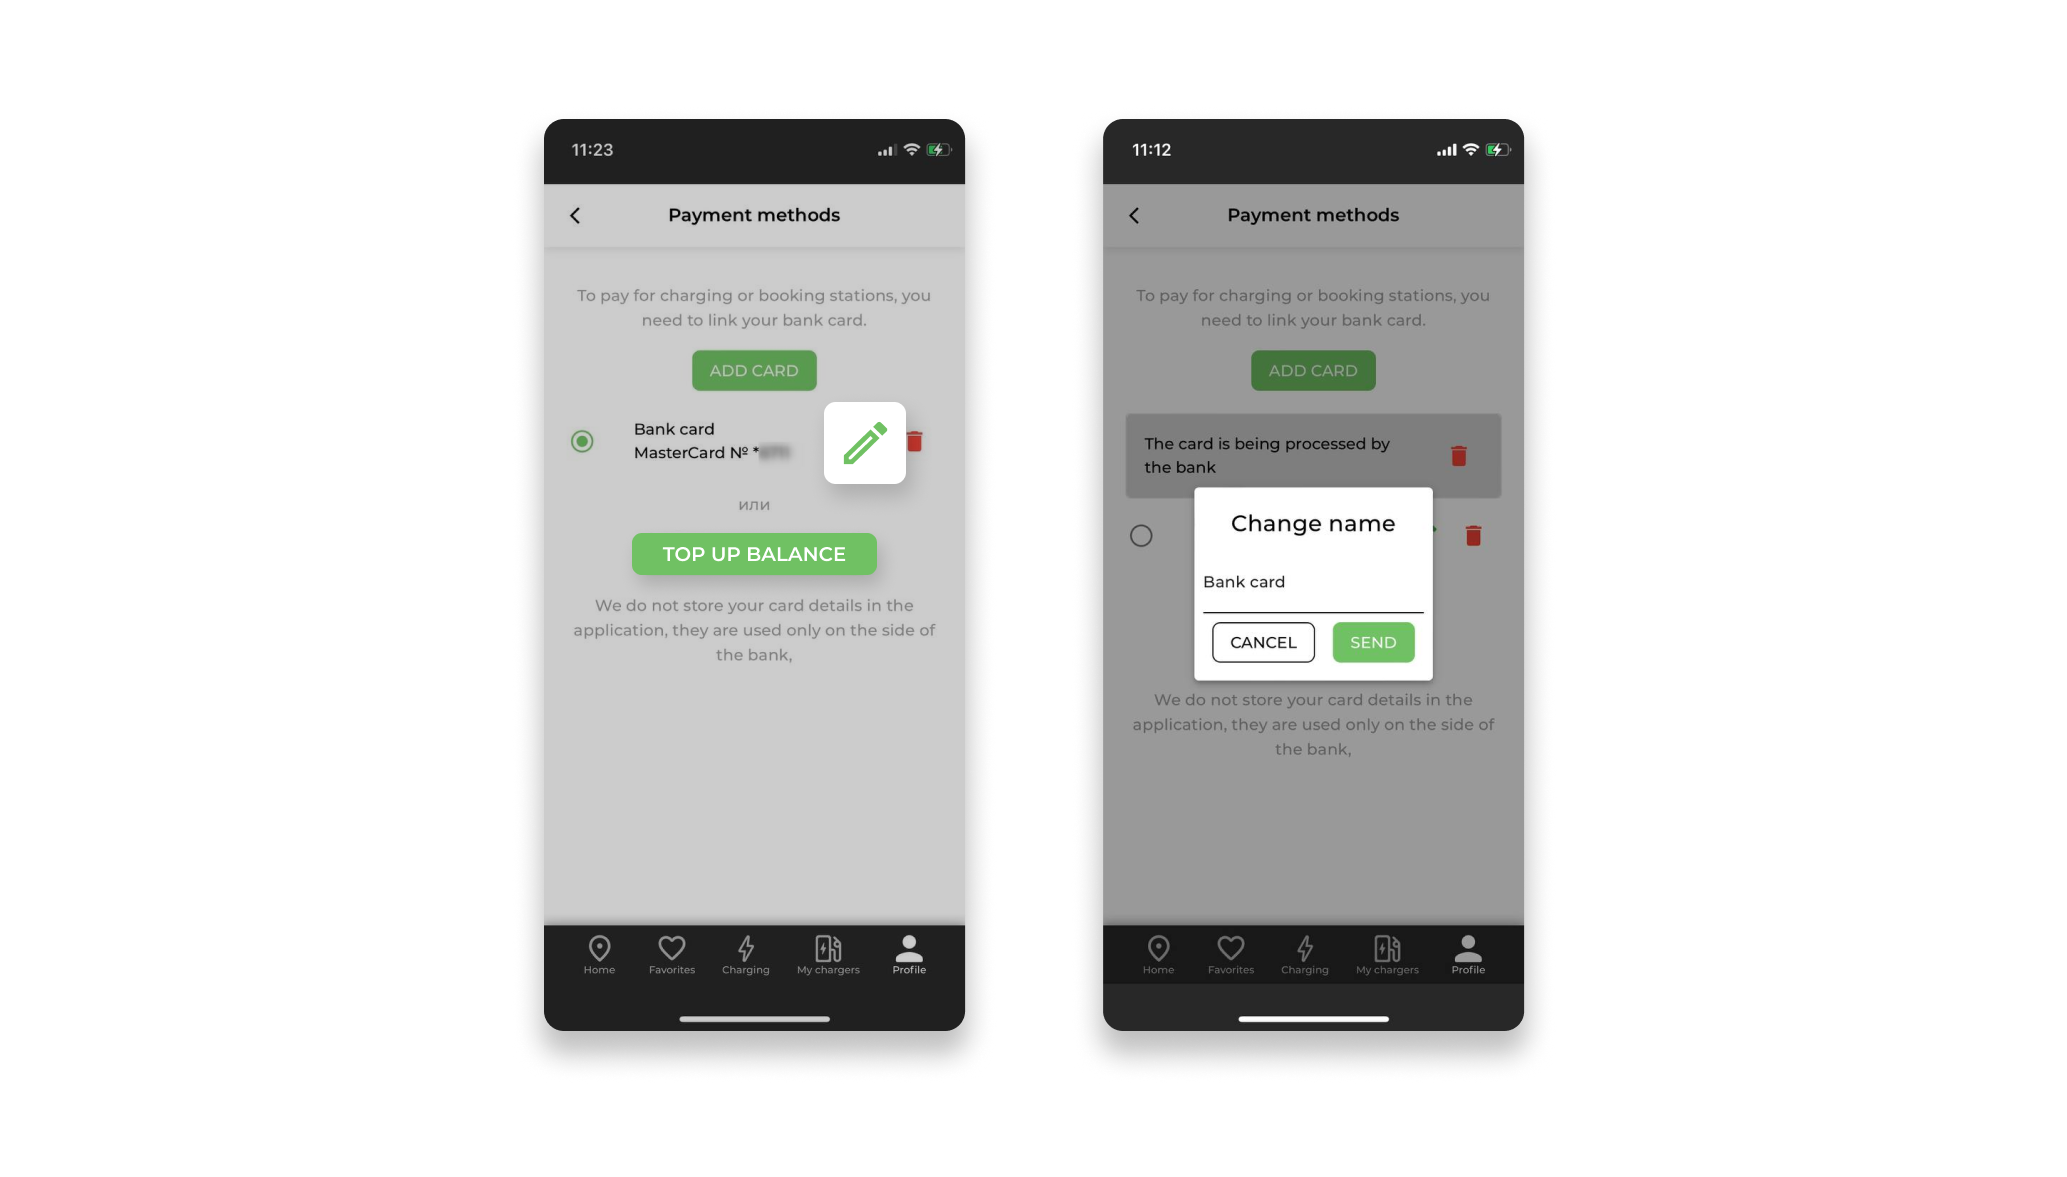
8.4 Payment Methods
Before performing the first paid operation (the beginning of the first charging) or at any convenient moment, the user must link a bank card in the "Payment methods" subsection.
The user also has access to the internal balance replenishment function. After the start of the charging session, the funds will be debited first from the internal balance, and then from the bank card.
8.4.1 Linking bank cards
To link the card, the user needs to go to the "Payment methods" subsection:
- Click "Link Card":
If the number is not confirmed, the system will not allow you to link a bank card.
- Enter your bank card details in the window that opens:
When linking the card, a trial debit is made in the amount of 1 ruble to confirm the availability of the account. This amount is returned to the user's card.

The system binds the bank card and displays it in payment methods. Data about linked cards is NOT STORED in the application, all payment transactions take place on the bank's side.
If necessary, the user is provided with the possibility of linking several cards by the user and switching the active bank card to pay for paid transactions.
The user has access to the function of editing the name of the bank card, in the case of linking several bank cards. To do this, click "Edit".
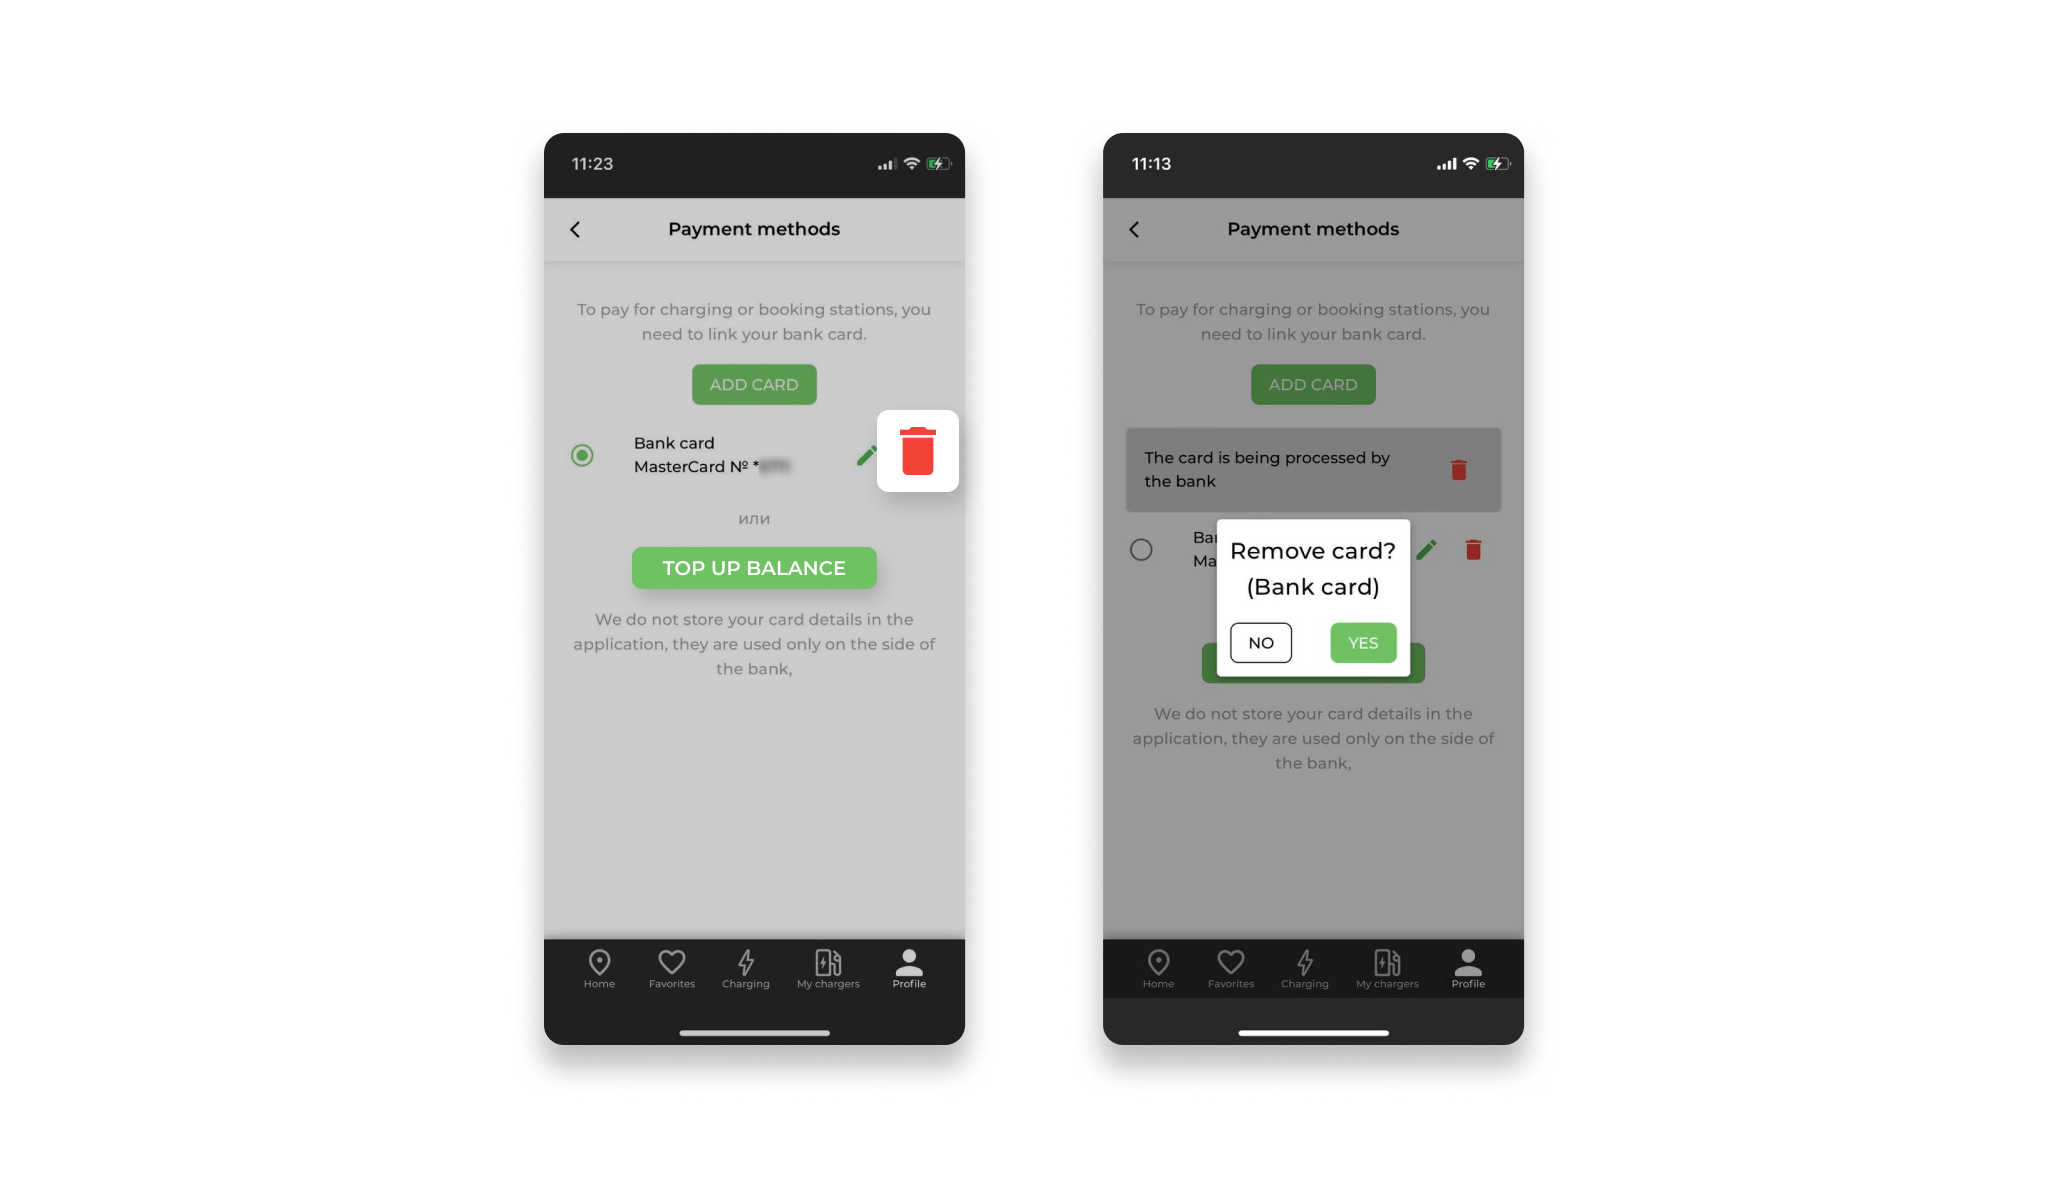
8.4.2 Unbinding of bank cards
At any time, the user can unlink the old card and link another bank card.
To do this, click the "Delete" button and confirm the operation in the window that opens.
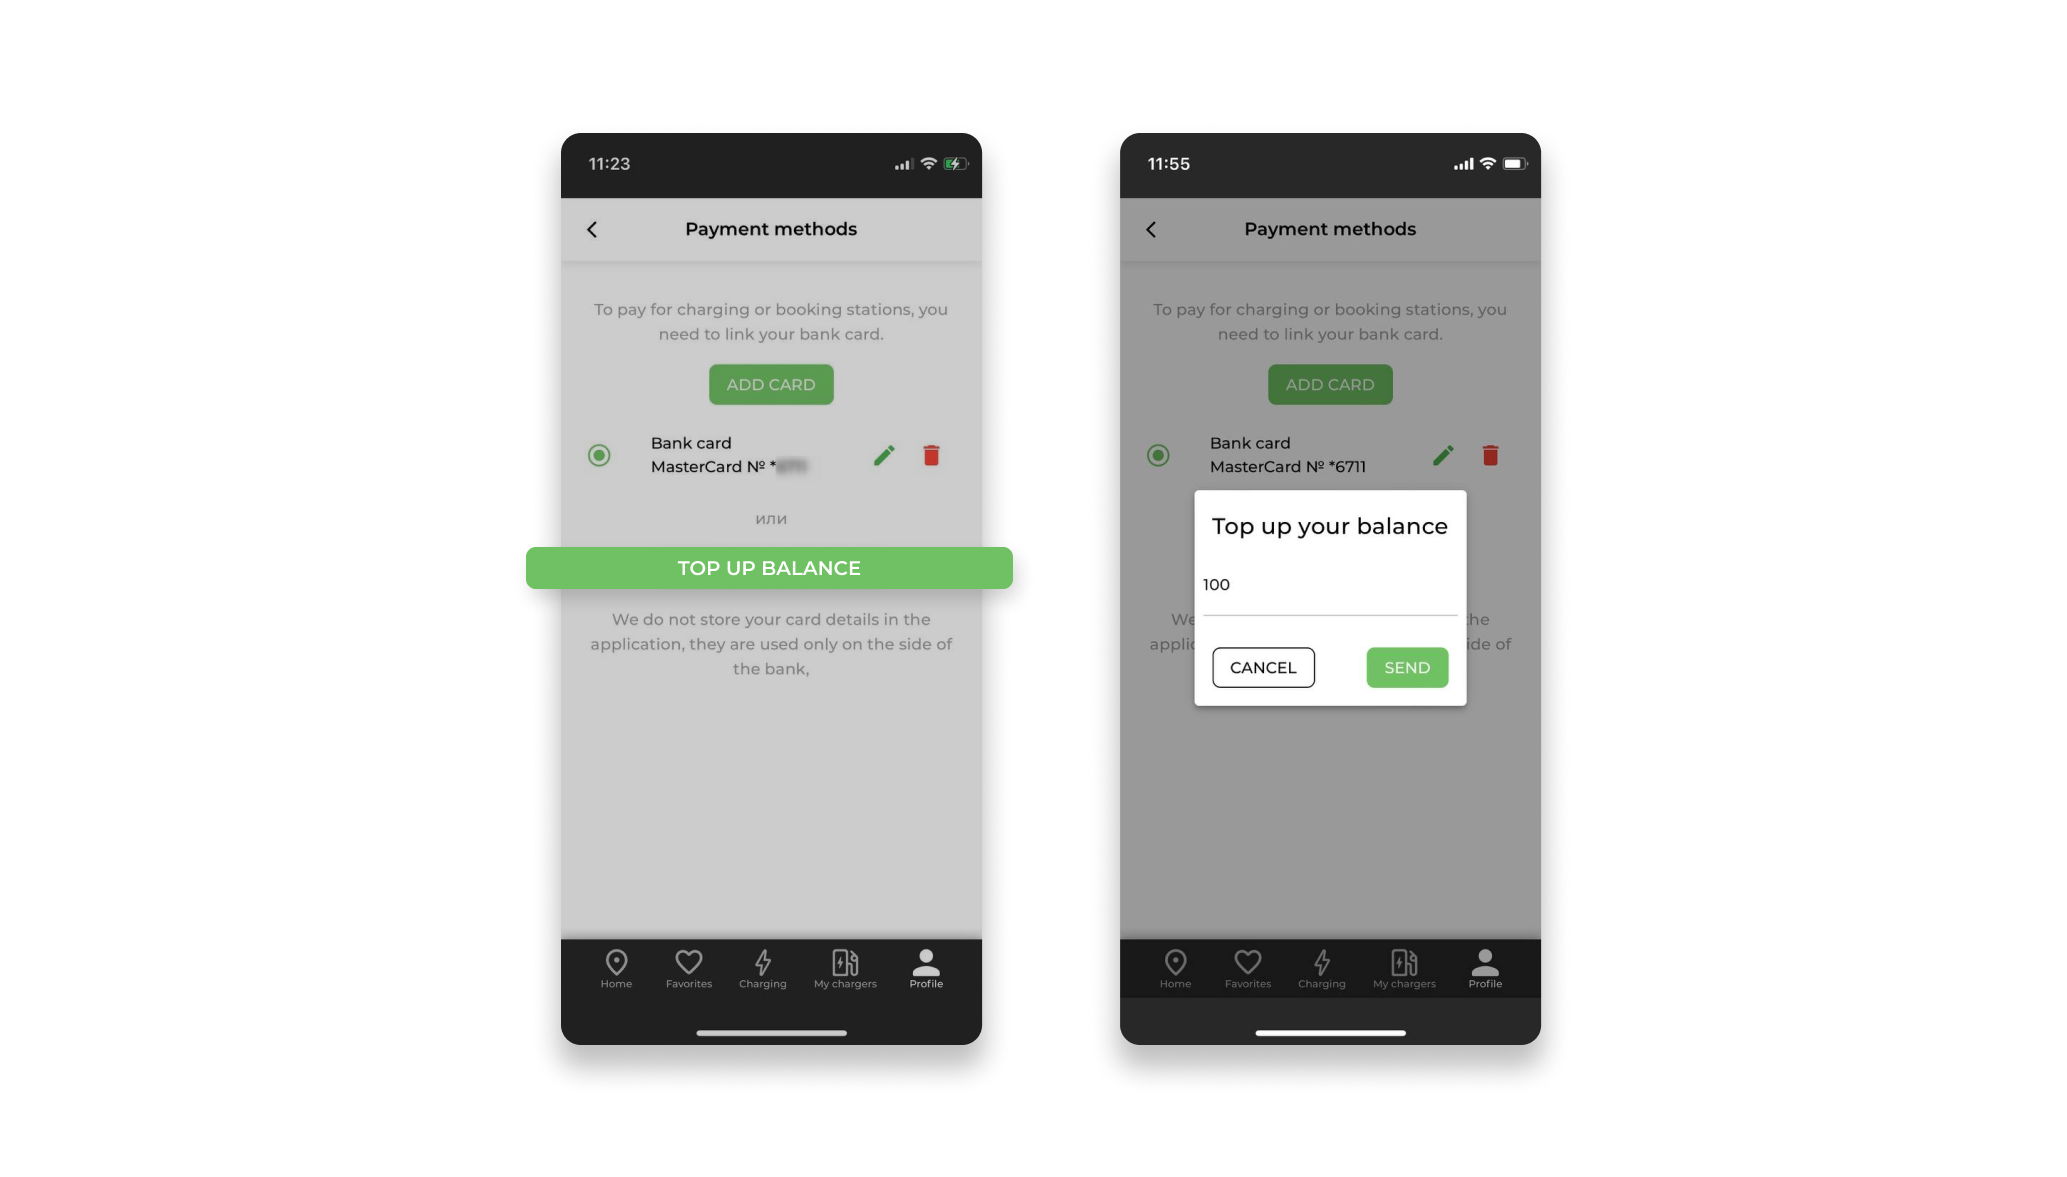
8.4.3 Replenishment of the internal balance
To replenish the internal balance, the user needs to go to the "Payment methods" subsection:
- Click "Top up the balance":
The system opens a window in which you need to specify the amount and click "Send".
In the opened Yukassa window, you need to choose one of the deposit methods.
When selecting the "Bank Card" method, the system opens a window for entering bank card data.
Enter the card details and click "Pay".
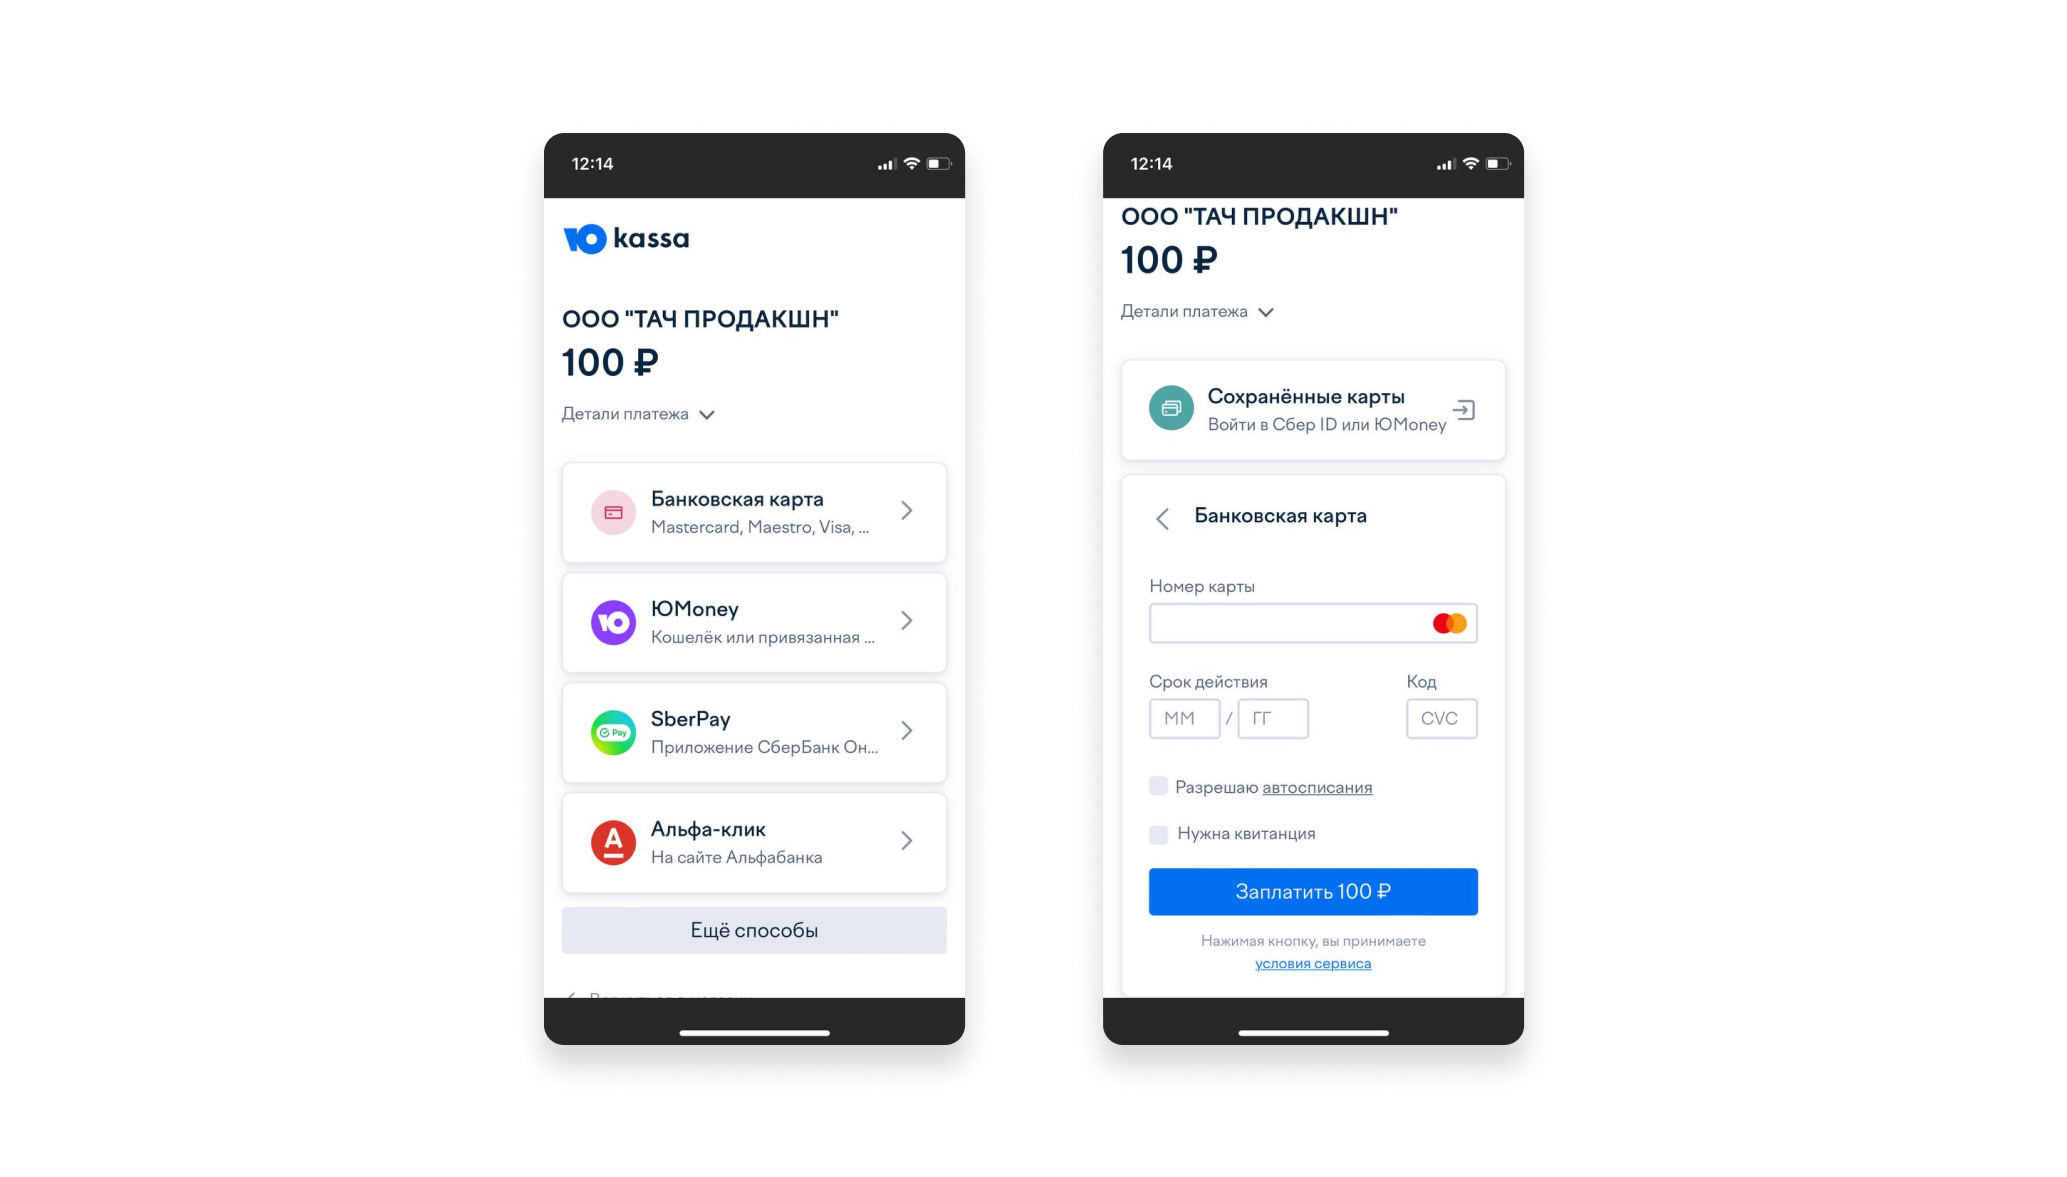
The system debits the amount from the card and replenishes the balance. The balance is displayed on the main Profile page.
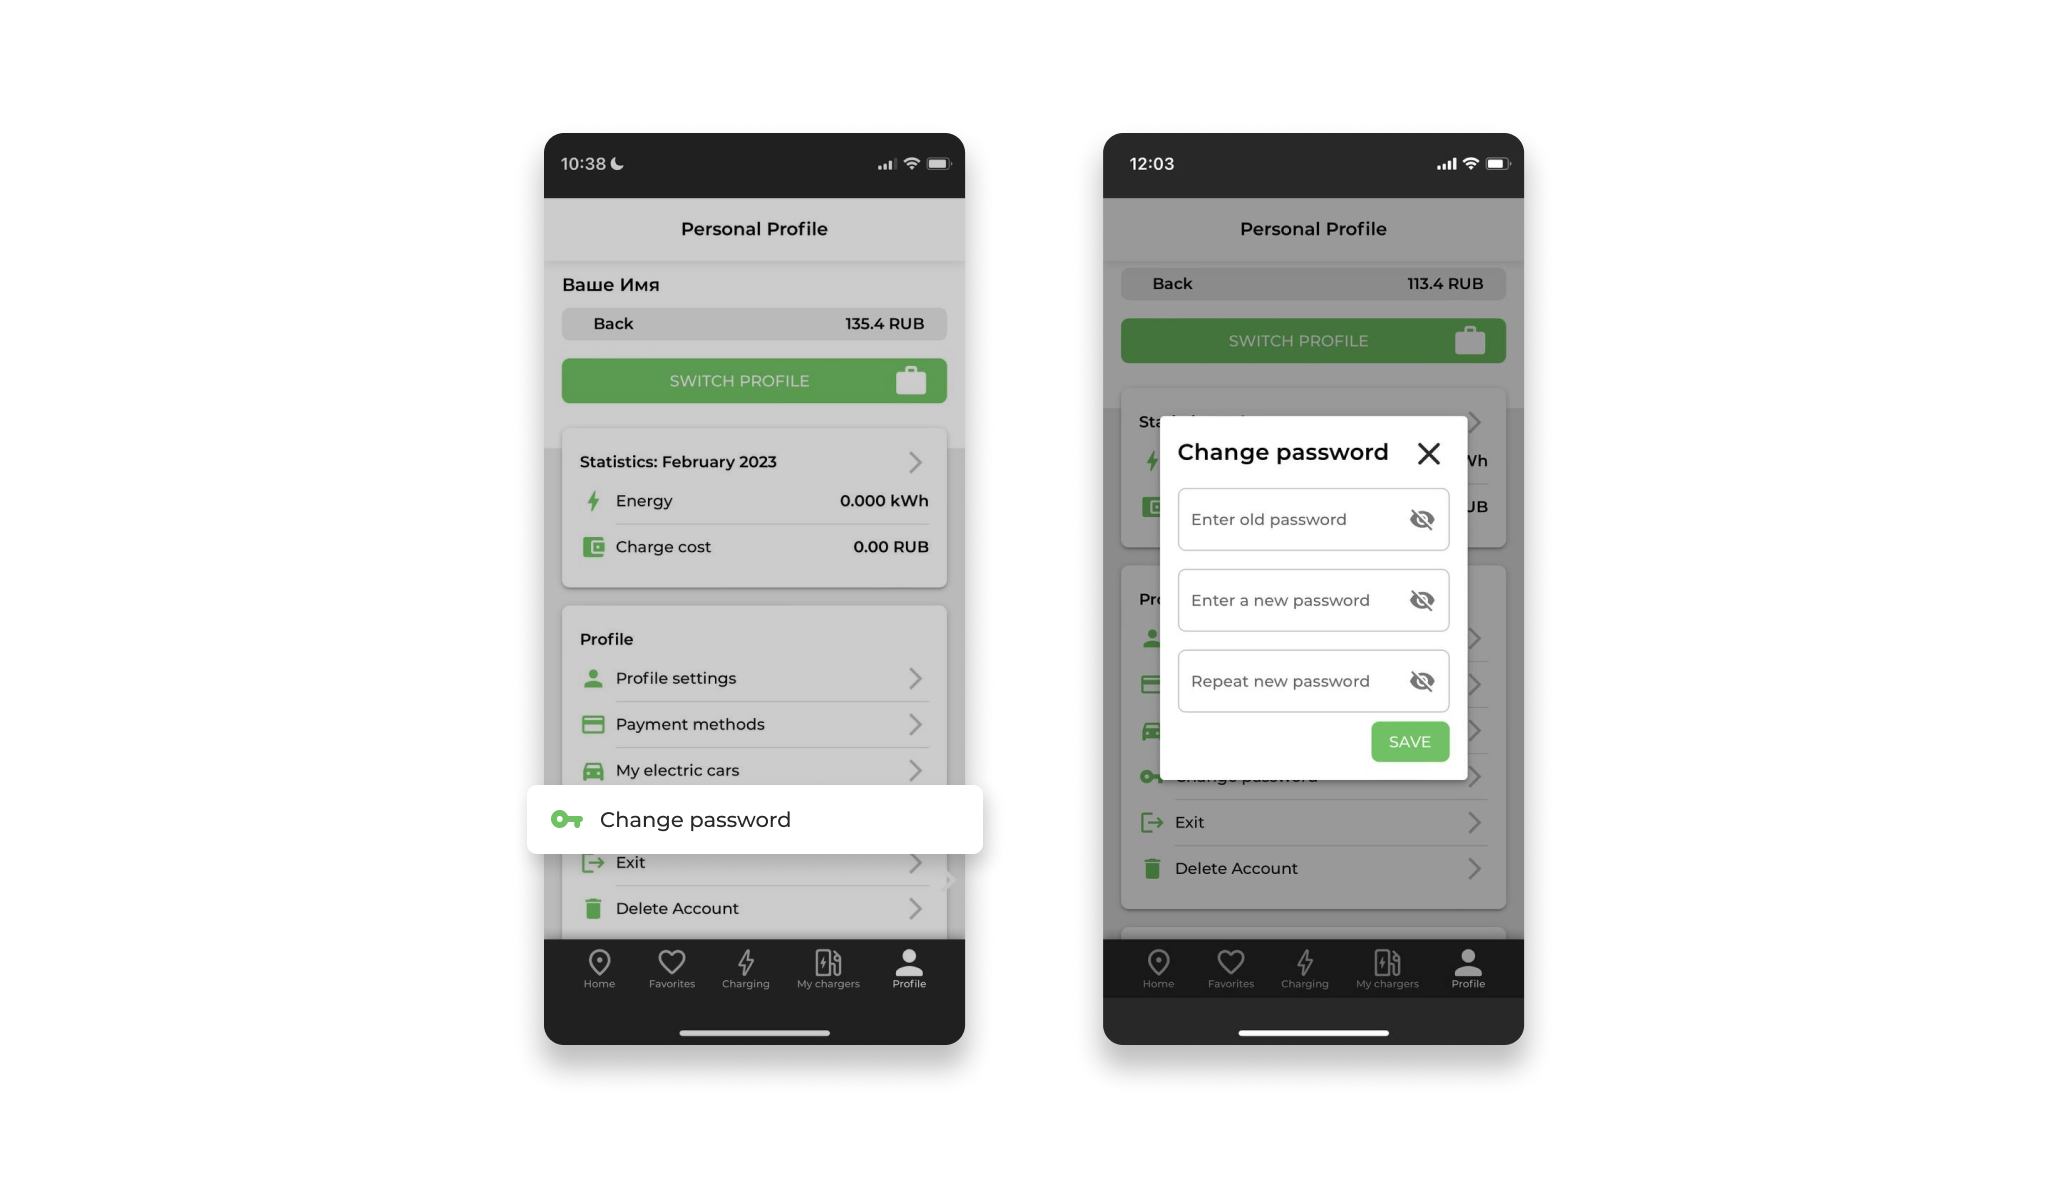
8.5 Change Password
To change the password in the menu of the "Profile" section, click "Change password". In the window that opens:
- Enter the old password;
- Enter a new password;
- Repeat the new password;
- Click "Save".
8.6 Delete Account
To delete an account in the menu of the "Profile" section, click "Delete account".
If the user has a debt on the account or there is money on the balance, the system issues a warning. Click "Yes".
- To repay the debt, you need to click "Repay";
- In order to return the money, you need to contact the technical support chat to resolve the issue.
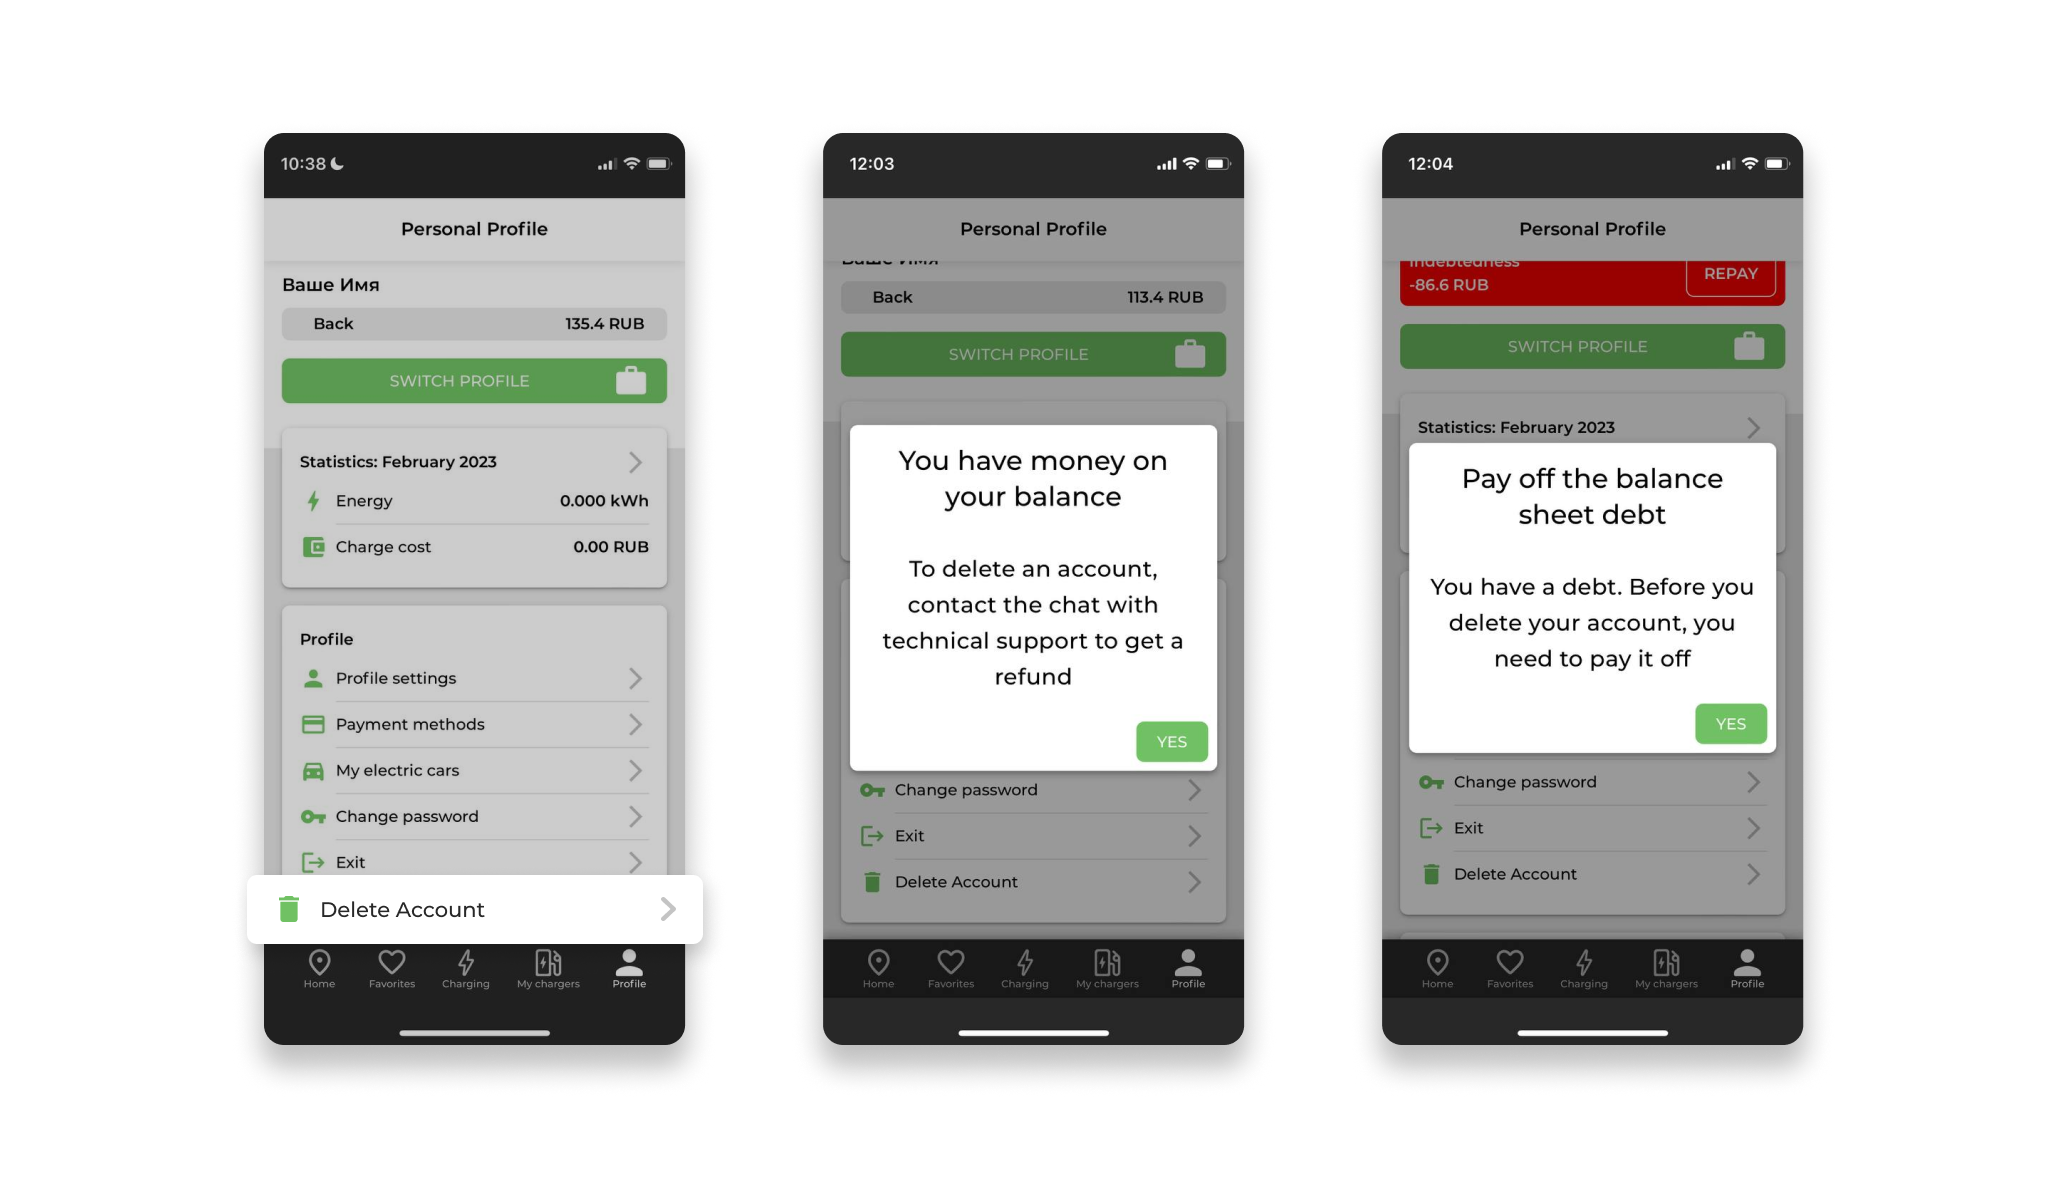
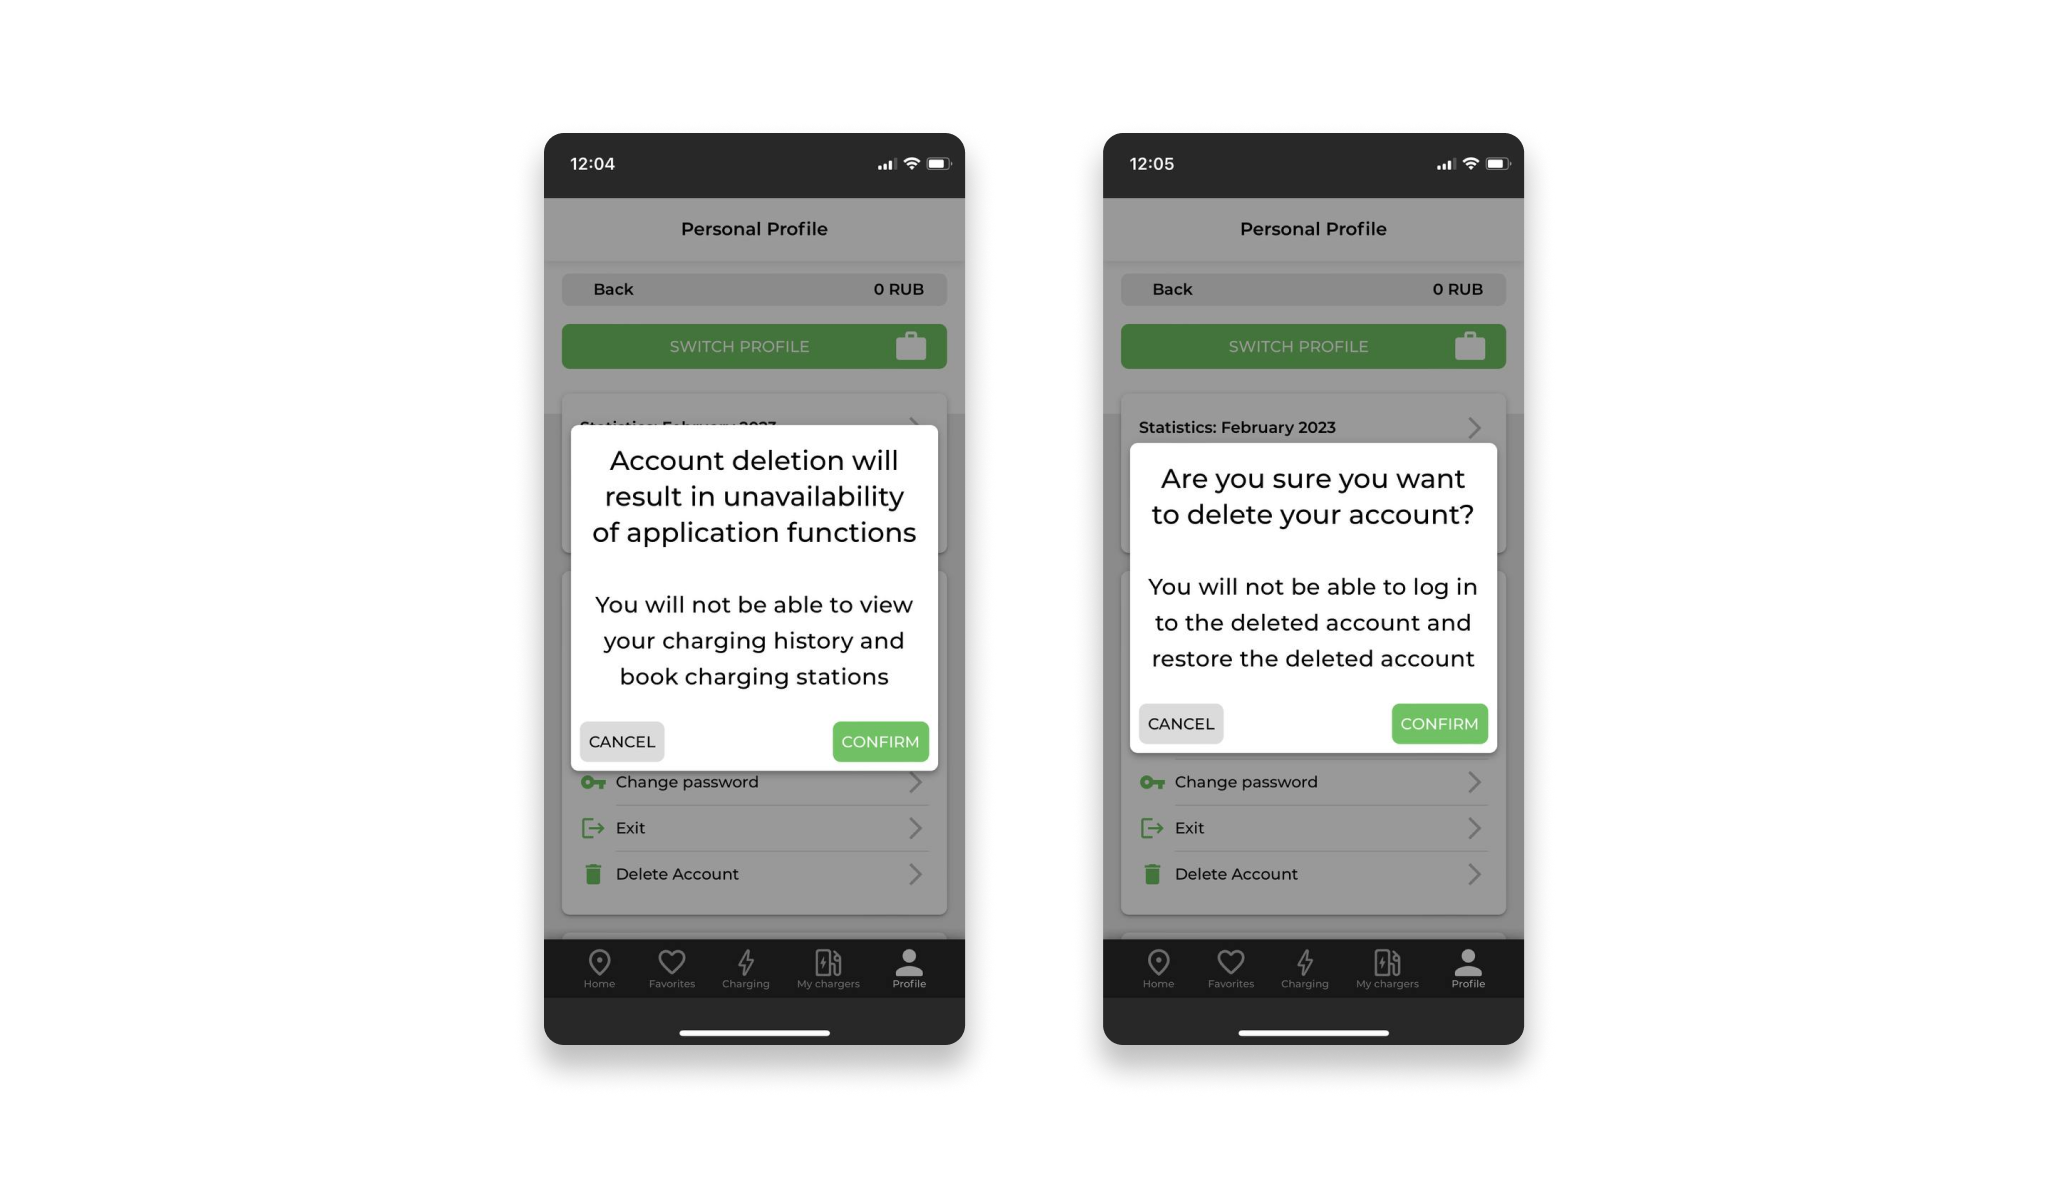
If the debt is repaid or there is a zero balance on the account, the system warns the user 2 times about deleting the account.
In each open window, click "Confirm".
The system deletes the user's account and opens the login window.
To log in, you will need to go through the registration stage.
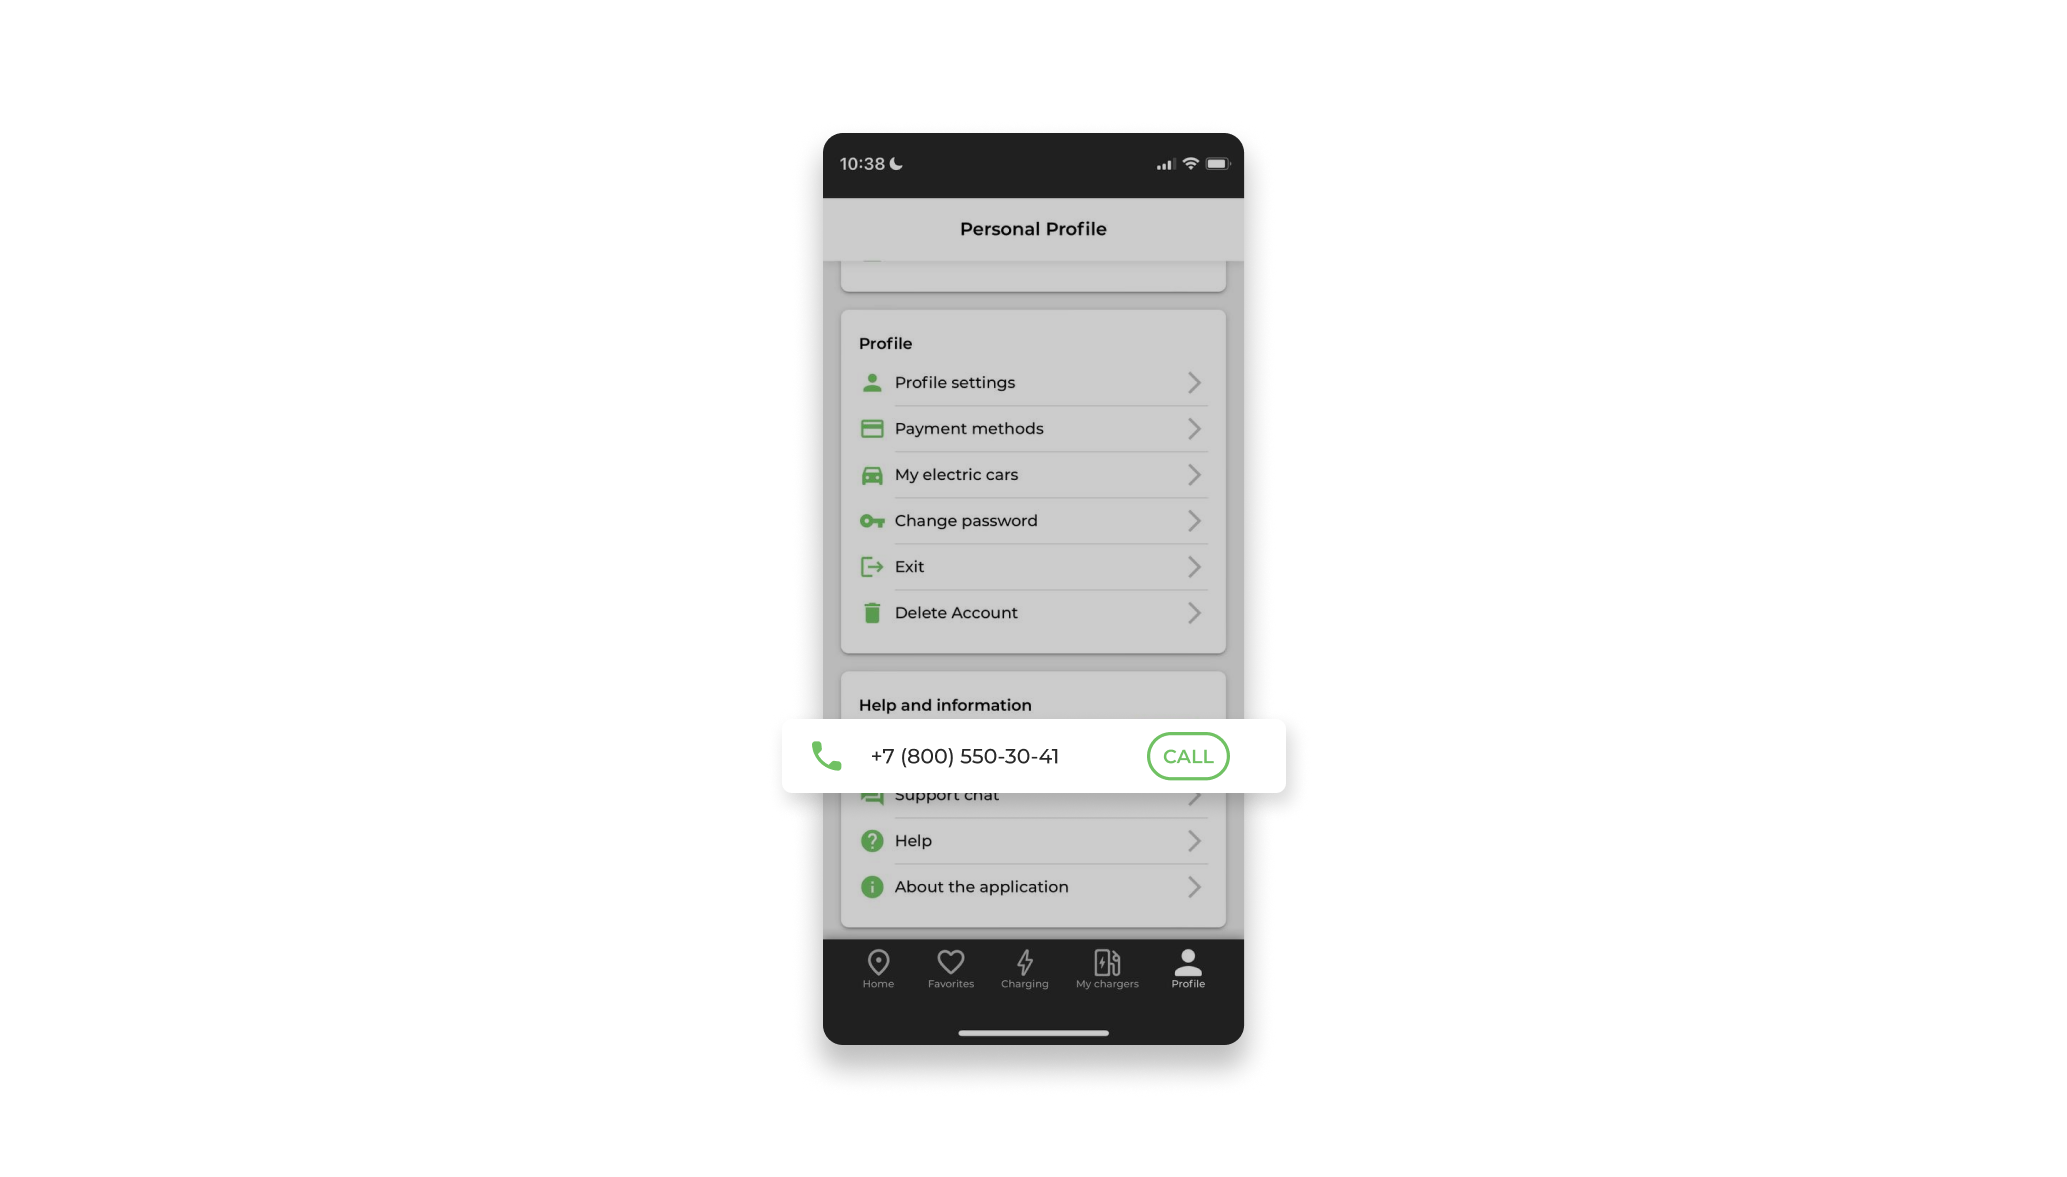
8.7 Technical Support Number
The location card displays the technical support number. The system supports an interactive button for calling "Call".
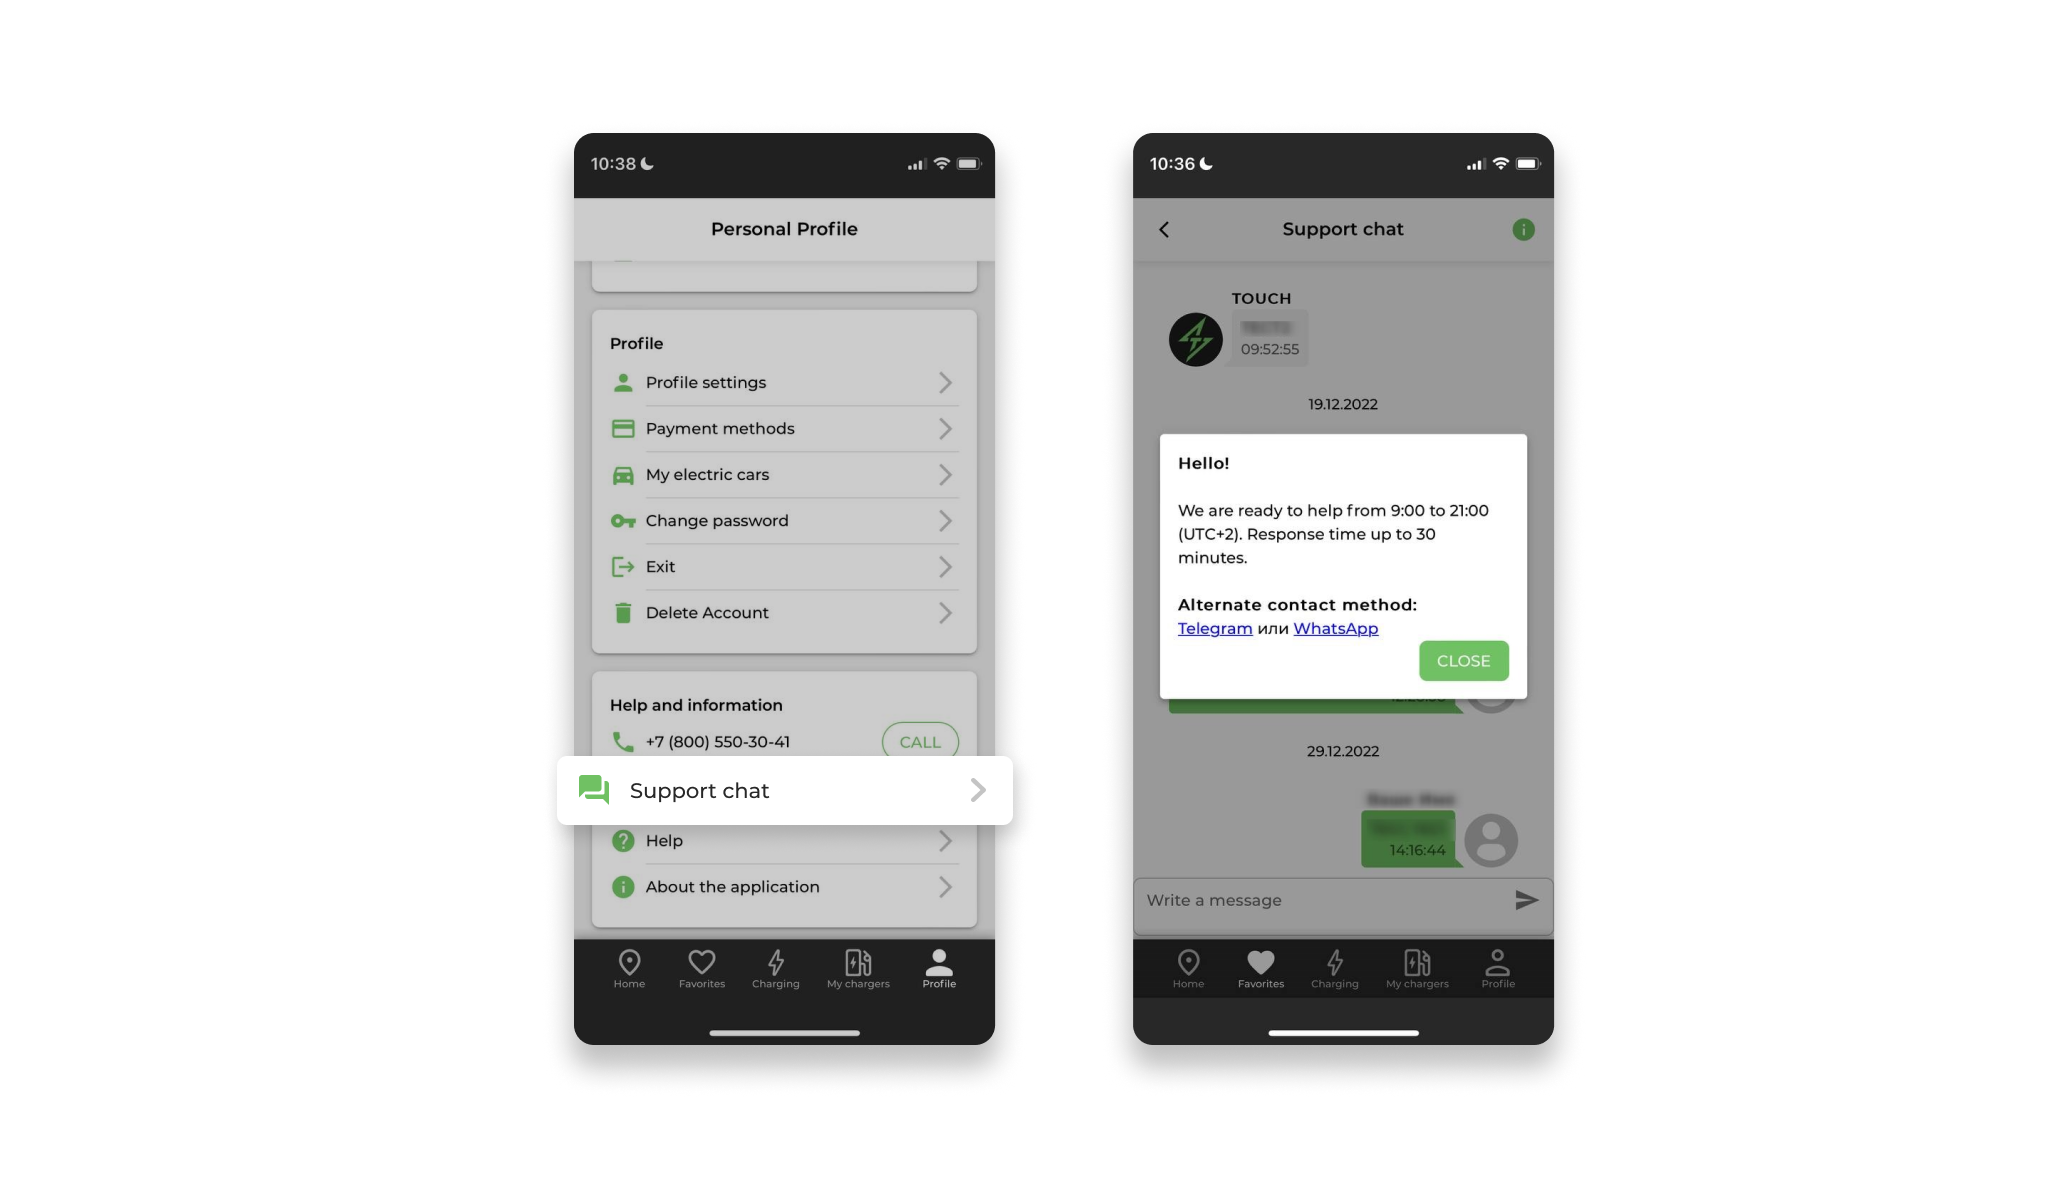
8.8 Chat with support
The user can go to the technical support chat subsection in two ways using the link Chat with support":
- From the Location card;
- From the "Profile" section.
The application opens a chat with support and displays the information:
- Technical support working hours and response time;
- Alternate communication methods: Telegram or WhatsApp.
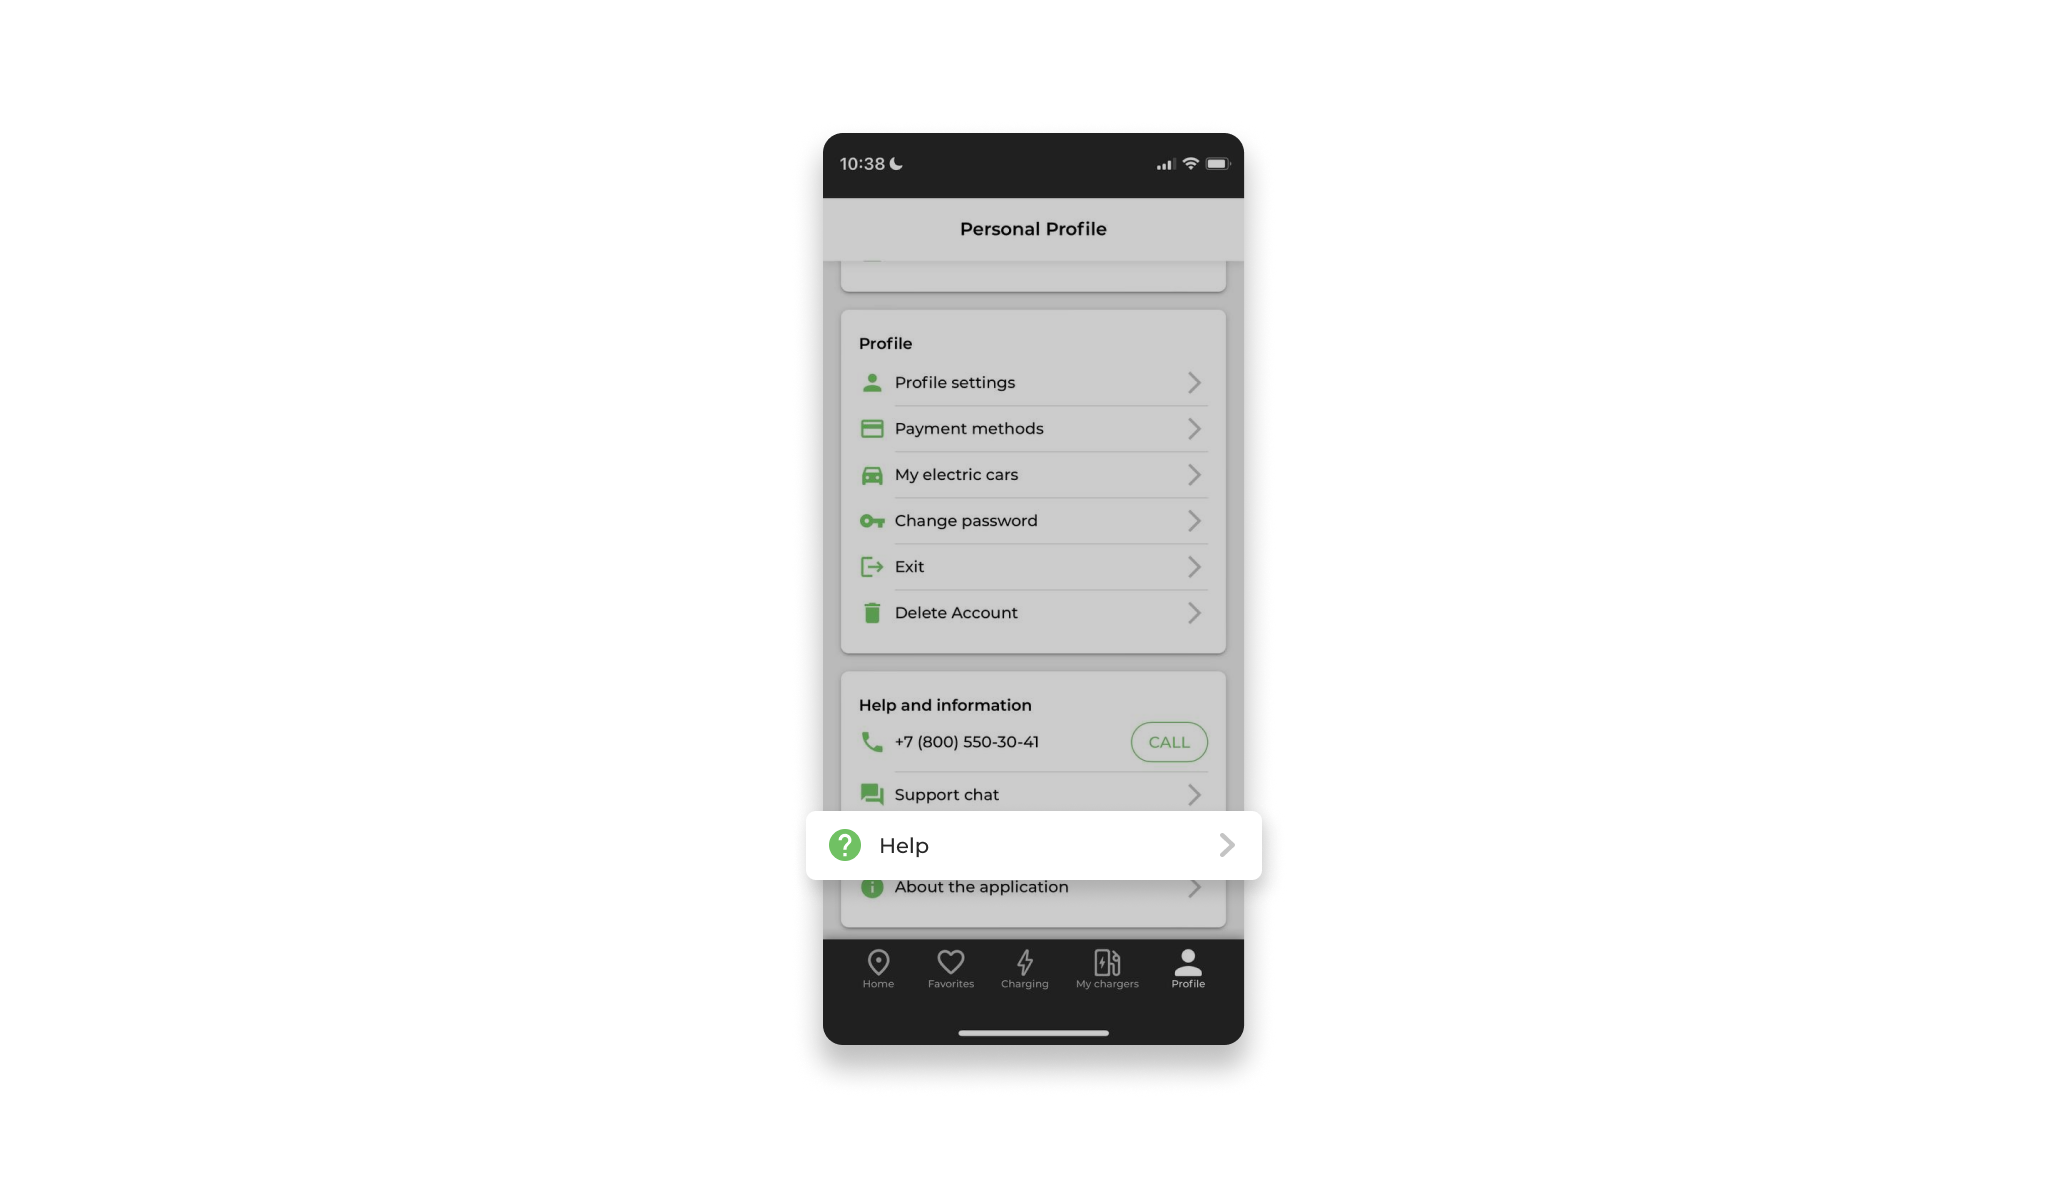
8.9 Application Help
The user can open the online version of the User's Guide in two ways by clicking on the link "Application Help":
- From the Location card;
- From the "Profile" section.
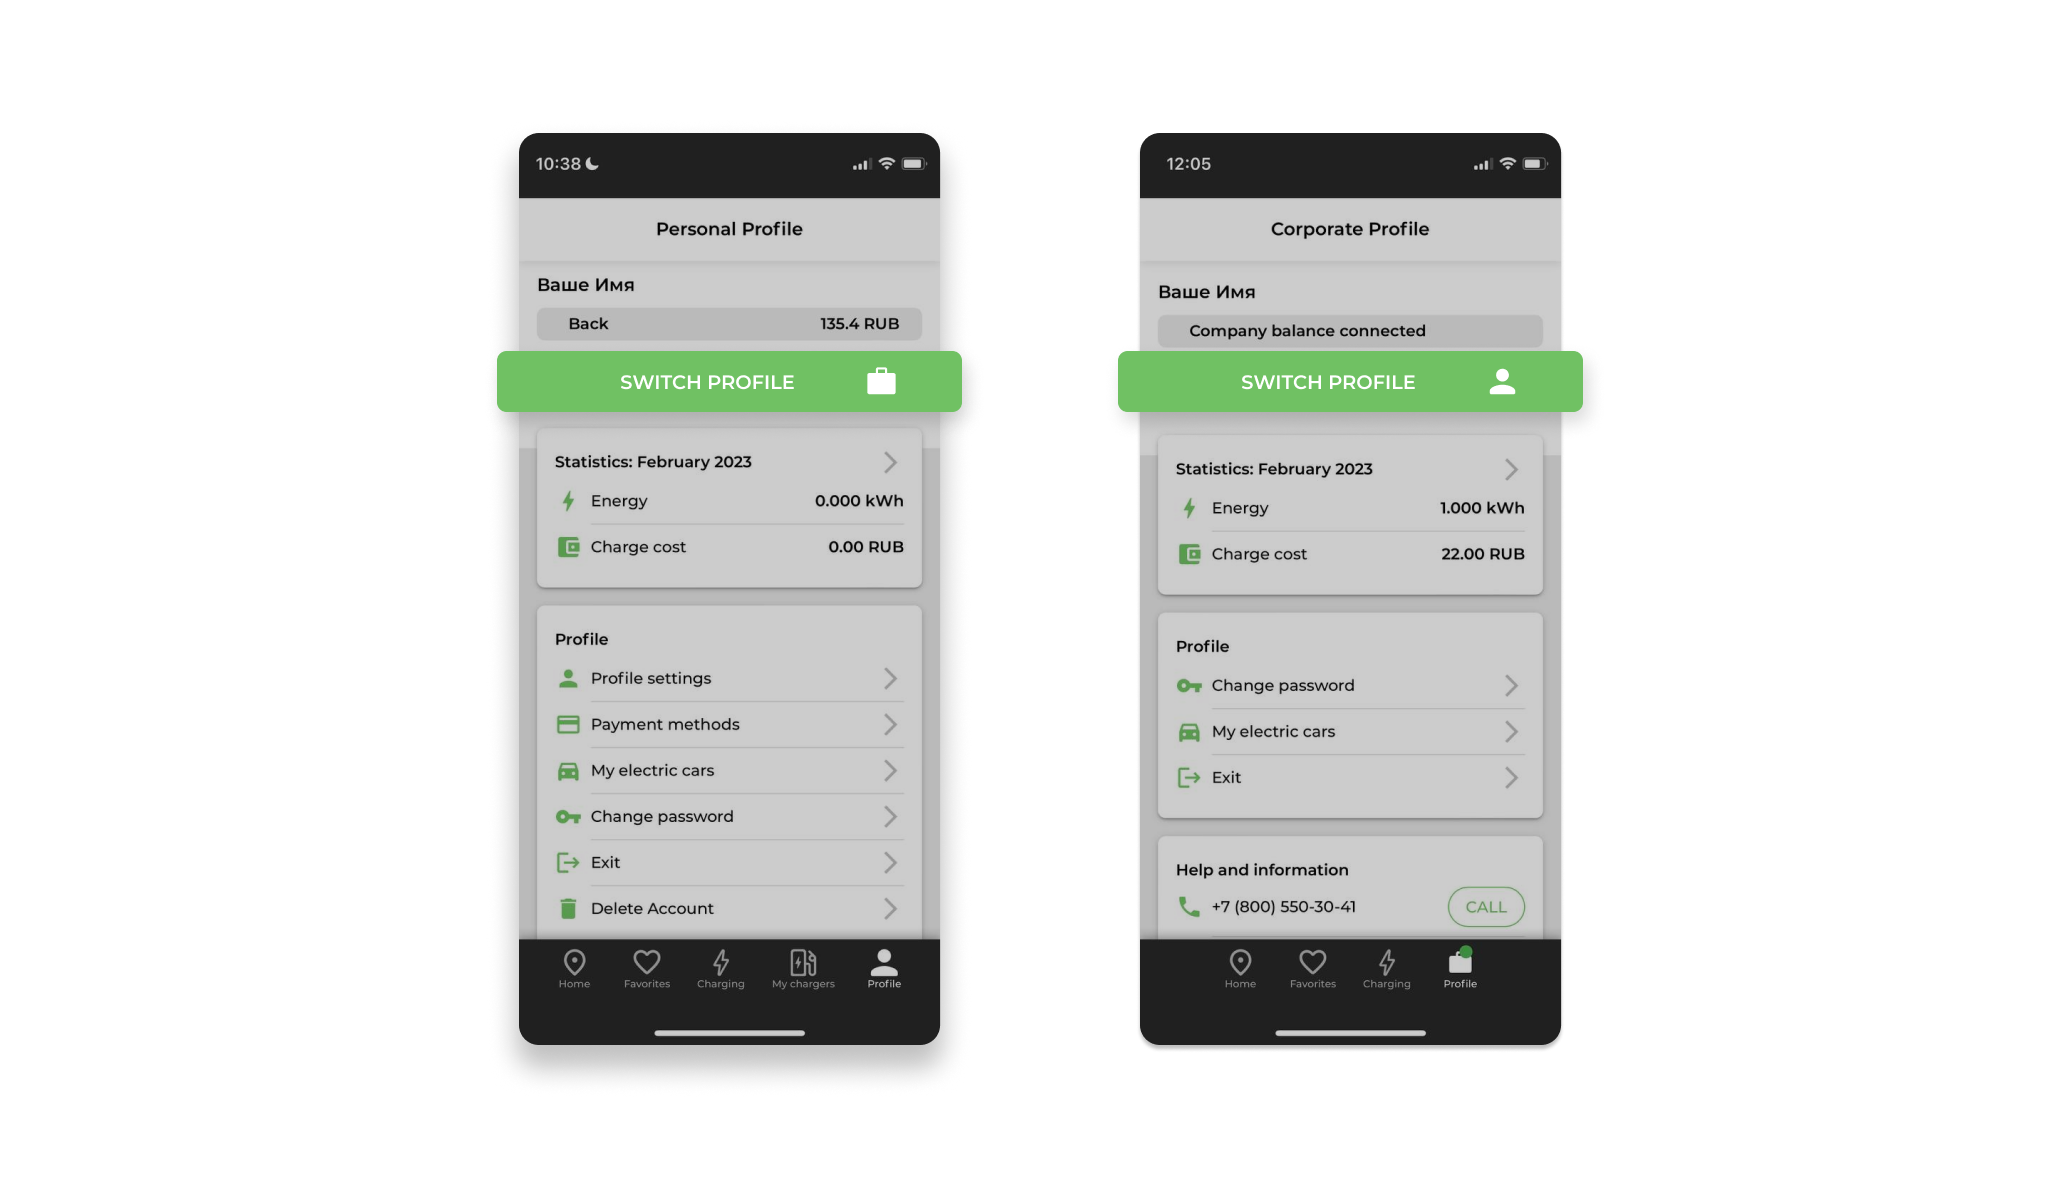
8.10 Switching from a personal profile to a corporate profile
A user added to the list of "Drivers" can switch to a corporate account. To do this, in the menu, click "Switch profile".
Under a corporate account, the user can charge his electric car at the expense of the company to which he is linked.
Also, it is not necessary for the user to link a personal bank card, funds are debited from the balance of the fleet.